- Packaging ideas: Use clear treat bags, mason jars, or small boxes lined with parchment. Tie wi
FREE PRINTABLE RECIPE
Get the Printable Recipe PDF (Free)
Enter your email and we’ll send you the ingredients + step-by-step instructions as a clean PDF you can save to your phone.
1 Enter your email below.2 Confirm from the email we send (double opt-in).3 Download your PDF instantly.- ✅ Printable PDF (ingredients + steps)
- ✅ Save it to your phone (no long scrolling)
- ✅ Includes cook time + servings
- ✅ Easy to follow
FAQ
Where’s the full recipe?
It’s delivered as a printable PDF so you can save it and cook without scrolling.I didn’t get the email.
Check Spam/Promotions and search your inbox for your site name. Then click Confirm to receive the PDF.Get the printable PDF for this recipe.Ever find yourself scrambling for a last-minute party snack or a fun, kid-friendly treat that everyone will actually eat? You’re not alone—busy home cooks everywhere want something quick, delicious, and guaranteed to disappear fast.
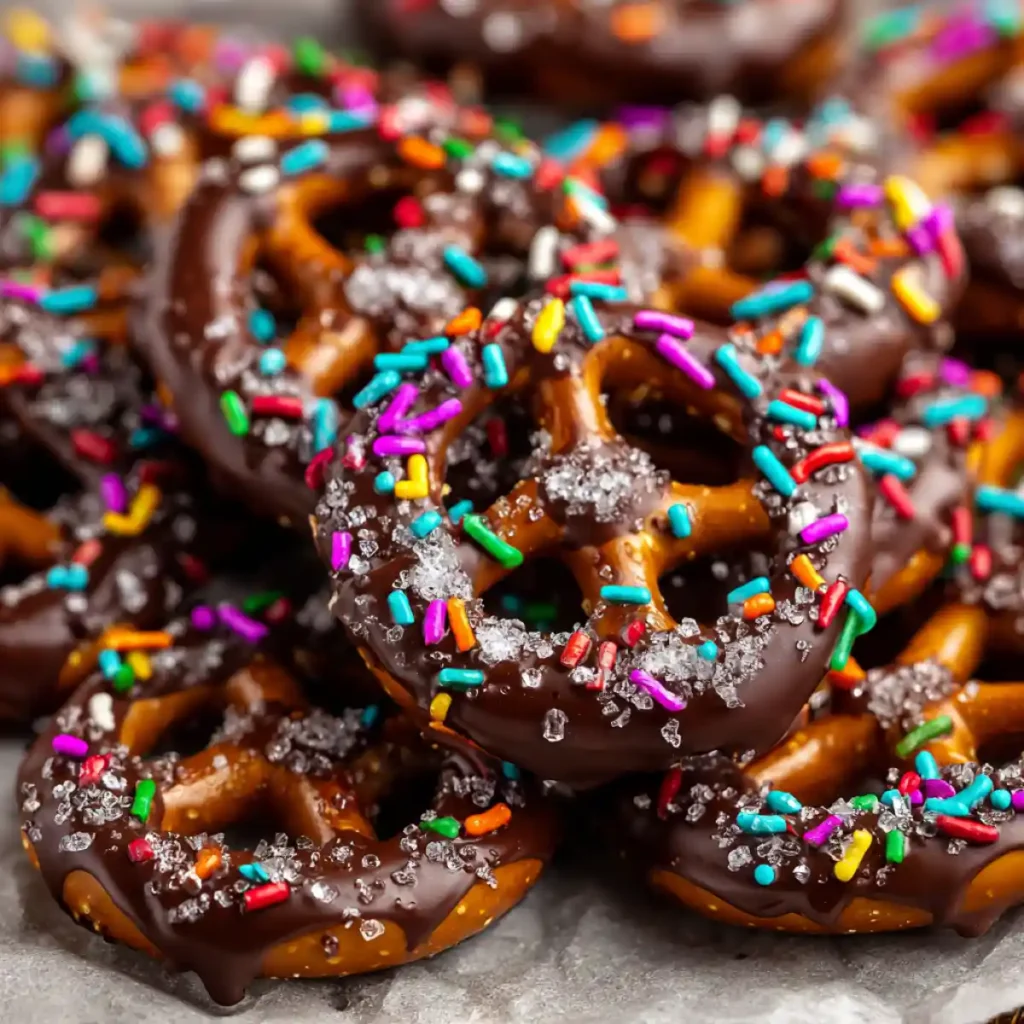
You’ll learn the best way to make chocolate covered pretzels, ingredient swaps (like almond bark or chocolate chips), fun variations (sprinkles, caramel, peanut butter), and pro tips for storage and gifting.
Recipe tested by a home cook with 10+ years of family baking experience. Includes reader tips and trusted methods from top food blogs.
Chocolate Covered Pretzels 2 Table of Contents
Ingredient Breakdown for Chocolate Covered Pretzels (With Measurements, Purpose, and Easy Swaps)
Pretzels
For chocolate covered pretzels, you’ll need:
- Mini pretzel twists: 4 cups (about 200g)
- Pretzel rods: 20–24 rods (about 200g)
- Pretzel bites: 4 cups (about 200g)
Each shape brings a different crunch and look to your chocolate covered pretzels. Mini twists are classic and easy to eat, rods are perfect for dramatic presentation or gifting, and bites are great for snack boards or little hands.
Choosing the Right Pretzel Shape for Dipping
- Mini twists: The classic bite—perfect snap and the ideal chocolate-to-pretzel ratio. These are my go-to for family movie nights.
- Rods: Great for gifting or party favors. Their length makes them easy to dip and decorate.
- Bites: Perfect for snack boards, kids’ parties, or when you want a poppable treat.
I love using mini twists for their satisfying crunch and the way the chocolate hugs every curve.
Chocolate
For coating, you’ll need about 12 ounces (340g) of chocolate—enough to cover 4 cups of pretzels or 20 rods. You can use:
- Chocolate chips (milk, dark, or white)
- Almond bark
- Melting wafers
- Chocolate bars (chopped)
How to Choose Quality Chocolate for Dipping
- Cocoa butter content: For white chocolate, look for real cocoa butter for a creamy melt. Many “white baking chips” use palm oil instead, which can affect texture.
- Coating chocolate vs. real chocolate: Coating chocolate (like candy melts) is easier to work with but can taste waxy. Real chocolate gives a richer flavor and a better snap.
- Sensory cues: Well-tempered chocolate has a glossy finish and a crisp snap. Even if you use the easy “faux temper” method (see below), you’ll get a melt-in-your-mouth texture.
Expert tip: A glossy finish and crisp snap means your chocolate is well-tempered—even if you use the easy ‘faux temper’ method.
Chocolate Bar vs. Chocolate Chips vs. Melting Wafers
- Chocolate bars: Melt smoothly and coat evenly. Great for a shiny, professional look.
- Chocolate chips: Convenient, but often contain stabilizers to hold their shape, which can make melting trickier. Add a teaspoon of coconut oil to help.
- Melting wafers: Designed for dipping—easy to use, but sometimes less flavorful.
Culinary note: Chocolate bars often melt smoother and coat more evenly than chips, which are formulated to hold their shape.
Toppings
Toppings make chocolate covered pretzels fun and festive. For 4 cups of pretzels, you’ll need about 1/2 cup total toppings (choose a mix):
- Sprinkles
- Sea salt flakes
- Mini M&Ms
- Caramel drizzle
- Peanut butter drizzle
- Crushed candy (peppermint, toffee, Oreos)
Creative Topping Ideas for Every Season
- Spring: Pastel sprinkles, freeze-dried berries
- Fall: Cinnamon sugar, crushed toffee
- Winter: Peppermint bits, edible glitter
- Summer: Coconut flakes, rainbow nonpareils
Personal tip: My family loves to make a “topping bar” for birthday parties—kids get to decorate their own! It’s a guaranteed hit and keeps little hands busy.
Optional Dietary Swaps
Chocolate covered pretzels can be made for almost any dietary need. Here’s how:
- Gluten free: Use gluten-free pretzel brands like Snyder’s of Hanover or Quinn.
- Vegan/dairy free: Enjoy Life and Hu Kitchen make excellent dairy-free chocolate.
- Sugar free/low calorie: Lily’s Sweets and ChocZero offer sugar-free chocolate chips and bars.
Reader-tested: Enjoy Life and Hu Kitchen are top picks for dairy-free chocolate. Always check labels for allergens.
Melting Aids
For smoother, glossier chocolate, add 1–2 teaspoons coconut oil or shortening per 12 ounces of chocolate. This helps the chocolate flow and coat the pretzels evenly.
Step-by-Step Preparation Instructions for Easy Chocolate Covered Pretzels
Prep Your Workspace
- Line 1–2 baking sheets with parchment or wax paper for easy cleanup.
- Set out your pretzels, toppings, and dipping tools (forks, skewers, or dipping wands).
Melt the Chocolate
You can melt chocolate for chocolate covered pretzels using a microwave or double boiler.
Pro Melting Techniques for Silky Chocolate
- Double boiler: Place chopped chocolate in a heatproof bowl over a pot of simmering water. Stir until smooth.
- Microwave: Heat chocolate in a microwave-safe bowl in 20–30 second bursts, stirring well between each. Stop when almost melted—residual heat will finish the job.
- Avoid seizing: Make sure no water gets into the chocolate. If it thickens, add a teaspoon of coconut oil.
- Faux tempering: Stir in a handful of chopped chocolate at the end for a shinier, snappier finish.
Expert tip: Faux tempering—adding a bit of chopped chocolate at the end—gives a shinier, snappier finish without a candy thermometer.
Dip the Pretzels
- Drop a pretzel into the melted chocolate.
- Use a fork, skewer, or dipping wand to lift it out.
- Tap gently on the side of the bowl to remove excess chocolate.
Dipping Tools and Tricks for Even Coating
- Fork: Easiest for twists and bites.
- Skewer or dipping wand: Great for rods.
- Tapping: Listen for the gentle tap of the fork—this helps remove extra chocolate for a crisp, even shell.
- Kid-friendly: Let kids use tongs or their (clean) hands for dipping and decorating.
Add Toppings
- While chocolate is still wet, sprinkle on your chosen toppings.
- For themed events, use holiday sprinkles or color-coordinated candies.
Set and Store
- Place dipped pretzels on the lined baking sheet.
- Let set at room temperature for 1–2 hours, or speed things up in the fridge for 20–30 minutes.
Troubleshooting Common Chocolate Issues
- Chocolate “bloom” (white streaks): Caused by temperature changes or moisture. Prevent by letting pretzels set in a cool, dry spot.
- Soggy pretzels: Make sure pretzels are fresh and store in an airtight container.
- Chocolate won’t set: Chill in the fridge, but avoid humidity.
Expert note: Humidity is the enemy—let pretzels set in a cool, dry spot for best crunch.
Variations
- Without cream: No cream needed—just chocolate and pretzels.
- Low sodium: Use unsalted pretzels or rinse salted ones briefly and dry before dipping.
- Vegan/dairy free: Use vegan chocolate and gluten-free pretzels.
- Caramel or peanut butter drizzle: Melt 1/4 cup caramel or peanut butter chips and drizzle over set chocolate.
When and How to Use Chocolate Covered Pretzels (Occasions, Storage, and Gifting Ideas)
Chocolate covered pretzels are the ultimate flexible treat—perfect for everything from meal prep snacks to party favors. Here’s how to make the most of your batch.
Occasions
Chocolate covered pretzels fit right in at:
- Meal prep snacks: Pack a few in lunchboxes for a sweet-salty pick-me-up.
- Sunday family treats: Set out a plate after dinner for a no-fuss dessert.
- Back-to-school lunches: Kids love finding these in their lunch bags.
- Party favors: Wrap a few rods or twists in cellophane for birthdays, showers, or weddings.
- Holiday gifts: Dress them up with seasonal toppings and festive packaging.
Chocolate Covered Pretzels as Edible Gifts
- Packaging ideas: Use clear treat bags, mason jars, or small boxes lined with parchment. Tie wi
FREE PRINTABLE RECIPE
Get the Printable Recipe PDF (Free)
Enter your email and we’ll send you the ingredients + step-by-step instructions as a clean PDF you can save to your phone.
1 Enter your email below.2 Confirm from the email we send (double opt-in).3 Download your PDF instantly.- ✅ Printable PDF (ingredients + steps)
- ✅ Save it to your phone (no long scrolling)
- ✅ Includes cook time + servings
- ✅ Easy to follow
FAQ
Where’s the full recipe?
It’s delivered as a printable PDF so you can save it and cook without scrolling.I didn’t get the email.
Check Spam/Promotions and search your inbox for your site name. Then click Confirm to receive the PDF.Get the printable PDF for this recipe.
