
This recipe provides a straightforward method for creating a buttery, fruit-filled dessert using convenient canned peaches. It is an ideal solution for enjoying a classic peach pie regardless of the current produce season.
List of ingredients
- 50 ounces canned peaches – strained well; use 50-60 ounces for a 10-inch deep-dish pie
- 3/4 cup granulated sugar – provides the primary sweetness for the filling
- 6 tbsp cornstarch – acts as the thickening agent for the peach juices
- 2 tbsp fresh lemon juice – adds necessary acidity to balance the sugar
- 1/2 tsp almond extract – enhances the natural flavor of the peaches
- 1/2 tsp salt – balances the sweetness and enhances other flavors
- 1 tbsp unsalted butter – dotted on top for richness
- 1 egg yolk – used for the golden egg wash
- 2 tbsp milk – combined with the yolk for the wash
- 2 tbsp granulated sugar – for sprinkling on the top crust
step-by-step instructions
- Prepare the Crust: Make the pie crust and divide it into two equal balls. Place them in the refrigerator until you are ready to assemble the pie.
- Line the Dish: Roll out one of the dough balls and place it into the pie dish. Cut the excess edges and fold them neatly.
- Heat the Oven: Preheat your oven to 425 degrees F (190 degrees C).
- Drain the Fruit: Use a sieve and a large bowl to drain the canned peaches. Remove all excess juice and discard it to prevent a soggy filling.
- Mix the Filling: In a large bowl, combine the drained canned peaches, granulated sugar, cornstarch, lemon juice, almond extract, and salt.
- Fill the Crust: Pour the prepared peach mixture directly into the prepared bottom pie crust.
- Add Butter: Dot the top of the peach filling with small pieces of unsalted butter.
- Prepare Top Crust: Roll out the second ball of pie crust dough.
- Seal the Pie: Cover the peach filling with the second crust and crimp the edges of the top and bottom crusts together.
- Vent the Steam: Cut 4 slits into the top crust to allow steam to escape during baking.
- Apply Egg Wash: Brush the entire top crust with a mixture of 1 egg yolk and 2 tablespoons of milk.
- Add Topping: Sprinkle 2 tablespoons of sugar over the brushed crust.
- Protect Edges: Cover the edges of the pie crust with aluminum foil to prevent them from browning too quickly.
- Bake: Bake the pie for 60 minutes or until the filling is bubbly and the crust is golden brown.
- Monitor Browning: Add more aluminum foil over the top of the pie if the center browns too quickly.
- Final Browning: Remove the aluminum foil 5 minutes before the pie is finished to ensure a deep brown crust.
- Cool: Remove the pie from the oven and let it cool for at least 1 hour before serving. Longer cooling times result in a thicker filling consistency.
Optimizing the Peach Filling
Ensure Thorough Draining of Peaches
Canned peaches contain a significant amount of liquid that can make a pie runny. Using a fine-mesh sieve ensures that only the fruit remains, allowing the cornstarch to work efficiently. This step is critical for achieving a sliceable consistency.
The Role of Cornstarch for Thickness
Six tablespoons of cornstarch is the precise amount needed to bind the fruit juices into a glossy gel. If you reduce this amount, the filling may remain liquid even after cooling. Ensure the starch is evenly mixed with the sugar before adding the peaches.
Balancing Sweetness with Fresh Lemon Juice
Fresh lemon juice provides the acidity needed to cut through the sugar and the syrup inherent in canned fruit. This prevents the pie from tasting one-dimensional. Always use fresh juice rather than bottled for a brighter flavor profile.
Enhancing Flavor with Almond Extract
Almond extract complements the stone fruit flavor of peaches more effectively than vanilla. It adds a subtle nutty depth that mimics the taste of fresh, high-quality orchard peaches. Use exactly half a teaspoon to avoid overpowering the fruit.
Advanced Crust Techniques
Maintaining Low Dough Temperature
Cold dough is essential for a flaky crust because it prevents the butter from melting before the pie hits the oven. If the dough becomes too soft during rolling, place it in the freezer for 10 minutes. Cold fats create the steam pockets that produce layers.
Strategic Use of Aluminum Foil
The edges of a pie crust cook faster than the center because they are thinner and more exposed to heat. Covering these edges with foil for the first 55 minutes prevents them from burning. Removing the foil at the end allows for a final, uniform golden brown color.
Applying the Egg Wash for Gloss
A mixture of egg yolk and milk provides a professional, high-gloss finish. The proteins in the yolk brown quickly, while the milk adds a smooth sheen. Apply it in a thin, even layer to avoid pooling in the crimps.
Preventing a Soggy Bottom Crust
A soggy bottom occurs when fruit juices soak into the raw dough before the crust can set. Thoroughly draining the peaches and using a deep-dish pan helps mitigate this. Ensure the oven is fully preheated to 425 degrees F to sear the bottom crust quickly.
Fruit and Thickener Substitutions
Using Frozen Peach Slices
Frozen peaches can be used as a substitute for canned fruit. Thaw them completely and drain them through a sieve for at least 30 minutes to remove excess water. You may need to increase the cornstarch by one tablespoon to account for the additional moisture.
Fresh Peach Adjustments
When using fresh peaches, peel and slice them into uniform pieces. Since fresh peaches vary in sweetness, taste a slice and adjust the granulated sugar amount accordingly. Fresh peaches often release more juice, so maintain the strict cornstarch ratio.
Alternative Thickening Agents
If cornstarch is unavailable, arrowroot powder or clear tapioca starch are suitable replacements. These starches provide a similar glossy finish and hold up well under high heat. Use the same volume measurement as specified for the cornstarch.
Sugar Variations for Depth
Substituting a portion of the granulated sugar with light brown sugar adds a hint of molasses. This creates a deeper, caramelized flavor in the filling. Keep the total amount of sugar the same to avoid affecting the thickening process.
Serving and Storage Guide
Allowing Proper Cooling Time
Slicing a pie immediately after baking causes the filling to run. A minimum cooling time of one hour allows the cornstarch to fully set the fruit juices. For the thickest possible consistency, let the pie cool for three to four hours.
Recommended Accompaniments
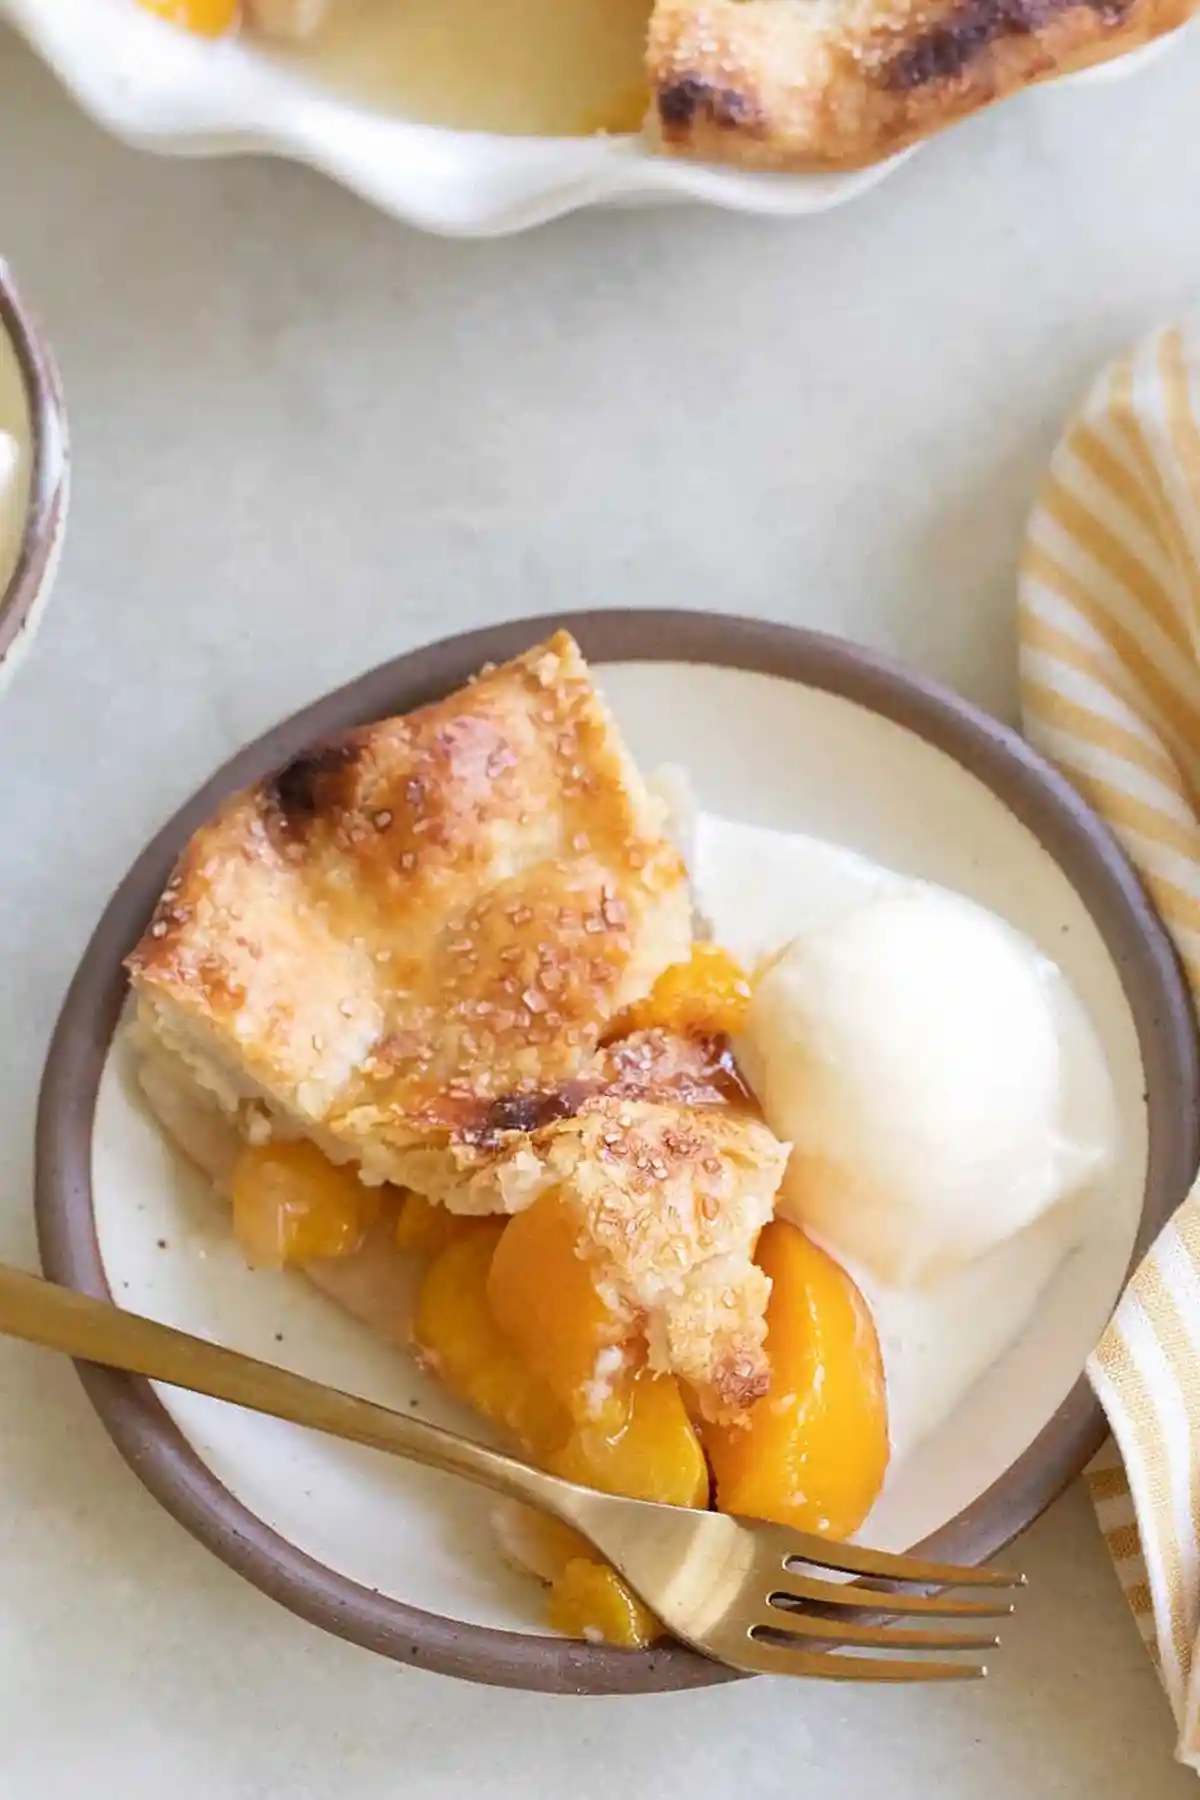
Serve warm slices of peach pie with a scoop of vanilla bean ice cream for a temperature contrast. Freshly whipped cream with a hint of cinnamon also complements the almond and peach flavors. Avoid overly sweet toppings to maintain the balance of the pie.
Refrigerator Storage Limits
Store leftover pie in an airtight container or cover the dish tightly with plastic wrap. The pie will remain fresh in the refrigerator for up to four days. Keep it on a middle shelf where the temperature is most consistent.
Freezing and Thawing Instructions
Bake the pie completely and cool it before wrapping it in plastic wrap and aluminum foil. It can be stored in the freezer for up to six months. Thaw the pie in the refrigerator overnight and reheat it in the oven at 350 degrees F to crisp the crust.
Troubleshooting Common Baking Issues
Managing Filling Overflow
If the filling bubbles over the edges, it is usually due to too much liquid or insufficient venting. Ensure the 4 slits in the top crust are wide enough to let steam escape. If overflow occurs, gently blot the pan with a paper towel.
Correcting Over-browned Crusts
If the top crust browns too quickly before the filling is bubbly, cover the entire top with aluminum foil. This protects the surface while allowing the internal temperature to rise. Monitor the pie every 10 minutes during the final phase of baking.
Preventing Stuck Bottom Crusts
To prevent the crust from sticking to the pan, ensure you are using a high-quality pie dish or lightly grease the pan with butter. Allow the pie to cool slightly before attempting to remove it from the dish. Using a deep-dish pan provides more structure to the base.
Fixing a Runny Filling After Baking
If the filling is too liquid after the one-hour cooling period, it likely lacked enough starch or was not baked long enough. Ensure the filling is bubbling actively before removing it from the oven. This bubbling is the sign that the cornstarch has reached the temperature needed to activate.
Frequently Asked Questions
Can I use canned peaches in heavy syrup for pie?
Yes, you can use peaches packed in heavy syrup. However, you must drain them even more thoroughly than those packed in juice to prevent the pie from becoming excessively sweet or runny. Rinse them slightly if the syrup is very thick.
Should I bake the crust before adding canned peach filling?
No, par-baking or blind-baking is not necessary for this double-crust recipe. The high oven temperature and the double-layer structure ensure the bottom crust cooks through. Draining the peaches is the most effective way to prevent a soggy bottom.
Can I use store-bought pie crust?
Store-bought crusts are a convenient alternative to homemade dough. Ensure you choose a deep-dish variety or reduce the peach filling by half to avoid overflow. Follow the package instructions for rolling and fitting the crust into the pan.
How do I make the filling thicker?
The most effective way to thicken the filling is to extend the cooling time. The starch network continues to strengthen as the temperature drops. If the pie is still runny after four hours, increase the cornstarch by one tablespoon in your next batch.
Print
Easy Canned Peach Pie
- Total Time: 2 hours 45 minutes
- Yield: 10 servings
- Diet: General
Description
This is the best peach pie recipe and it’s made with canned peaches! It’s easy to make, buttery and so flavorful. Perfect to serve year-round!
Ingredients
- 50 ounces canned peaches, strained
- 3/4 cup granulated sugar
- 6 tbsp cornstarch
- 2 tbsp fresh lemon juice
- 1/2 tsp almond extract
- 1/2 tsp salt
- 1 tbsp unsalted butter
- 1 egg yolk
- 2 tbsp milk
- 2 tbsp sugar, for sprinkling
- Pie crust (homemade or store-bought)
Instructions
- Step 1: Make the pie crust and divide it into two balls. Refrigerate until you’re ready to use.
- Step 2: Roll out one of the dough balls and place it in the pie dish. Cut the edges and fold.
- Step 3: Preheat the oven to 425 degrees F (190 degrees C).
- Step 4: Using a sieve and a large bowl, drain peaches. Remove all of the excess juice and discard.
- Step 5: In a large bowl, combine canned peaches, sugar, cornstarch, lemon juice, almond extract, and salt.
- Step 6: Pour the peach mixture into the prepared pie crust.
- Step 7: Dot the top of the pie with butter.
- Step 8: Roll out the second pie crust.
- Step 9: Cover the top of the pie with another layer of pie crust and crimp the edges together.
- Step 10: Cut 4 slits in the top crust.
- Step 11: Brush the entire pie with an egg wash made of 1 egg yolk and 2 tablespoons of milk.
- Step 12: Sprinkle sugar over the top of the crust.
- Step 13: Cover the edges of the pie crust with aluminum foil to prevent them from burning.
- Step 14: Bake for 60 minutes or until the filling is bubbly and the crust is golden brown.
- Step 15: Add more tinfoil over the top if it gets too brown.
- Step 16: Remove the tinfoil 5 minutes before the pie is done to brown the crust.
- Step 17: Remove from oven and cool for at least 1 hour before serving.
Notes
Use canned peaches packed in juice, not syrup. Drain them well to avoid a runny filling. Let the pie cool completely before slicing to help the filling set. Cover the crust edges with foil while baking to prevent over-browning.
- Prep Time: 15 minutes
- Cook Time: 60 minutes
- Category: Dessert
- Method: Baking
- Cuisine: American
Nutrition
- Serving Size: 1 slice
- Calories: 174 kcal
- Sugar: 30 g
- Sodium: 138 mg
- Fat: 3 g
- Saturated Fat: 2 g
- Unsaturated Fat: 2 g
- Trans Fat: 1 g
- Carbohydrates: 36 g
- Fiber: 2 g
- Protein: 2 g
- Cholesterol: 26 mg