
This guide provides a professional method for creating a buttery double-crust peach pie using either fresh or frozen fruit. The recipe features a unique sour cream pastry that ensures a flaky texture and a thickened filling that resists sogginess.
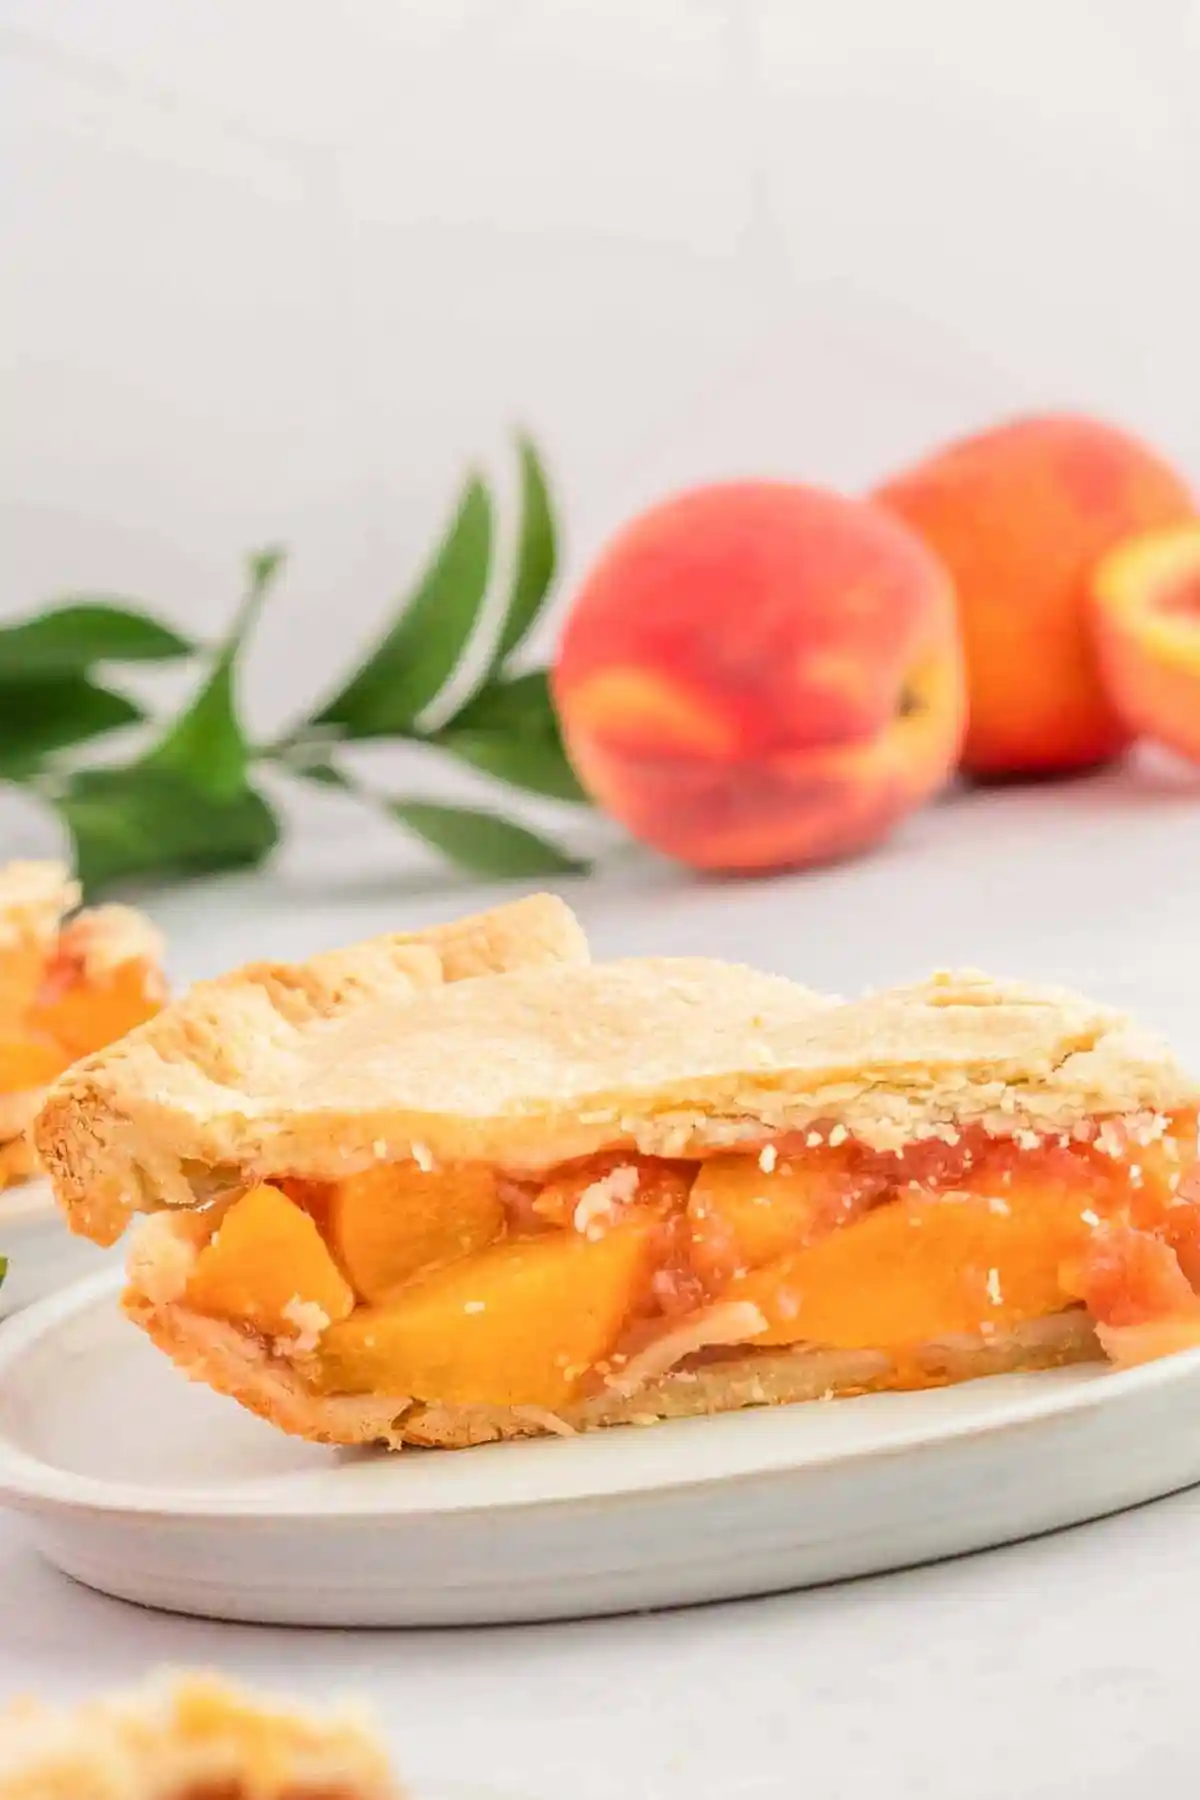
List of ingredients
- 1/2 cup sour cream (cold) – adds moisture and tenderness to the crust.
- 2 large egg yolks (cold) – provides structure and a rich color.
- 2 1/2 cups all-purpose flour – the primary base for the pastry.
- 3 teaspoons granulated white sugar – adds a subtle sweetness to the dough.
- 1/4 teaspoon sea salt – enhances flavor; omit if using salted butter.
- 12 tablespoons unsalted butter (1 1/2 sticks), cut into small cubes – creates the flaky layers.
- 5 cups fresh or frozen peaches (peeled and sliced; thawed if using frozen) – the main fruit component.
- 1/2 cup light brown sugar – adds a deep, molasses-like sweetness.
- 2 tablespoons cornstarch – thickens the fruit juices.
- 1/2 tablespoon ground cinnamon – provides warmth and spice.
- 1 teaspoon vanilla essence – adds an aromatic floral note.
- 1/4 teaspoon sea salt – balances the sugar in the filling.
step-by-step instructions
- Prepare Wet Ingredients: In a small bowl, whisk the cold sour cream and cold egg yolks together until combined. Set this mixture aside for later use in the dough.
- Mix Dry Ingredients: Place the all-purpose flour, white sugar, and salt in a food processor bowl. Pulse several times to ensure the ingredients are evenly distributed.
- Incorporate Butter: Add the cubed cold butter to the processor. Pulse approximately 10 times until the butter is broken down into pea-sized pieces, being careful not to overmix.
- Form the Dough: Pulse in half of the sour cream and egg mixture about 5 times. Add the remaining wet mixture and process until the dough becomes smooth and pliable.
- Chill the Pastry: Shape the dough into two equal balls on a work surface. Wrap each ball in plastic wrap and refrigerate for 30 minutes to relax the gluten.
- Combine Filling Ingredients: In a large nonstick saucepan over medium-high heat, stir together the sliced peaches, brown sugar, cornstarch, cinnamon, vanilla essence, and salt.
- Thicken the Filling: Bring the mixture to a gentle boil, then reduce heat to low. Simmer for 15-25 minutes, stirring occasionally, until the filling reaches a thick consistency.
- Preheat Oven: Once the crusts have chilled and the filling is ready, preheat your oven to 350°F.
- Roll Bottom Crust: On a floured surface, roll one dough ball to a 10-inch diameter. Place it in a 9-inch pie pan and trim the excess edges with shears or a knife.
- Add Filling: Pour the thickened peach mixture into the prepared bottom crust, spreading it evenly.
- Roll Top Crust: Roll out the second dough ball to the same size and gently place it over the filling.
- Seal and Vent: Press the edges to seal and flute them using your fingers. Cut four small slits in the center of the crust to allow steam to escape.
- Bake the Pie: Bake for 35-45 minutes. If the edges brown too quickly, cover them with a pie shield or aluminum foil strips.
- Cool and Set: Remove the pie when the crust is golden and the filling bubbles. Cool on a wire rack for at least 2 hours before slicing to let the filling set.
Selecting the Perfect Peach Variety
Choose Freestone Peaches for Ease
Freestone peaches are the ideal choice for baking because the pit separates easily from the flesh. This prevents the fruit from bruising or tearing during the pitting process. This leads to cleaner slices and a more professional appearance in the final pie.
Identifying the Ideal Ripeness
Select peaches that are soft to the touch but not mushy. Peaches that are too firm will not release enough natural sugars and juices during the simmering process. Conversely, overripe peaches may collapse and become too soft, losing their distinct shape in the filling.
Handling Frozen Peaches Correctly
When using frozen peaches, ensure they are fully thawed before starting the filling process. Thawing allows you to drain excess water if necessary and ensures the fruit cooks evenly. This prevents the filling from becoming watery or creating large pockets of steam under the crust.
Effective Peeling Techniques
Peeling peaches is necessary because the fuzzy skins can create an unpleasant texture in the baked dessert. You can use a vegetable peeler or blanch the peaches in boiling water for a few seconds to slip the skins off easily. This results in a smooth, consistent filling texture.
Advanced Pastry Preparation Techniques
Maintaining Low Temperatures
The key to a flaky crust is keeping the butter cold until it hits the oven. Cold butter creates small pockets of fat that steam during baking, which lifts the layers of flour. If the butter melts during mixing, the crust will become dense and cookie-like rather than flaky.
The Role of Sour Cream in Dough
Adding sour cream introduces acidity and fat, which inhibits excessive gluten development. This results in a more tender crumb that melts in the mouth. It also adds a subtle tang that balances the sweetness of the peach filling.
Preventing Gluten Overdevelopment
Avoid over-pulsing the dough in the food processor once the wet ingredients are added. Overworking the flour develops too much gluten, which can lead to a tough, chewy crust. Stop processing as soon as the dough comes together into a pliable ball.
The Importance of the Chilling Phase
Chilling the dough for 30 minutes allows the flour to fully hydrate and the fats to re-solidify. This prevents the pastry from shrinking in the oven. It also makes the dough much easier to roll out without sticking to the surface.
Rolling for Optimal Thickness
Use a rolling pin to achieve a consistent thickness of about 1/8 inch across the entire crust. Uneven thickness can lead to some areas being underbaked while others burn. A consistent roll ensures the bottom crust cooks through completely.
Developing the Filling Texture
The Science of Cornstarch Thickening
Cornstarch acts as a stabilizing agent that binds the fruit juices into a gel. This prevents the filling from running when the pie is sliced. It provides a glossy finish and a clean break, ensuring each slice holds its shape on the plate.
Benefits of Brown Sugar over White
Brown sugar contains molasses, which adds a rich, caramel-like depth to the peaches. While white sugar provides sweetness, brown sugar enhances the natural flavor of the fruit. This creates a more complex taste profile that complements the cinnamon.
Simmering for Stability
Cooking the filling on the stovetop before baking is a critical step. This process reduces excess moisture and activates the cornstarch. By pre-thickening the fruit, you significantly reduce the risk of a soggy bottom crust.
Balancing Flavor with Sea Salt
A small amount of sea salt is essential to cut through the heavy sugar content. Salt enhances the perception of the peach flavor and the aromatic quality of the vanilla essence. It prevents the dessert from tasting one-dimensionally sweet.
Precision Baking and Finishing
Using a Pie Shield Effectively
The edges of a double-crust pie often cook faster than the center. Using a pie shield or foil strips protects these edges from over-browning while the center continues to bake. This ensures a uniform golden-brown color across the entire surface.
The Function of Venting Slits
Cutting slits in the top crust is necessary to allow steam to escape from the bubbling fruit. Without these vents, the steam can build up pressure, potentially causing the top crust to lift or burst. It also helps the crust dry out and crisp up.
Managing Oven Rack Position
Baking the pie on the center rack ensures an even distribution of heat from both the top and bottom elements. If the bottom crust seems underdone, you can move the pie to the lower rack for the last 10 minutes of baking. This provides more direct heat to the base of the pan.
The Necessity of the Cooling Window
Allowing the pie to cool for at least two hours is not optional. During this time, the pectin in the fruit and the cornstarch finish setting. Slicing a hot pie will cause the filling to flow out, resulting in a messy presentation.
Alternative Ingredient Options
Gluten-Free Flour Substitutes
You can replace the all-purpose flour with a high-quality 1:1 gluten-free flour blend. Ensure the blend contains xanthan gum to mimic the binding properties of gluten. This allows the crust to remain stable during the rolling and baking process.
Reducing Added Sugars
For a lower-calorie version, you can substitute the granulated and brown sugars with a monk fruit sweetener. Use a cup-for-cup replacement designed for baking. This maintains the sweetness while significantly reducing the glycemic impact of the dessert.
Alternative Thickeners
If cornstarch is unavailable, arrowroot powder or all-purpose flour can be used as substitutes. Arrowroot provides a similar clarity to cornstarch but may require a slight adjustment in quantity. Flour creates a more opaque filling with a slightly different mouthfeel.
Storage and Preservation Guidelines
Safe Refrigeration Practices
Because the crust contains dairy and eggs, the pie should be refrigerated if not eaten within two hours. Store it in an airtight container or cover it tightly with plastic wrap to prevent the crust from absorbing fridge odors. This keeps the pastry fresh for several days.
Freezing the Entire Pie
This pie can be frozen whole for up to four months. Let the pie set in the freezer for two hours before wrapping it in several layers of plastic wrap and foil. This prevents freezer burn and maintains the integrity of the buttery crust.
Thawing and Reheating Instructions
Thaw the pie overnight in the refrigerator before serving. To reheat, place individual slices in a microwave for 30 seconds or in a 300°F oven for 10 minutes. Reheating in the oven is preferred as it restores the crispness of the pastry.
Troubleshooting Common Pie Issues
Fixing a Soggy Bottom Crust
A soggy bottom often occurs when the filling is too wet or the oven temperature is too low. To prevent this, ensure you simmer the filling until thick. You can also bake the pie on a preheated pizza stone to send immediate heat into the bottom crust.
Preventing Overbrowned Edges
If your edges are browning too quickly, check your oven calibration. Using a lower rack position or a pie shield is the best way to manage this. Applying a light egg wash can also help the edges brown more evenly and with a professional sheen.
Managing a Runny Filling
A runny filling usually indicates that the cornstarch was not fully activated or the filling was not simmered long enough. Ensure the mixture reaches a gentle boil before reducing the heat. If the pie is already baked and runny, let it cool longer to allow the starches to set.
Addressing Tough Pastry
Toughness in the crust is typically caused by overmixing the dough. When the flour is worked too much, gluten strands become tight and rigid. To avoid this, use a food processor and stop as soon as the dough becomes a cohesive mass.
Frequently Asked Questions
Do you peel peaches before baking in a pie?
Yes, peaches should be peeled first. The fuzzy skin does not break down during baking and can create an unpleasant texture in the filling. Peeling ensures a smooth, professional result.
How do you prevent the bottom crust of a pie from getting soggy?
Prevent sogginess by cooking the filling on the stove to remove excess moisture before adding it to the crust. Additionally, baking on a preheated stone or ensuring the oven is fully preheated helps crisp the base.
How do you keep a peach pie from being runny?
Use a reliable thickener like cornstarch and ensure the filling is simmered until it thickens. Most importantly, allow the pie to cool completely for at least two hours before slicing to let the structure set.
Print
Perfect Peach Pie with Frozen Peaches or Fresh
- Total Time: 95 minutes
- Yield: 8 slices
- Diet: General
Description
Learn how to make a juicy and delicious peach pie with frozen peaches or fresh peaches for an easy summer treat or Thanksgiving dessert!
Ingredients
- 1/2 cup sour cream (cold)
- 2 large egg yolks (cold)
- 2 1/2 cups all-purpose flour
- 3 teaspoons granulated white sugar
- 1/4 teaspoon sea salt
- 12 tablespoons unsalted butter, cut into small cubes
- 5 cups fresh or frozen peaches, peeled and sliced (thawed if using frozen)
- 1/2 cup light brown sugar
- 2 tablespoons cornstarch
- 1/2 tablespoon ground cinnamon
- 1 teaspoon vanilla essence
- 1/4 teaspoon sea salt
Instructions
- Step: In a small bowl, whisk the sour cream and egg yolk to combine. Set aside.
- Step: In the work bowl of a food processor, pulse the flour, white sugar, and salt a few times to combine.
- Step: Add the butter to the bowl and pulse about 10 times, until butter is in pea size pieces.
- Step: Add half the sour cream and egg mixture and pulse about 5 times to combine, then add the remaining sour cream mixture and pulse/process to create a smooth, pliable dough.
- Step: Gather the dough together and transfer to a work surface. Separate the dough into two evenly sized balls. Wrap each separately in plastic wrap and chill in the refrigerator for 30 minutes.
- Step: In a large nonstick sauce pan over medium-high heat, stir together peaches, brown sugar, cornstarch, cinnamon, vanilla essence, and salt.
- Step: When mixture comes to a gentle boil, reduce heat to low. Simmer over low heat for 15-25 minutes, stirring occasionally, until mixture thickens.
- Step: Preheat oven to 350℉.
- Step: On a lightly floured work surface, use a rolling pin to roll one ball of pastry dough to a diameter of 10 inches. Gently lift the crust and place it in a 9-inch pie pan. Use kitchen shears or a sharp paring knife to trim excess dough from the edge.
- Step: Fill the crust with the peach filling. Roll out the top crust.
- Step: Gently transfer the second pie crust over the filling, pressing gently so it lays flat against the filling. Flute the edges using your thumb and forefinger. Using a small paring knife, cut four slits in the center of the crust to allow for venting.
- Step: Bake in preheated oven for 35-45 minutes, checking at 35 minutes to ensure that the edges aren’t overbrowning. If the edges of the crust are getting too brown, cover them with a pie crust shield or strips of aluminum foil.
- Step: Remove from oven and transfer to a wire cooling rack to cool for at least 2 hours before slicing.
Notes
Ensure pie crust ingredients are very cold, especially the butter. Freestone peaches are recommended for easier pitting. Thaw frozen peaches completely before making the filling.
- Prep Time: 15 minutes
- Cook Time: 80 minutes
- Category: Dessert
- Method: Baking
- Cuisine: American
Nutrition
- Serving Size: 1 slice
- Calories: 442 kcal
- Sugar: 24 g
- Sodium: 304 mg
- Fat: 22 g
- Saturated Fat: 13 g
- Unsaturated Fat: 7 g
- Trans Fat: 1 g
- Carbohydrates: 57 g
- Fiber: 3 g
- Protein: 6 g
- Cholesterol: 102 mg