
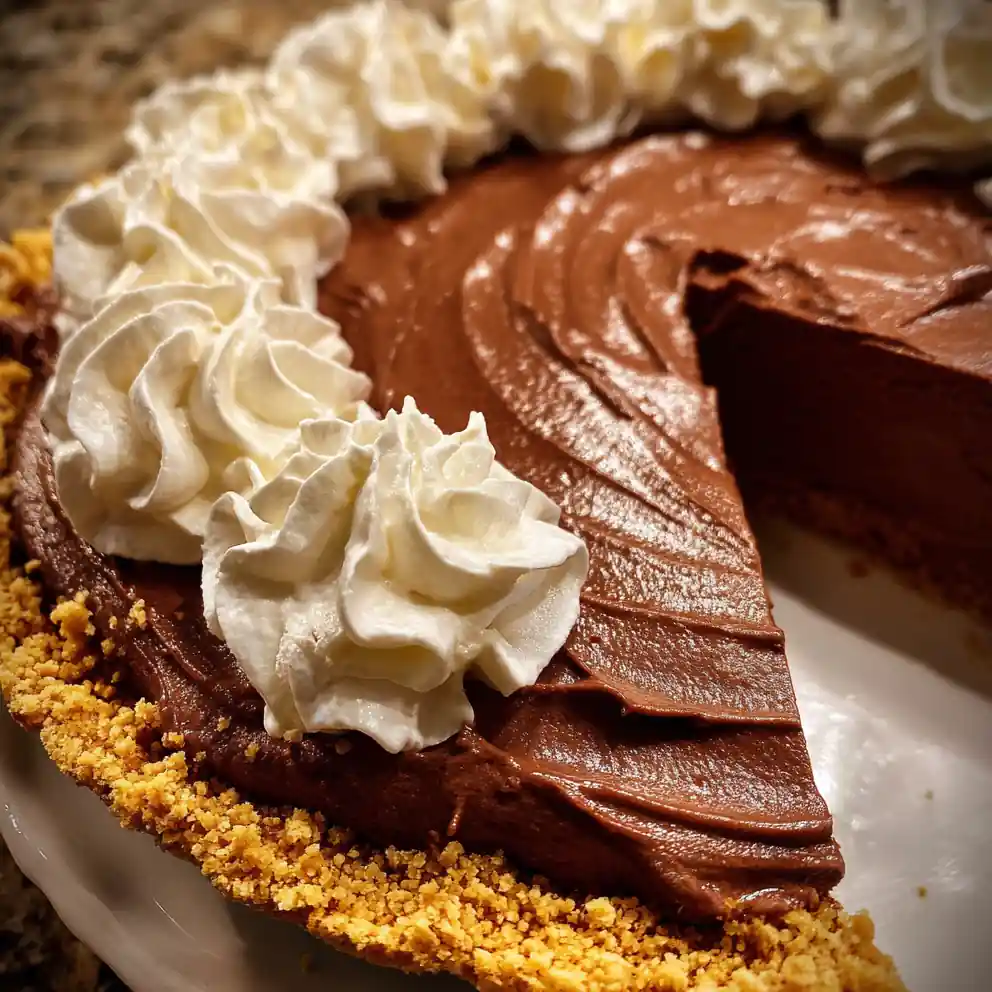
I love how this dessert feels both simple and elegantly impressive; the airy lightness of this Chocolate Mousse Pie Silky Whipped Filling is simply divine.
Perfect for busy weeknights or a stress-free holiday dessert, it’s a family favorite that looks impressive but is surprisingly simple to make. You’ll adore this recipe for its irresistible texture and deep chocolate flavor, making it an excellent choice for a satisfying finish to any family dinner. Get ready for a show-stopping dessert that comes together in a snap!
Ingredients You’ll Need (and Why They Matter)
- Core ingredients for your Chocolate Mousse Pie Silky Whipped Filling:
- 8 oz (225g) high-quality semi-sweet chocolate, chopped (for deep, rich flavor)
- 2 cups (480ml) cold heavy cream (the secret to an ethereal whipped filling)
- ¼ cup (50g) granulated sugar (to sweeten the mousse)
- 1 packet (7g) unflavored gelatin (provides structure for perfect slices)
- ¼ cup (60ml) cold water (to bloom the gelatin)
- 1 tsp (5ml) pure vanilla extract (enhances overall flavor)
- One 9-inch (23cm) pre-made pie crust (graham cracker or cookie crust works great; I often reach for a store-bought graham cracker crust for ease).
- Purpose explained: Quality chocolate ensures a rich, satisfying taste, vital for a great Chocolate Mousse Pie. Heavy cream whips into the light, airy mousse. Gelatin stabilizes the filling for perfect slicing, ensuring your pie holds its shape.
- Suggested upgrades: Opt for a premium brand of chocolate chips or a baking bar for the best flavor. Using organic heavy cream can also elevate the texture of your silky whipped filling. Consider making your pie crust from scratch if time allows for an extra touch.
- Substitutions for diets:
- For dairy-free: Use full-fat canned coconut cream (chilled overnight, scoop out the thick cream) instead of heavy cream and ensure you choose dairy-free chocolate.
- For low-sugar: Substitute granulated sugar with a baking-friendly sugar alternative (like erythritol or stevia blend).
- For gluten-free: Use a certified gluten-free pie crust.
- Flavor boosters or special add-ins: A pinch of ½ tsp espresso powder deepens the chocolate flavor in your Chocolate Mousse Pie.
Step-by-Step Cooking Directions
- Prepare your pie crust: If using a pre-baked crust, ensure it’s cooled completely to avoid a soggy bottom. If raw, bake according to package directions in a 9-inch pie plate until lightly golden (usually 10-12 minutes at 375°F/190°C), then cool fully, about 30 minutes.
- Bloom the gelatin: Sprinkle the unflavored gelatin evenly over ¼ cup (60ml) cold water in a small bowl. Let it sit for 5 minutes until it softens and becomes thick, like a gel.
- Melt chocolate: Gently melt the 8 oz (225g) chopped chocolate using a double boiler or microwave (in 30-second intervals), stirring until smooth and glossy. Remove from heat and stir in the bloomed gelatin until it’s fully dissolved and the mixture is uniform.
- Whip the cream: In a large, chilled mixing bowl, whip 2 cups (480ml) cold heavy cream with ¼ cup (50g) sugar and 1 tsp (5ml) vanilla extract using an electric mixer until soft peaks form. The cream should look light and fluffy, creating the base of your ethereal silky whipped filling.
- Combine mousse ingredients: Gently fold about a third of the whipped cream into the warm melted chocolate mixture to lighten it, until just combined. Then, carefully fold in the remaining whipped cream until no streaks of chocolate remain. Don’t overmix, or the mousse will lose its airy texture and become dense. This creates the airy Chocolate Mousse Pie filling.
- Pour into crust: Spoon the Chocolate Mousse Pie Silky Whipped Filling into the prepared pie crust, spreading evenly with a spatula until smooth.
- Chill to set: Refrigerate the pie for at least 4-6 hours, or preferably overnight, until the silky whipped filling is completely set. I often make this pie the night before a gathering; the longer chill really helps the Chocolate Mousse Pie Silky Whipped Filling set perfectly for easy slicing.
- Shortcuts for busy cooks: Use a good quality store-bought graham cracker or Oreo cookie crust. Opt for pre-chopped chocolate if available to save prep time. Do not skip chilling time for the best results!
- Notes on variations: For a festive twist, add ½ teaspoon peppermint extract to the whipped cream in Step 4. For individual servings, prepare the Chocolate Mousse Pie in mini tart shells or ramekins.
Serving Ideas and Everyday Uses
- This Chocolate Mousse Pie Silky Whipped Filling is perfect for easy weeknight desserts, impressive holiday gatherings, potlucks, birthdays, or just a special treat for family Sunday dinner. I find this pie brings smiles to any family gathering.
- Serve slices with fresh raspberries, sliced strawberries, or a dusting of cocoa powder. A dollop of extra whipped cream is always welcome! Pair with a hot cup of coffee or a glass of cold milk.
- The pie can be made 1-2 days ahead of time and stored, covered, in the refrigerator. Freezing is not recommended, as it can affect the silky whipped filling texture upon thawing. Store leftovers covered in the fridge for up to 3-4 days.
Wellness and Lifestyle Fit with Chocolate Mousse Pie Silky Whipped Filling
While a decadent treat, a small slice of this rich Chocolate Mousse Pie Silky Whipped Filling provides a satisfying indulgence without overdoing it. It’s about enjoying dessert mindfully, making it a sustainable part of a family’s healthy eating journey.
- It’s family-friendly (a classic dessert everyone loves), comfort food (rich and satisfying), and surprisingly easy to make. I also appreciate that it’s a wonderful way to elevate any meal without stress.
- This isn’t just a dessert; it’s a quick family dinner finisher that brings smiles and a sense of occasion to the table. This easy dessert recipe feels gourmet.
Making It Your Own
- I often add a pinch of orange zest to the chocolate for a bright, flavorful chocolate-orange mousse pie. Experiment with different extracts like almond, hazelnut, or a touch of cinnamon for warmth.
- Top with chocolate curls, a light dusting of cocoa powder, or a drizzle of chocolate ganache for extra flair. For a sophisticated look, pipe additional whipped cream decoratively.
- For dairy-free: Ensure you use dairy-free chocolate and full-fat canned coconut cream. For nut-free: Use a nut-free pie crust, like a basic graham cracker or cookie crust. For low-sugar: Use approved sugar substitutes for both the mousse and whipped topping.
Common Questions Answered
“Can Chocolate Mousse Pie Silky Whipped Filling be made ahead for meal prep?”
Yes, this Chocolate Mousse Pie Silky Whipped Filling is perfect for making 1-2 days in advance. It actually benefits from the chilling time, allowing the silky whipped filling to fully set. This makes it a great option for meal prep or stress-free entertaining.
“What’s the best way to store Chocolate Mousse Pie Silky Whipped Filling leftovers?”
Store any leftover Chocolate Mousse Pie Silky Whipped Filling covered tightly with plastic wrap or in an airtight container in the refrigerator for up to 3-4 days. This keeps that fresh, silky whipped filling and rich chocolate flavor intact for continued enjoyment.
“Can I substitute ingredients for a healthier version of Chocolate Mousse Pie Silky Whipped Filling?”
You can use a sugar substitute designed for baking, like erythritol or stevia, and opt for a certified gluten-free crust. For a lighter filling, focus on using good quality dark chocolate (70% cacao) in your Chocolate Mousse Pie Silky Whipped Filling. Remember, portion control is key for healthy eating.
“Why isn’t my Chocolate Mousse Pie Silky Whipped Filling setting properly?”
Ensure your gelatin is properly bloomed and fully dissolved in the warm chocolate mixture. Also, the pie needs adequate chilling time, at least 4-6 hours or preferably overnight, for the Chocolate Mousse Pie Silky Whipped Filling to fully set. I always give mine a full night’s rest for the perfect texture.
“What kind of chocolate is best for this pie’s rich filling?”
For the best Chocolate Mousse Pie Silky Whipped Filling, semi-sweet or dark chocolate (around 60-70% cacao) is recommended. This provides a rich chocolate flavor without being overly bitter or too sweet, ensuring a balanced, delicious silky whipped filling.
“Can I use a different crust for this Chocolate Mousse Pie Silky Whipped Filling?”
Absolutely! While a traditional pastry crust is lovely, a graham cracker crust, Oreo cookie crust, or even a shortbread crust would be delicious with the Chocolate Mousse Pie Silky Whipped Filling. Choose what your family enjoys most for this easy dessert.
“How do I get the perfect Chocolate Mousse Pie Silky Whipped Filling texture?”
Ensure your heavy cream is very cold before whipping; this helps it achieve maximum volume. Also, don’t overmix when combining the chocolate and cream. Gently fold them together to maintain that airy, silky whipped filling texture for your Chocolate Mousse Pie Silky Whipped Filling.
This Chocolate Mousse Pie with its Silky Whipped Filling is truly an easy, elegant dessert that brings smiles to every table, perfect for a quick family dinner. Print this recipe, save it to your Pinterest for later, and share the joy of this incredible pie with your family and friends!
Print
Chocolate Mousse Pie Silky Whipped Filling
- Total Time: 282 minutes
- Yield: 8 servings
- Diet: General
Description
This Chocolate Mousse Pie Silky Whipped Filling is a surprisingly simple yet elegantly impressive dessert. Featuring an irresistible airy texture and deep chocolate flavor, it is perfect for busy weeknights or holiday gatherings.
Ingredients
- 8 oz (225 g) high-quality semi-sweet chocolate, chopped
- 2 cups (480 ml) cold heavy cream
- 0.25 cup (50 g) granulated sugar
- 1 packet (7 g) unflavored gelatin
- 0.25 cup (60 ml) cold water
- 1 tsp (5 ml) pure vanilla extract
- One 9-inch (23 cm) pre-made pie crust (graham cracker or cookie crust)
Instructions
- Prepare Pie Crust: If using a pre-baked crust, ensure it is cooled completely. If raw, bake according to package directions in a 9-inch pie plate until lightly golden (usually 10-12 minutes at 375°F/190°C), then cool fully (about 30 minutes).
- Bloom Gelatin: Sprinkle the unflavored gelatin evenly over 0.25 cup (60 ml) cold water in a small bowl. Let it sit for 5 minutes until it softens and becomes thick.
- Melt Chocolate: Gently melt the 8 oz (225 g) chopped chocolate using a double boiler or microwave (in 30-second intervals), stirring until smooth and glossy. Remove from heat and stir in the bloomed gelatin until fully dissolved.
- Whip Cream: In a large, chilled mixing bowl, whip 2 cups (480 ml) cold heavy cream with 0.25 cup (50 g) sugar and 1 tsp (5 ml) vanilla extract using an electric mixer until soft peaks form.
- Combine Mousse Ingredients: Gently fold about a third of the whipped cream into the warm melted chocolate mixture to lighten it, until just combined. Then, carefully fold in the remaining whipped cream until no streaks of chocolate remain (do not overmix).
- Pour Into Crust: Spoon the chocolate mousse filling into the prepared pie crust, spreading evenly with a spatula until smooth.
- Chill To Set: Refrigerate the pie for at least 4-6 hours, or preferably overnight, until completely set for easy slicing.
Notes
For shortcuts, use a store-bought graham cracker or Oreo cookie crust and pre-chopped chocolate. For variations, add 0.5 tsp espresso powder to deepen chocolate flavor or 0.5 tsp peppermint extract to the whipped cream for a festive twist. Do not skip chilling time for the best results. Pie can be made in mini tart shells for individual servings.
- Prep Time: 30 minutes
- Cook Time: 12 minutes
- Category: Dessert
- Method: No-Bake, Chilling
- Cuisine: American
Nutrition
- Serving Size: 1 slice (1/8 of pie)
- Calories: 380 calories
- Sugar: 30 g
- Sodium: 180 mg
- Fat: 28 g
- Saturated Fat: 17 g
- Unsaturated Fat: 7 g
- Trans Fat: 0 g
- Carbohydrates: 40 g
- Fiber: 3 g
- Protein: 5 g
- Cholesterol: 75 mg
FREE PRINTABLE RECIPE
Get the Printable Recipe PDF (Free)
Enter your email and we’ll send you the ingredients + step-by-step instructions as a clean PDF you can save to your phone.
- ✅ Printable PDF (ingredients + steps)
- ✅ Save it to your phone (no long scrolling)
- ✅ Includes cook time + servings
- ✅ Easy to follow
FAQ
Where’s the full recipe?
It’s delivered as a printable PDF so you can save it and cook without scrolling.
I didn’t get the email.
Check Spam/Promotions and search your inbox for your site name. Then click Confirm to receive the PDF.