
I love making a special treat that feels elaborate but comes together easily, and this is it! This honeybun cake recipe with cinnamon swirl glaze truly delivers on that promise, filling your kitchen with an irresistible aroma of warm cinnamon and sweet pastry. It’s an easy, family-friendly dessert perfect for a cozy weekend breakfast or a quick weeknight indulgence when you need something sweet. You’ll get that bakery-style flavor without the fuss, making this honeybun cake a reliable favorite for busy families.
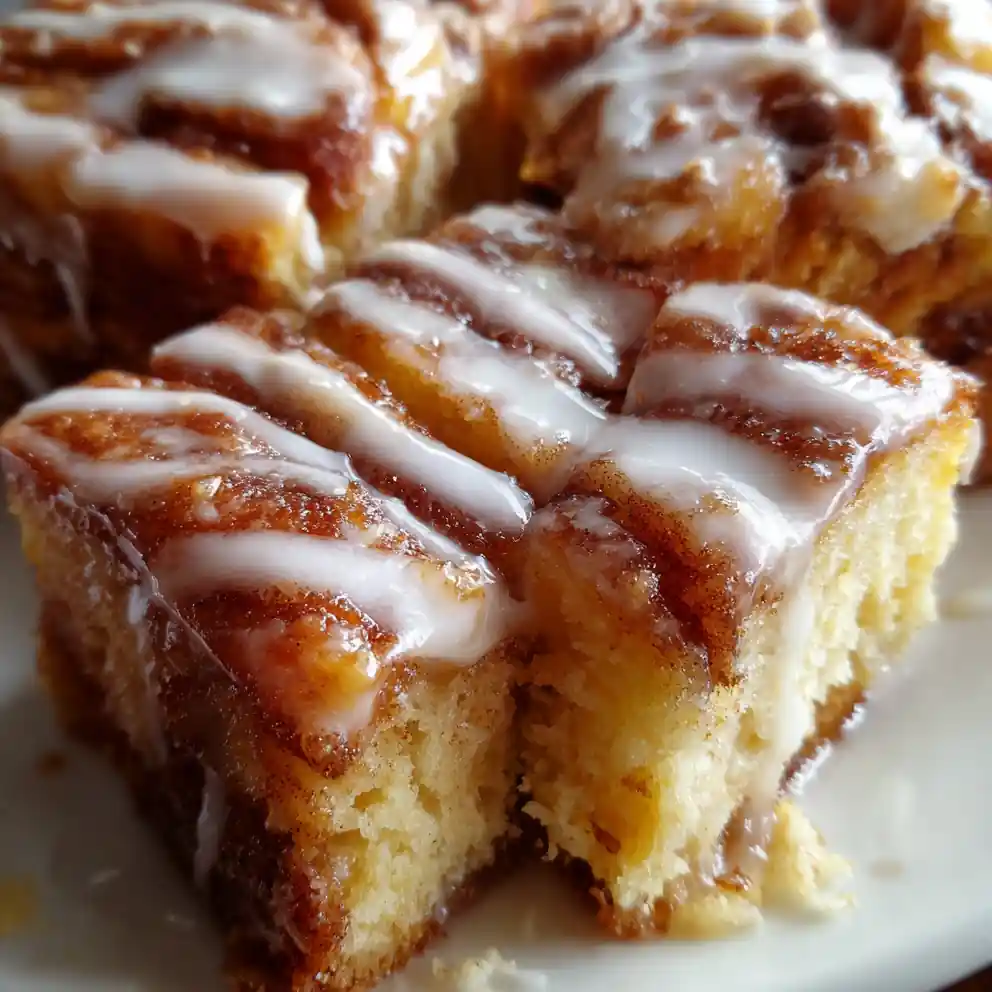
Ingredients You’ll Need for Your Honeybun Cake (With Purpose & Options)
For the Cake Batter
- Flour: 2 cups (240g) all-purpose flour (for a tender crumb, or try unbleached).
- Granulated sugar: 1 cup (200g) granulated sugar (provides sweetness).
- Brown sugar: 1/2 cup (100g) light brown sugar, packed (adds moisture and a hint of caramel).
- Eggs: 2 large eggs (bind ingredients, give structure).
- Milk: 1 cup (240ml) whole milk (any milk works, or buttermilk for tang; ensures tenderness).
- Vegetable oil: 1/2 cup (120ml) vegetable oil (keeps the cake incredibly moist; I often use canola oil here).
- Vanilla extract: 2 teaspoons pure vanilla extract (essential flavor boost).
- Baking powder: 2 teaspoons baking powder (for perfect rise).
- Baking soda: 1 teaspoon baking soda (aids rise, reacts with brown sugar).
- Pinch of salt: 1/2 teaspoon fine sea salt (balances sweetness).
For the Cinnamon Swirl
- Melted butter: 1/2 cup (113g) unsalted butter, melted (the binding agent).
- Brown sugar: 1 cup (200g) light brown sugar, packed (delivers deep, caramelized sweetness).
- Ground cinnamon: 2 tablespoons ground cinnamon (the signature warm spice; ensure it’s fresh!).
For the Easy Glaze
- Powdered sugar: 2 cups (240g) powdered sugar (for a smooth, sweet finish).
- Milk or water: 3-4 tablespoons milk or water (to achieve the right consistency; I prefer milk for richness).
- Vanilla extract: 1 teaspoon pure vanilla extract (extra flavor).
Swaps & Upgrades
- Dairy-free: Use plant-based milk and dairy-free butter.
- Gluten-free: Swap 1:1 gluten-free baking flour blend for all-purpose.
- Lower sugar: Reduce sugar in cake and swirl by 1/4 cup each for a slightly less sweet honeybun cake.
Clear Step-by-Step Instructions for Your Honeybun Cake
Prepare Your Pan & Preheat Oven
Preheat your oven to 350°F (175°C) until warm. Generously grease and flour a 9×13 inch baking pan; this ensures the cake releases cleanly when golden brown.
Mix the Cake Batter
- Whisk dry ingredients: In a large bowl, combine flour, sugars, baking powder, baking soda, and salt. Whisk until light and fully blended.
- Add wet ingredients: Pour in milk, oil, eggs, and vanilla. Mix gently with a spoon or electric mixer on low speed until just combined; the batter will be smooth but thick. If it looks dry, splash in 1-2 Tbsp more milk.
- Pour into pan: Spread half of the cake batter evenly into the prepared 9×13 inch pan, aiming for a consistent layer.
Create the Cinnamon Swirl
- Combine swirl ingredients: In a small bowl, mix melted butter, brown sugar, and cinnamon until a thick, fragrant paste forms.
- Drizzle over batter: Dollop spoonfuls of the cinnamon mixture over the first layer of cake batter in the pan, distributing it evenly. I find using a small spoon helps here for good coverage.
- Top with remaining batter: Carefully spread the remaining cake batter over the cinnamon layer, gently coaxing it to cover the swirl without disturbing it too much.
- Swirl it: Use a knife or skewer to gently swirl the cinnamon mixture through the cake batter, creating beautiful ribbons. Don’t overmix; just a few strokes until you see distinct swirls.
Bake to Golden Perfection
- Bake: Bake for 30-35 minutes, or until the top is golden brown and a toothpick inserted into the center comes out clean. The honeybun cake will feel springy to the touch.
- Cool slightly: Let the honeybun cake cool in the pan for 10-15 minutes on a wire rack. This allows it to set before glazing.
Mix & Apply the Glaze
- Whisk glaze: While the cake cools, whisk powdered sugar, milk/water, and vanilla extract in a medium bowl until the mixture is smooth and pourable, like a thick syrup.
- Glaze the warm cake: Pour the ready glaze over the slightly warm honeybun cake, spreading it evenly with a spatula. The warmth helps the glaze slightly melt and seep into the cake, creating that signature sticky finish.
Perfect Times to Serve This Honeybun Cake Dish
This delightful dessert fits any occasion, from simple weeknight treats to special gatherings. Its comforting flavor makes it a family favorite.
- Everyday uses: Quick weeknight dessert, school lunchbox treat, easy after-dinner indulgence for the whole family.
- Special moments: Potlucks, holiday brunches, comforting Sunday morning bake, or even birthday parties.
- Pairings: Best served warm with a scoop of vanilla ice cream, a dollop of whipped cream, or alongside a strong cup of coffee.
Nutrition & Wellness Angle of This Honeybun Cake Recipe
While this is a sweet treat, it can certainly be part of a balanced diet when enjoyed in moderation. It offers a wonderful sweet energy boost, perfect for an afternoon pick-me-up or a satisfying end to a family meal.
This honeybun cake recipe with cinnamon swirl glaze inherently includes options for healthier family meals through simple modifications. Consider using whole wheat flour or reducing sugar amounts.
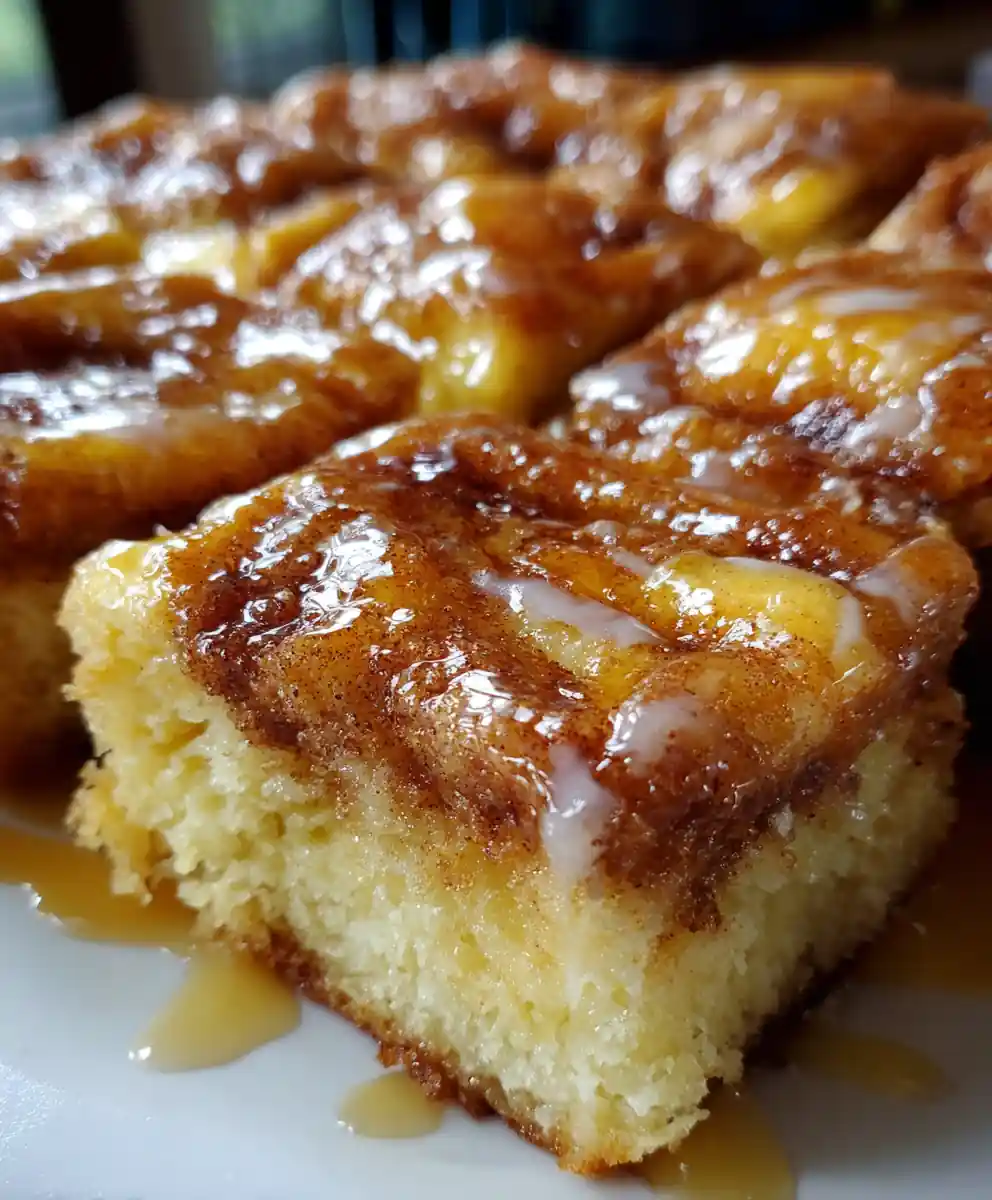
Everyday Benefits & Practical Uses
This easy, family-friendly honeybun cake recipe brings significant benefits to your kitchen:
- Saves time: Quick prep, minimal ingredients, and easy cleanup are perfect for busy families.
- Eats well: A comforting, delicious dessert that everyone will love.
- Stretches a budget: Made with common pantry staples, making it an economical choice.
Readers will love this recipe because it brings back nostalgic bakery flavors at home and is simple enough for beginner bakers. It’s also perfect for making ahead and sharing, fitting into meal prep recipes.
Chef’s Tips and Flexible Adjustments for Your Honeybun Cake
To elevate your honeybun cake, consider these simple enhancements:
- Flavor enhancers: Add a pinch of nutmeg to the cinnamon swirl for extra warmth; consider using brown butter in the glaze for a deeper, nutty flavor.
- Seasoning tricks: Always ensure your ground cinnamon is fresh for the most vibrant aroma and taste in your honeybun cake.
- Cooking techniques: Avoid overmixing the cake batter; mix until just combined for a tender crumb. Baking evenly is key for perfect texture.
- Adjustments for kids: Let them help with mixing the swirl or drizzling the glaze, making it a fun family activity. My kids love to help with the swirling part; it’s a great way to involve them in cooking!
- Picky eaters: The familiar sweet cinnamon flavor of this honeybun cake recipe is generally a big hit with children and adults alike.
- Dietary needs: Remember the gluten-free and dairy-free swaps mentioned in Part 1 to cater to various needs.
- Safety notes: Always supervise children when working around hot ovens.
Reader FAQs About Honeybun Cake
Q: Can I freeze this honeybun cake for later?
Yes! This is a great meal prep recipe. Bake and cool this honeybun cake completely, then wrap it tightly in plastic wrap and foil. It will keep well in the freezer for up to 3 months. Thaw at room temperature or gently warm individual slices in the oven at 300°F (150°C) for 10-15 minutes.
Q: What’s the healthiest way to prepare this honeybun cake recipe?
To make this honeybun cake recipe a bit healthier, you can substitute up to half of the all-purpose flour with whole wheat pastry flour. Also, reduce the granulated sugar in the cake and brown sugar in the swirl by about 1/4 cup each. Opt for plant-based fats like avocado oil for a heart-healthy choice. Enjoy smaller portions as a treat.
Q: Which brands or stores sell the best ingredients for a honeybun cake?
For a delicious honeybun cake, standard pantry staples work wonderfully. Any reliable all-purpose flour brand is fine, and for cinnamon, I always recommend finding a fresh, fragrant ground cinnamon from your local grocery store for the best flavor payoff.
Q: How do I store leftover honeybun cake?
Store leftover cake at room temperature in an airtight container for up to 3-4 days to maintain freshness and moisture. For longer storage, refrigerate for up to a week. The glaze may firm slightly when cold, but it softens beautifully when brought back to room temperature.
Q: Can I make this honeybun cake in a different size pan?
Yes, you can adapt this honeybun cake recipe to other pan sizes. An 8×8 inch pan will yield a thicker cake, but expect longer baking time, around 40-50 minutes. A Bundt pan also works, but monitor baking closely to ensure it’s fully cooked through.
Q: What if my glaze is too thin or too thick?
The perfect glaze consistency is key. If your glaze is too thin, gradually whisk in more powdered sugar, one tablespoon at a time, until it thickens to your liking. If it’s too thick, add a tiny bit more milk or water, just a few drops, until you reach a smooth, pourable consistency.
Q: Can I add fruit to this honeybun cake?
While not traditional, you could certainly experiment! Gently fold in about 1/2 cup of finely diced apples or peaches with the cinnamon swirl mixture before adding the top layer of batter for an extra fruity twist. Ensure the fruit is finely chopped to bake evenly.
This easy honeybun cake with cinnamon swirl glaze is a delicious, fuss-free way to bring smiles to your table, making weeknight desserts simple and satisfying. I love how this comforting classic always brings joy, so pin it for later recipe inspiration!
Print
honeybun cake recipe With Cinnamon Swirl Glaze
- Total Time: 65 minutes
- Yield: 1 (9×13 inch) cake (12 servings)
- Diet: General
Description
This honeybun cake recipe with cinnamon swirl glaze is an easy, family-friendly dessert perfect for a cozy weekend breakfast or a quick weeknight indulgence. It delivers bakery-style flavor without the fuss, filling your kitchen with an irresistible aroma of warm cinnamon and sweet pastry.
Ingredients
- 2 cups all-purpose flour
- 1 cup granulated sugar
- 0.5 cup light brown sugar, packed
- 2 large eggs
- 1 cup whole milk
- 0.5 cup vegetable oil
- 2 teaspoons pure vanilla extract
- 2 teaspoons baking powder
- 1 teaspoon baking soda
- 0.5 teaspoon fine sea salt
- 0.5 cup unsalted butter, melted
- 1 cup light brown sugar, packed
- 2 tablespoons ground cinnamon
- 2 cups powdered sugar
- 3–4 tablespoons milk or water
- 1 teaspoon pure vanilla extract
Instructions
- Prepare Pan & Preheat Oven: Preheat oven to 350°F (175°C). Generously grease and flour a 9×13 inch baking pan.
- Whisk Dry Ingredients: In a large bowl, combine flour, granulated sugar, 0.5 cup brown sugar, baking powder, baking soda, and salt. Whisk until light and fully blended.
- Add Wet Ingredients: Pour in milk, oil, eggs, and 2 teaspoons vanilla extract. Mix gently with a spoon or electric mixer on low speed until just combined; batter will be smooth but thick. If it looks dry, splash in 1-2 tablespoons more milk.
- Pour Half Batter: Spread half of the cake batter evenly into the prepared 9×13 inch pan.
- Combine Swirl Ingredients: In a small bowl, mix melted butter, 1 cup brown sugar, and cinnamon until a thick, fragrant paste forms.
- Drizzle Swirl Over Batter: Dollop spoonfuls of the cinnamon mixture over the first layer of cake batter, distributing it evenly.
- Top With Remaining Batter: Carefully spread the remaining cake batter over the cinnamon layer, gently coaxing it to cover the swirl.
- Swirl Cinnamon: Use a knife or skewer to gently swirl the cinnamon mixture through the cake batter, creating ribbons. Do not overmix.
- Bake Cake: Bake for 30-35 minutes, or until the top is golden brown and a toothpick inserted into the center comes out clean.
- Cool Cake Slightly: Let the cake cool in the pan for 10-15 minutes on a wire rack.
- Whisk Glaze: While the cake cools, whisk powdered sugar, 3-4 tablespoons milk/water, and 1 teaspoon vanilla extract in a medium bowl until the mixture is smooth and pourable, like a thick syrup.
- Glaze Warm Cake: Pour the ready glaze over the slightly warm cake, spreading it evenly with a spatula.
Notes
To make this recipe dairy-free, use plant-based milk and dairy-free butter. For a gluten-free version, swap a 1:1 gluten-free baking flour blend for the all-purpose flour. If you prefer a less sweet cake, reduce sugar in the cake batter and cinnamon swirl by 0.25 cup each. Store leftovers covered at room temperature for up to 3 days, or refrigerate for longer freshness.
- Prep Time: 20 minutes
- Cook Time: 35 minutes
- Category: Dessert
- Method: Baking
- Cuisine: American
Nutrition
- Serving Size: 1 slice (approx. 100 g)
- Calories: 450 calories
- Sugar: 55 g
- Sodium: 200 mg
- Fat: 22 g
- Saturated Fat: 10 g
- Unsaturated Fat: 8 g
- Trans Fat: 0 g
- Carbohydrates: 60 g
- Fiber: 1 g
- Protein: 4 g
- Cholesterol: 50 mg
FREE PRINTABLE RECIPE
Get the Printable Recipe PDF (Free)
Enter your email and we’ll send you the ingredients + step-by-step instructions as a clean PDF you can save to your phone.
- ✅ Printable PDF (ingredients + steps)
- ✅ Save it to your phone (no long scrolling)
- ✅ Includes cook time + servings
- ✅ Easy to follow
FAQ
Where’s the full recipe?
It’s delivered as a printable PDF so you can save it and cook without scrolling.
I didn’t get the email.
Check Spam/Promotions and search your inbox for your site name. Then click Confirm to receive the PDF.