
I’ve always dreamt of baking that perfect artisan loaf right in my own kitchen, and now you can too!
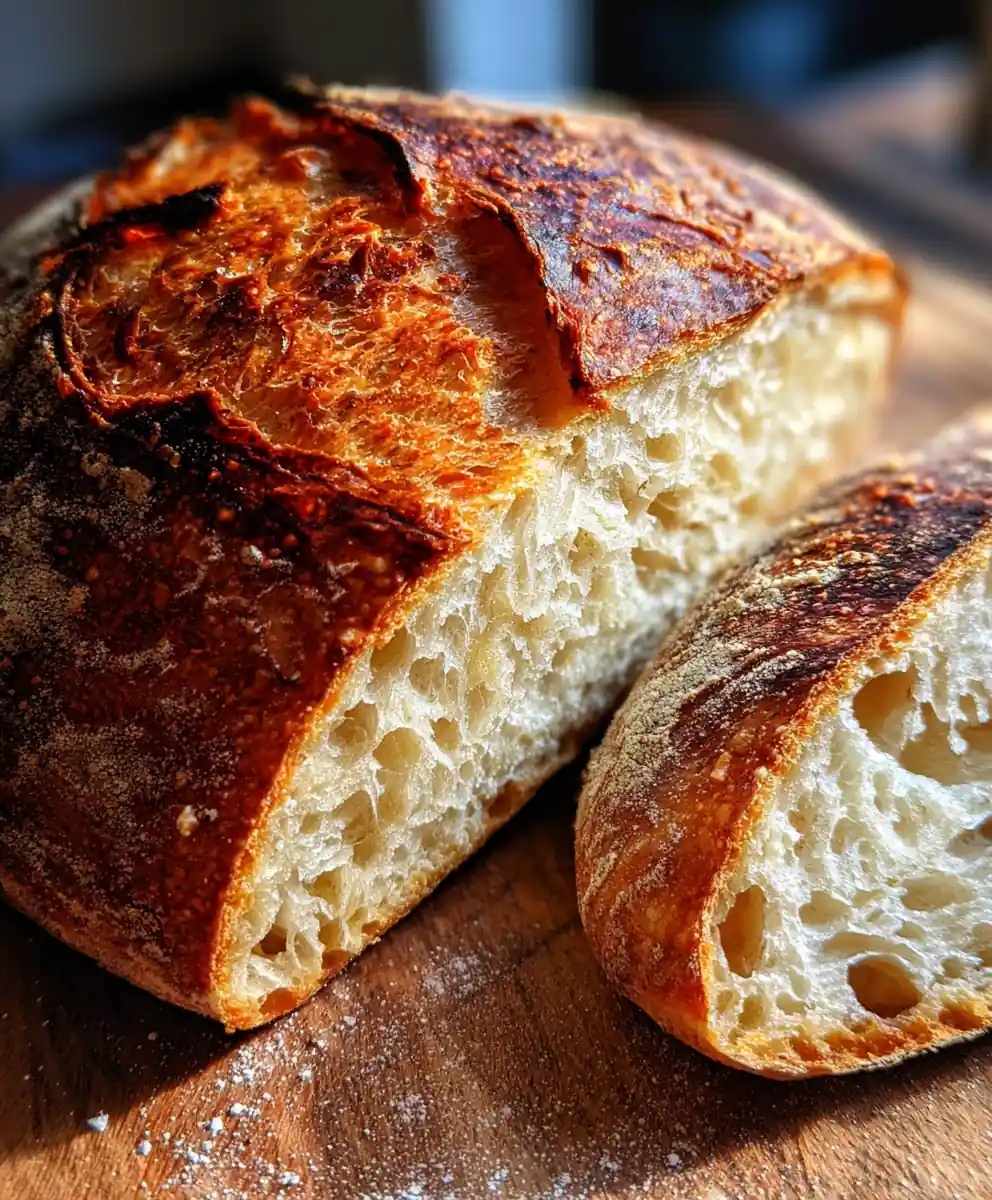
Our simple sourdough recipe With Burnished Amber Crust is your ticket to creating a truly beautiful loaf. Imagine pulling a warm, aromatic loaf from your oven, its crust a deep burnished amber, bringing that rustic, comforting aroma to your family table.
This foolproof method takes the mystery out of sourdough baking, making it accessible for everyone, even on a busy weeknight. Get ready for an incredibly flavorful, satisfying bread experience with minimal effort.

Ingredient List with Functions
- Active Sourdough Starter: 100g (about 1/2 cup) — The vibrant heart of your loaf, providing essential rise and a complex tangy flavor.
- All-Purpose Flour: 500g (about 4 cups) — Builds the vital structure and chew of your bread. (For a gluten-free simple sourdough recipe, use a 1:1 gluten-free flour blend, though texture may vary slightly.)
- Warm Water: 350g (about 1 1/2 cups) — Crucial for hydrating the dough and activating the gluten. I find water around 90-95°F (32-35°C) works best.
- Salt: 10g (2 teaspoons) — Enhances flavor and helps strengthen the dough structure. I typically use fine sea salt.
- Olive Oil (optional): 1 Tbsp — A small addition for a softer crumb and richer taste. (Can be swapped for melted coconut oil for a subtle flavor.)
Consider organic, unbleached flours for a deeper, more complex flavor in your simple sourdough recipe With Burnished Amber Crust. For flavor boosters, try a sprinkle of dried rosemary or thyme on top before baking, or a dash of everything bagel seasoning for an extra savory crunch. Incorporating these premium choices elevates this healthy recipe idea into something truly special.
Step-by-Step Cooking Instructions
- Activate Your Starter (Prep Night Before): Feed 50g active starter with 50g all-purpose flour and 50g warm water. Mix well until combined. Let sit at room temperature (around 70°F/21°C) for 8-12 hours until bubbly and active, showing good rise.
- Mix the Dough (Prep 15 min): In a large bowl, combine 100g active starter, 350g warm water, 500g flour, and 10g salt. Mix with a spoon or your hands until no dry spots remain and a shaggy dough forms. Cover the bowl loosely and rest for 30 minutes to allow the flour to fully hydrate.
- First Set of Stretch & Folds (5 min): Perform 3 sets of gentle stretch and folds, 30 minutes apart. To do this, moisten your hands slightly, gently pull a section of dough from the edge of the bowl, stretch it upwards, and fold it over the center. Rotate the bowl and repeat this 4-6 times until all sides have been folded. The dough will start to feel smoother and more elastic. If the dough tears easily, it might need more rest between folds; give it another 10-15 minutes.
- Bulk Fermentation (4-6 hours): Cover the bowl and let the dough rise at room temperature (68-75°F / 20-24°C) for 4-6 hours, or until it has visibly increased in volume by about 50-75%. The dough will look airy and bubbly, and feel soft when gently poked. For an easy dinner idea, I sometimes start this process in the morning so it’s ready for cold proofing by evening.
- Shape the Loaf (10 min): Lightly flour your work surface. Gently turn out the dough onto the floured surface. Using minimal flour, shape into a tight round or oval, creating tension on the surface. Avoid overworking the dough to preserve its airy structure.
- Cold Proof (Overnight 8-16 hours): Place the shaped dough seam-side up in a floured banneton or a bowl lined with a floured kitchen towel. Cover tightly with plastic wrap or a shower cap and refrigerate overnight (8-16 hours). This step develops deep flavor and helps achieve that characteristic burnished amber crust.
- Preheat Oven & Dutch Oven (30-45 min): Preheat your oven to 450°F (230°C) with a 5-6 quart Dutch oven inside for at least 30 minutes. This creates a super hot environment for an amazing oven spring.
- Score & Bake (Covered, 25 min): Carefully remove the hot Dutch oven from the oven. Gently transfer the dough, seam-side down, into the hot pot. Score the top of the dough with a sharp knife or lame to control expansion. Bake covered for 25 minutes. You’ll hear the dough begin to crackle as the crust sets.
- Achieve Burnished Amber Crust (Uncovered, 15-20 min): Remove the Dutch oven lid. Reduce oven temperature to 425°F (220°C). Continue baking uncovered for another 15-20 minutes, until the crust is a deep, rich burnished amber color and the internal temperature reaches 200-210°F (93-99°C) when checked with an instant-read thermometer. This is key for that perfect simple sourdough recipe finish.
- Cool Completely (1-2 hours): Transfer the finished bread to a wire rack. Cool completely for at least 1-2 hours before slicing. Resist the urge to slice early; cooling fully ensures the perfect crumb texture and allows the internal moisture to redistribute evenly.
Occasions and Serving Ideas
This simple sourdough recipe fits seamlessly into any family kitchen. Its robust flavor and satisfying texture make it a versatile staple.
- Everyday uses: Enjoy slices with eggs for breakfast, as a base for hearty sandwiches for lunch, or alongside a comforting stew for easy dinner ideas. It also makes for nutritious snacks any time.
- Special moments: Impress guests at your next brunch, elevate a holiday meal, or make family gatherings feel extra special with a beautiful homemade loaf.
- Pairing suggestions: Serve with a drizzle of your favorite olive oil and a sprinkle of sea salt, alongside a vibrant garden salad, or as the perfect accompaniment to a warm bowl of soup.
For convenience, store your cooled loaf in a paper bag at room temperature for 2-3 days. To extend freshness, slice the bread, then freeze it in an airtight bag for up to a month. You can toast individual slices directly from frozen for quick meals.
Nutrition & Lifestyle Advantages of Simple Sourdough
Beyond its incredible taste, this simple sourdough recipe offers real benefits for active lifestyles. The slow fermentation process can make it easier to digest, providing sustained energy for your day.
It’s a fantastic family-friendly addition, forming the basis of many balanced meals. Kids often love the chewy crust and soft interior, making it a healthy recipe idea everyone can enjoy.
This simple sourdough recipe is a fantastic healthy recipe idea that fits into easy dinner recipes, helps with quick meal prep, and makes for nutritious snacks. Naturally fermented, it’s often easier to digest than conventional bread and a great whole-grain component for many dietary approaches.
How It Helps Solve Everyday Needs
Embrace the joy of baking this simple sourdough recipe at home. It’s significantly more affordable than purchasing artisan loaves, and you likely have most of the organic ingredients already.
This method offers a rewarding way to nourish your family with wholesome food, saving you money and providing deliciousness. It’s an adaptable staple that fits into various meals, proving homemade can be both convenient and superior.
- Saves money on weekly grocery bills.
- Provides a delicious, wholesome staple for countless meals.
- Adds a touch of homemade luxury to your everyday table.
Kitchen Tips and Creative Adjustments
Elevate your simple sourdough recipe with flavor boosters. Try kneading in 1/4 cup of chopped sun-dried tomatoes, a handful of fresh rosemary, or some grated hard cheese during the initial mix for a delicious variation. I often stir in a tablespoon of everything bagel seasoning for an extra crunch before baking.
To experiment with texture or adapt for dietary needs, explore using a blend of flours. Substituting 100g of the all-purpose flour with whole wheat or spelt flour can add a nuttier flavor and denser crumb. For a gluten-free option, use a reliable 1:1 gluten-free bread flour blend, noting the hydration may need minor adjustment.
Always ensure your sourdough starter is vigorous and active; it should be bubbly and float when a small piece is dropped in water. This is crucial for a good rise and that perfect burnished amber crust.
Common Questions Answered
Is simple sourdough recipe suitable for meal prep?
Yes, absolutely! Baking a larger batch of this simple sourdough recipe and freezing portions is an excellent strategy for quick meal prep. You’ll have wholesome bread ready for healthy breakfasts or easy dinner ideas all week long.
Can I freeze sourdough bread and reheat later?
You certainly can. Once your loaf cools completely, slice it and place the slices in an airtight freezer bag. When you’re ready to enjoy, simply toast the slices directly from frozen until warmed through.
What’s the healthiest way to serve simple sourdough recipe?
This nutritious bread is fantastic toasted with mashed avocado and a sprinkle of chili flakes, or alongside a bowl of high-protein lentil soup. Enjoying it with fresh vegetables or a lean protein makes for a very balanced meal.
How do I achieve that perfect burnished amber crust?
The secret lies in proper hydration and a two-stage baking method. I’ve found baking covered in a preheated Dutch oven at high temperature first, then uncovered at a slightly lower heat, ensures great oven spring and that deep, gorgeous burnished amber crust.
What if my sourdough starter isn’t very active?
If your starter seems sluggish, try feeding it a smaller amount of flour and water (e.g., 25g each) every 8-12 hours for a day or two. Ensure it’s in a warm spot, around 75°F (24°C), until it consistently doubles in size.
Can I make this simple sourdough recipe in a regular oven without a Dutch oven?
While a Dutch oven is ideal for that signature crust, you can still get good results. Preheat a baking stone or heavy sheet pan to 450°F (230°C). To create steam, place a metal pan with boiling water on the bottom rack of your oven as you load the dough.
Conclusion
This simple sourdough recipe with a burnished amber crust truly empowers you to bake delicious, wholesome bread at home, effortlessly. It’s a rewarding journey that delivers amazing flavor and texture to your family table.
Ready to bake your own masterpiece for healthy eating? Pin this simple sourdough recipe now for quick meals and share your beautiful burnished loaves with us!
Print
simple sourdough recipe With Burnished Amber Crust
- Total Time: 1465 minutes
- Yield: 1 large loaf (about 12 servings)
- Diet: General
Description
This simple sourdough recipe creates a beautiful, aromatic loaf with a deep burnished amber crust. It’s a foolproof method, making sourdough baking accessible for everyone, resulting in a flavorful and satisfying bread with minimal effort.
Ingredients
- 100 g active sourdough starter, 0.5 cup
- 500 g all-purpose flour, 4 cups
- 350 g warm water, 1.5 cups
- 10 g salt, 2 teaspoons
- 1 Tbsp olive oil, optional (can be swapped for melted coconut oil for a subtle flavor)
Instructions
- Activate Starter: Feed 50 g active starter with 50 g all-purpose flour and 50 g warm water. Mix well until combined. Let sit at room temperature (around 70F/21C) for 8-12 hours until bubbly and active, showing good rise.
- Mix Dough and Rest: In a large bowl, combine 100 g active starter, 350 g warm water, 500 g flour, and 10 g salt. Mix with a spoon or your hands until no dry spots remain and a shaggy dough forms. Cover the bowl loosely and rest for 30 minutes to allow the flour to fully hydrate.
- Perform Stretch and Folds: Perform 3 sets of gentle stretch and folds, 30 minutes apart. To do this, moisten your hands slightly, gently pull a section of dough from the edge of the bowl, stretch it upwards, and fold it over the center. Rotate the bowl and repeat this 4-6 times until all sides have been folded. The dough will start to feel smoother and more elastic. (If the dough tears easily, give it another 10-15 minutes rest between folds.)
- Bulk Fermentation: Cover the bowl and let the dough rise at room temperature (68-75F / 20-24C) for 4-6 hours, or until it has visibly increased in volume by about 50-75%. The dough will look airy and bubbly, and feel soft when gently poked.
- Shape Loaf: Lightly flour your work surface. Gently turn out the dough onto the floured surface. Using minimal flour, shape into a tight round or oval, creating tension on the surface. Avoid overworking the dough to preserve its airy structure.
- Cold Proof Overnight: Place the shaped dough seam-side up in a floured banneton or a bowl lined with a floured kitchen towel. Cover tightly with plastic wrap or a shower cap and refrigerate overnight (8-16 hours). This step develops deep flavor and helps achieve that characteristic burnished amber crust.
- Preheat Oven and Dutch Oven: Preheat your oven to 450F (230C) with a 5-6 quart Dutch oven inside for at least 30 minutes.
- Score and Bake Covered: Carefully remove the hot Dutch oven from the oven. Gently transfer the dough, seam-side down, into the hot pot. Score the top of the dough with a sharp knife or lame to control expansion. Bake covered for 25 minutes.
- Bake Uncovered: Remove the Dutch oven lid. Reduce oven temperature to 425F (220C). Continue baking uncovered for another 15-20 minutes, until the crust is a deep, rich burnished amber color and the internal temperature reaches 200-210F (93-99C).
- Cool Bread: Transfer the finished bread to a wire rack. Cool completely for at least 1-2 hours before slicing. Cooling fully ensures the perfect crumb texture and allows the internal moisture to redistribute evenly.
Notes
For a gluten-free option, use a 1:1 gluten-free flour blend, though texture may vary slightly. Consider organic, unbleached flours for a deeper, more complex flavor. For flavor boosters, try a sprinkle of dried rosemary or thyme on top before baking, or a dash of everything bagel seasoning for an extra savory crunch. Cooling completely is crucial for perfect crumb and moisture distribution.
- Prep Time: 45 minutes
- Cook Time: 45 minutes
- Category: Bread
- Method: Baking
- Cuisine: General
Nutrition
- Serving Size: 1 slice (80 g)
- Calories: 220 calories
- Sugar: 2 g
- Sodium: 330 mg
- Fat: 1.5 g
- Saturated Fat: 0.3 g
- Unsaturated Fat: 1.2 g
- Trans Fat: 0 g
- Carbohydrates: 45 g
- Fiber: 3 g
- Protein: 9 g
- Cholesterol: 0 mg
FREE PRINTABLE RECIPE
Get the Printable Recipe PDF (Free)
Enter your email and we’ll send you the ingredients + step-by-step instructions as a clean PDF you can save to your phone.
- ✅ Printable PDF (ingredients + steps)
- ✅ Save it to your phone (no long scrolling)
- ✅ Includes cook time + servings
- ✅ Easy to follow
FAQ
Where’s the full recipe?
It’s delivered as a printable PDF so you can save it and cook without scrolling.
I didn’t get the email.
Check Spam/Promotions and search your inbox for your site name. Then click Confirm to receive the PDF.