
I absolutely adore finding simple ways to make desserts feel extra special for my family. This peanut butter icing recipe With Chocolate Drip delivers pure bliss, marrying creamy, rich peanut butter with a glossy, decadent chocolate finish. It’s the perfect way to elevate any cake or cupcake into a bakery-worthy treat, ideal for those busy weeknights when you still want something homemade and heartfelt.
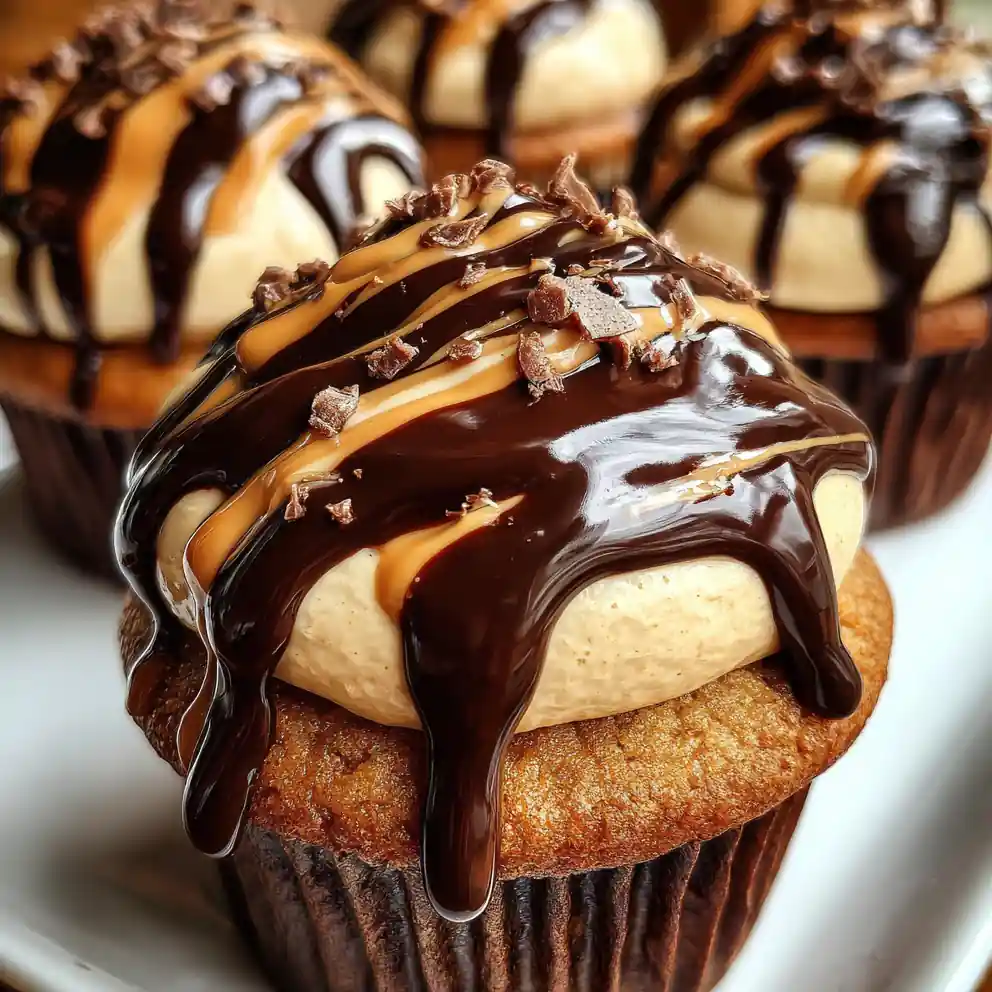
What You’ll Need (Ingredients and Why They Matter for the Best Peanut Butter Icing and Chocolate Drip)
Core Ingredients for Creamy Peanut Butter Icing:
- Unsalted Butter (room temperature): 1 cup (226g). Key for a smooth, rich base and easy blending. (I always use unsalted so I control the salt level.)
- Creamy Peanut Butter: 1 cup (250g). The star flavor! Choose your favorite smooth variety for the best peanut butter icing recipe With Chocolate Drip. (Or sunflower seed butter for a nut-free option.)
- Powdered Sugar: 3-4 cups (360-480g). Essential for sweetness and a super fine, non-grainy texture.
- Whole Milk or Heavy Cream: 2-4 Tbsp (30-60ml). Adjusts consistency to perfectly spreadable. (Almond milk works too for a lighter touch.)
- Vanilla Extract: 1 tsp (5ml). Adds warmth and depth to the peanut butter flavor.
Core Ingredients for Luscious Chocolate Drip:
- Semi-Sweet Chocolate Chips: 1 cup (170g). Melts beautifully for a rich chocolate flavor. Quality chips make a significant difference.
- Heavy Cream: 1/2 cup (120ml). Creates a smooth, pourable ganache consistency.
Highlight Premium or Specialty Options:
- Natural, unsweetened peanut butter for a less sweet, more intense flavor.
- High-quality chocolate chips (e.g., Ghirardelli, Guittard) for a richer drip, enhancing your peanut butter icing recipe With Chocolate Drip.
Smart Swaps for Diets:
- Dairy-Free: Use vegan butter sticks and plant-based milk/cream (almond, oat) for both icing and drip, ensuring a family-friendly option.
- Lower Sugar: Use a powdered sugar substitute if preferred (adjusting for taste), making it a healthy eating choice.
Flavor Boosters:
- Pinch of Salt: Balances sweetness in the icing, bringing out the delicious peanut butter.
- Espresso Powder: A tiny bit in the chocolate drip deepens its flavor without tasting like coffee.
Easy Step-by-Step Cooking Guide for Peanut Butter Frosting and Chocolate Drip
Numbered Steps with Times and Cues:
- Make the Peanut Butter Icing (10-12 minutes): Beat softened butter until light and pale (2-3 min). Add peanut butter; beat until smooth. Gradually add powdered sugar, then 2 Tbsp milk and vanilla. Beat until creamy and easily spreadable. If it looks dry, splash in 1-2 Tbsp milk.
- Prepare the Chocolate Drip (5-7 minutes): Place chocolate chips in a bowl. Heat 1/2 cup heavy cream until simmering. Pour over chips; let sit 2-3 min. Whisk until smooth, glossy. Cool to warm, pourable for a perfect peanut butter icing recipe With Chocolate Drip.
- Frost Your Treats: Apply peanut butter icing recipe With Chocolate Drip generously to cooled cakes or cupcakes using an offset spatula. Smooth tops and sides until even and inviting.
- Add the Chocolate Drip: Spoon or pipe slightly cooled ganache along the dessert’s edge, letting it naturally drip. Fill center if desired, creating a stunning finish for your peanut butter icing recipe With Chocolate Drip.
When I’m short on time, I sometimes use a zip-top bag with a corner snipped off for a quick and controlled drip. This really helps on busy weeknights!
Shortcuts for Faster Prep:
- Use a stand mixer for quick, effortless icing beating.
- Microwave chocolate chips and cream in 30-second intervals for the drip, stirring after each, making this an easy recipe for busy nights.
Inline Notes for Dietary Adjustments:
- For dairy-free, ensure all vegan butter and plant-based substitutes are fully incorporated for desired texture.
Serving Ideas, Pairings, and Make-Ahead Uses for Your Decadent Frosting
Perfect Moments to Serve:
This delightful peanut butter icing recipe with chocolate drip elevates any occasion, making everyday moments feel special. It’s perfect for adding a homemade touch to celebrations or simply enjoying a family-friendly treat after a busy week.
- Birthday cakes
- Cupcakes for school events
- Cozy weeknight dessert
- Special occasion treats
Pair with Sides, Sauces, or Drinks:
The rich flavors of this frosting complement many desserts. I find it especially wonderful on a simple vanilla cupcake, letting the icing truly shine.
- Chocolate Fudge Cake
- Vanilla Cupcakes
- Rich Brownies
- Sugar Cookies
- Tall glass of cold milk
- Hot cup of coffee
Prep in Advance & Storage:
This family-friendly recipe is great for meal prep, saving you time. Preparing elements in advance simplifies dessert creation for quick meals and gatherings.
- Peanut Butter Icing: Make 3-5 days ahead. Store in an airtight container in the fridge. Bring to room temperature and re-whip briefly before using.
- Chocolate Drip: Prepare up to 1 week ahead. Store in the fridge. Gently reheat in the microwave or over a double boiler, stirring until pourable.
- Frosted Desserts: Store covered at room temperature for 2-3 days, or in the fridge for up to 5 days.
Wellness and Lifestyle Benefits with This Homemade Treat
Tie Recipe to Popular Lifestyle Goals:
Enjoying homemade treats in moderation is a key part of balanced eating. This easy peanut butter icing recipe with chocolate drip brings joy and comfort without unnecessary additives.
- Balanced Eating: Mindfully enjoy homemade sweets.
- Family-Friendly: A fun activity to make with kids, fostering kitchen skills.
- Easy Recipes for Busy Nights: Quickly assemble impressive desserts.
Emphasize Qualities:
Control your ingredients with this homemade version. It offers quick prep time, making satisfying, delicious desserts accessible even on hectic schedules.
- Quick prep time
- Satisfying and delicious
- Made with wholesome ingredients you control
Everyday Value and Flexibility of Peanut Butter Icing
Show How it Saves Money and Fits into Weekly Meal Plans:
Making your own peanut butter icing recipe is incredibly cost-effective compared to bakery purchases. This versatile frosting fits into various meal plans for dessert, ensuring you always have a delicious option.
- Cost-Effective: Significantly cheaper than store-bought.
- Reduces Waste: Uses common pantry staples effectively.
- Versatile: Great on almost any baked good.
- Convenience: Always have a homemade frosting ready.
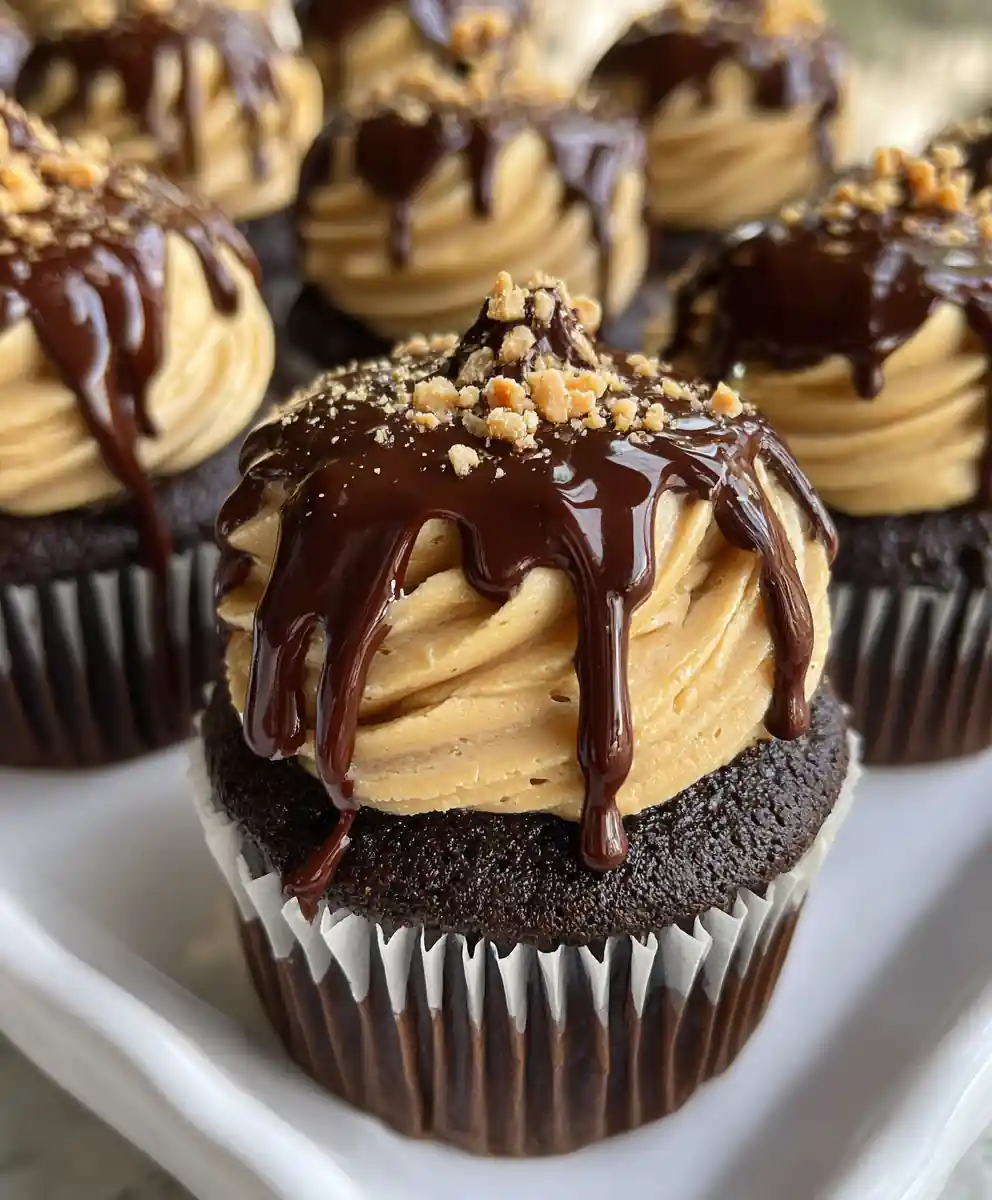
Chef’s Notes and Customization Options
Advanced Flavor or Texture Tweaks:
Elevate your peanut butter icing recipe with these simple adjustments for a gourmet touch. A tiny pinch of flaky sea salt on the chocolate drip beautifully enhances all the flavors.
- For an extra intense chocolate flavor, use dark chocolate chips for the drip.
- A tiny pinch of flaky sea salt on top of the chocolate drip enhances all the flavors.
Spice and Seasoning Variations:
Experiment with spices to add a new dimension to your family-friendly dessert. These additions are simple ways to customize the flavor profile.
- Add a pinch of cinnamon or nutmeg to the peanut butter icing for a spiced twist.
- A dash of cayenne pepper in the chocolate ganache for a Mexican hot chocolate experience.
Substitutions for Kids, Allergies, or Diet Restrictions:
This recipe is adaptable for various dietary needs, making it a truly family-friendly option. You can enjoy the deliciousness even with specific preferences.
- Nut-Free: Substitute sunflower seed butter for peanut butter.
- Dairy-Free: Use plant-based butter and milk/cream.
- Different Drip: Use white chocolate chips with cream for a white chocolate ganache drip.
Common Questions Answered
How do I make my peanut butter icing smooth and not grainy?
Ensure your butter is truly at room temperature and beat it well initially. Always use powdered sugar, not granulated, as its fine texture dissolves easily for a silky smooth finish. Beat on medium-high speed for several minutes after adding the liquid.
Can I use natural peanut butter for this recipe?
Yes, but choose a creamy, no-stir natural peanut butter. If it’s very oily, drain off some excess oil before measuring. It might result in a slightly less firm peanut butter icing recipe, so you may need less milk in the final steps.
What’s the best way to get a perfect chocolate drip?
The key is temperature. Let the ganache cool slightly until it’s warm but still liquid; it should feel just warm to the touch. Test on a hidden spot first on your dessert. A squeeze bottle or a spoon works well for controlled application.
How long does peanut butter icing last at room temperature?
If made with dairy, this peanut butter icing is best stored in the fridge for food safety. For extended periods or for meal prep recipes, keep frosted items refrigerated in an airtight container for up to 5 days. Bring them to room temperature before serving for optimal texture.
Can I make this dairy-free or vegan?
Absolutely! For a dairy-free version, substitute dairy butter with a solid plant-based butter stick (like Miyoko’s Kitchen). Use unsweetened plant milk (almond or oat) and full-fat canned coconut milk or a dairy-free cream alternative for the chocolate drip. This still creates a delicious, high-protein dessert option.
What desserts go best with this frosting?
This amazing peanut butter icing recipe is fantastic on so many baked goods! I personally love it on classic chocolate cupcakes, especially when I want an easy dinner idea that ends on a sweet note. It’s truly a versatile frosting.
Why is my chocolate drip too thick/thin?
If your chocolate drip is too thick, add a tiny bit more warm heavy cream (1 tsp at a time) and stir until it reaches the right consistency. If it’s too thin, add a few more chocolate chips, let them sit for a minute, then stir until smooth, or simply let it cool longer to thicken naturally.
Conclusion
This easy peanut butter icing recipe with a chocolate drip is a true game-changer for your home baking. It’s simple to make, incredibly delicious, and guaranteed to be a family favorite. I love having this option for quick meals, it truly saves the day!
Go ahead and whip up a batch this weekend – and don’t forget to save this recipe on Pinterest for all your future dessert needs!
Print
peanut butter icing recipe With Chocolate Drip
- Total Time: 28 minutes
- Yield: 12 servings (for a cake or 24 cupcakes)
- Diet: Customizable
Description
This recipe provides instructions for making a creamy, rich peanut butter icing paired with a glossy, decadent chocolate drip, perfect for elevating cakes or cupcakes into bakery-worthy treats. It’s ideal for busy weeknights when you want a homemade dessert that feels special.
Ingredients
- 1 cup (226 g) unsalted butter, room temperature
- 1 cup (250 g) creamy peanut butter
- 3.5 cups (420 g) powdered sugar
- 3 Tbsp (45 ml) whole milk or heavy cream
- 1 tsp (5 ml) vanilla extract
- 1 cup (170 g) semi-sweet chocolate chips
- 0.5 cup (120 ml) heavy cream (for chocolate drip)
- Pinch of salt (optional, for icing)
- Small amount of espresso powder (optional, for chocolate drip)
Instructions
- Make The Peanut Butter Icing: Beat softened butter until light and pale (2-3 min). Add peanut butter and beat until smooth. Gradually add powdered sugar, then 2 Tbsp milk and vanilla extract. Beat until creamy and easily spreadable. (If dry, add 1-2 Tbsp more milk.)
- Prepare The Chocolate Drip: Place chocolate chips in a bowl. Heat 0.5 cup heavy cream until simmering. Pour hot cream over the chocolate chips and let sit for 2-3 minutes. Whisk until the mixture is smooth and glossy. Cool to a warm, pourable consistency.
- Frost Your Treats: Apply the peanut butter icing generously to cooled cakes or cupcakes using an offset spatula. Smooth the tops and sides until even.
- Add The Chocolate Drip: Spoon or pipe the slightly cooled ganache along the dessert’s edge, allowing it to naturally drip down the sides. Fill the center if desired.
Notes
For dairy-free options, use vegan butter sticks and plant-based milk/cream. For a quicker drip application, use a zip-top bag with a corner snipped off. A stand mixer can speed up icing preparation, and microwaving can accelerate chocolate melting for the drip.
- Prep Time: 18 minutes
- Cook Time: 0 minutes
- Category: Dessert Topping
- Method: No-Bake, Mixing, Melting
- Cuisine: American
Nutrition
- Serving Size: 2 Tbsp (about 30 g)
- Calories: 360 calories
- Sugar: 38 g
- Sodium: 180 mg
- Fat: 26 g
- Saturated Fat: 13 g
- Unsaturated Fat: 10 g
- Trans Fat: 0 g
- Carbohydrates: 32 g
- Fiber: 2 g
- Protein: 7 g
- Cholesterol: 35 mg
FREE PRINTABLE RECIPE
Get the Printable Recipe PDF (Free)
Enter your email and we’ll send you the ingredients + step-by-step instructions as a clean PDF you can save to your phone.
- ✅ Printable PDF (ingredients + steps)
- ✅ Save it to your phone (no long scrolling)
- ✅ Includes cook time + servings
- ✅ Easy to follow
FAQ
Where’s the full recipe?
It’s delivered as a printable PDF so you can save it and cook without scrolling.
I didn’t get the email.
Check Spam/Promotions and search your inbox for your site name. Then click Confirm to receive the PDF.