Ever stared at a tub of Philadelphia cheesecake filling and thought, “Now what?” You’re not alone—especially on those oven-free nights when time’s tight, the kids want something sweet, and you’re hoping to skip the cleanup.
This ready-to-use cheesecake base is a real lifesaver—creamy, sweet, and sturdy enough to whip up an indulgent dessert in under 10 minutes. No water bath. No baking stress. Just fridge-to-fork bliss.
Born from my mom’s “set-it-and-forget-it” Sundays, it’s now my favorite shortcut for weeknight treats, holiday trifles, or those unexpected dessert emergencies. Let’s dive into why Philadelphia cheesecake filling deserves a spot in every home cook’s fridge.

Table of Contents
Table of Contents
Ingredient Breakdown (with Measurements, Purpose) — What’s in Philadelphia Cheesecake Filling and How to Use It
Philadelphia cheesecake filling is more than just cream cheese in a tub—it’s a pre-sweetened, stabilized base made to hold its shape in no-bake desserts. It’s designed for convenience and flavor without extra effort.
What’s Inside:
- Cream Cheese Base (primary): This is where the tangy, rich cheesecake flavor comes from—it’s smooth, thick, and full-bodied.
- Sweeteners: Already mixed in, meaning you don’t need to add sugar unless you’re adjusting for flavor.
- Stabilizers & Thickeners: These help it hold its structure in layered jars, dips, or pies—no gelatin needed.
For busy home cooks, it means less measuring and more creating.
Prepping the Filling for Best Texture
To get the best texture:
- Let the tub sit out at room temperature for 5–10 minutes before scooping. This softens the mixture and makes it easier to layer or spread.
- Gently stir or fold the filling before using. Sometimes the contents settle a little in the fridge, and this helps restore its creamy consistency.
Nutritional & Allergen Tips
While Philadelphia cheesecake filling is often labeled gluten-free, regional variations may differ. Always double-check the ingredient label if you have sensitivities.
This product is not dairy-free, so it isn’t suitable for those avoiding lactose. If you’re going plant-based, try a vegan cream cheese alternative and mix with powdered sugar and lemon juice to mimic the texture.
Ingredient Customization Ideas
Want to give your filling a personal twist? Try these add-ins:
- Citrus zest (lemon or orange) for brightness
- Peanut butter or Nutella for richness
- Espresso powder or cocoa for bold flavor
- Crushed toffee or candied ginger for special occasions
These simple tweaks can turn your dessert into something entirely new with barely any effort.
Store Brands vs. Philadelphia — Does It Matter?
In testing, store-brand cheesecake fillings can vary widely. Many tend to be thinner or overly sweet.
Philadelphia’s version is:
- Thicker and smoother
- Less artificial tasting
- More reliable in layered desserts or freezer recipes
If you’re prepping for a party or gifting dessert jars, stick with the name brand for best results.
Step-by-Step Preparation Instructions — Easy No-Bake Recipes Using Philadelphia Cheesecake Filling
Here are tried-and-true no-bake dessert ideas that highlight Philadelphia cheesecake filling in all its creamy glory.
Recipe 1: Classic No-Bake Cheesecake Cups
Print
Classic No-Bake Cheesecake Cups
- Total Time: 10 minutes
- Yield: 4 servings
- Diet: Vegetarian
Description
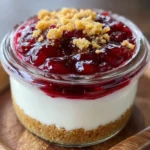
Creamy, no-bake cheesecake dessert layered with crushed cookies and fresh fruit, ready in minutes.
Ingredients
- 1 cup crushed graham crackers or Oreos
- 2 tablespoons melted butter
- 1 tub Philadelphia cheesecake filling (24.3 oz / 680g)
- Fresh berries or fruit compote
Instructions
- Prepare the Crust: Mix crushed cookies with melted butter and press into the base of small jars or cups.
- Add the Filling: Spoon cheesecake filling over the crust.
- Top the Dessert: Top with berries or compote.
- Chill Before Serving: Chill 1 hour before serving.
Notes
- Substitute with gluten-free cookies for a gluten-free version.
- Store covered in refrigerator for up to 3 days.
- Nutritional values are estimated based on typical ingredients.
- Prep Time: 10 minutes
- Cook Time: 0 minutes
- Category: Desserts
- Method: No-Cook
- Cuisine: American
Nutrition
- Serving Size: 1 cup
- Calories: 350
- Sugar: 22g
- Sodium: 320mg
- Fat: 22g
- Saturated Fat: 12g
- Unsaturated Fat: 8g
- Trans Fat: 0g
- Carbohydrates: 32g
- Fiber: 1g
- Protein: 4g
- Cholesterol: 45mg
Recipe 2: Cheesecake Fruit Dip
Print
Cheesecake Fruit Dip
- Total Time: 5 minutes
- Yield: 6 servings
- Diet: Vegetarian
Description
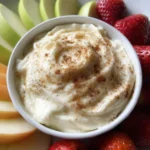
Creamy cheesecake dip with maple syrup and cinnamon—perfect with fruit or pretzels.
Ingredients
- 1 tub Philadelphia cheesecake filling
- 1–2 tablespoons maple syrup
- ½ teaspoon cinnamon or cardamom (optional)
Instructions
- Mix Ingredients: Combine all ingredients and stir until smooth.
- Serve: Serve with sliced apples, strawberries, or pretzels.
Notes
- Use honey or agave syrup instead of maple syrup for a different flavor.
- Store in an airtight container in the refrigerator for up to 3 days.
- Nutrition data is estimated.
- Prep Time: 5 minutes
- Cook Time: 0 minutes
- Category: Desserts
- Method: No-Cook
- Cuisine: American
Nutrition
- Serving Size: 1/6 of recipe
- Calories: 180
- Sugar: 15g
- Sodium: 120mg
- Fat: 9g
- Saturated Fat: 6g
- Unsaturated Fat: 2g
- Trans Fat: 0g
- Carbohydrates: 22g
- Fiber: 0g
- Protein: 2g
- Cholesterol: 20mg
Recipe 3: Dump Cake with Cheesecake Filling
Print
Dump Cake With Cheesecake Filling
- Total Time: 50 minutes
- Yield: 8 servings
- Diet: Vegetarian
Description
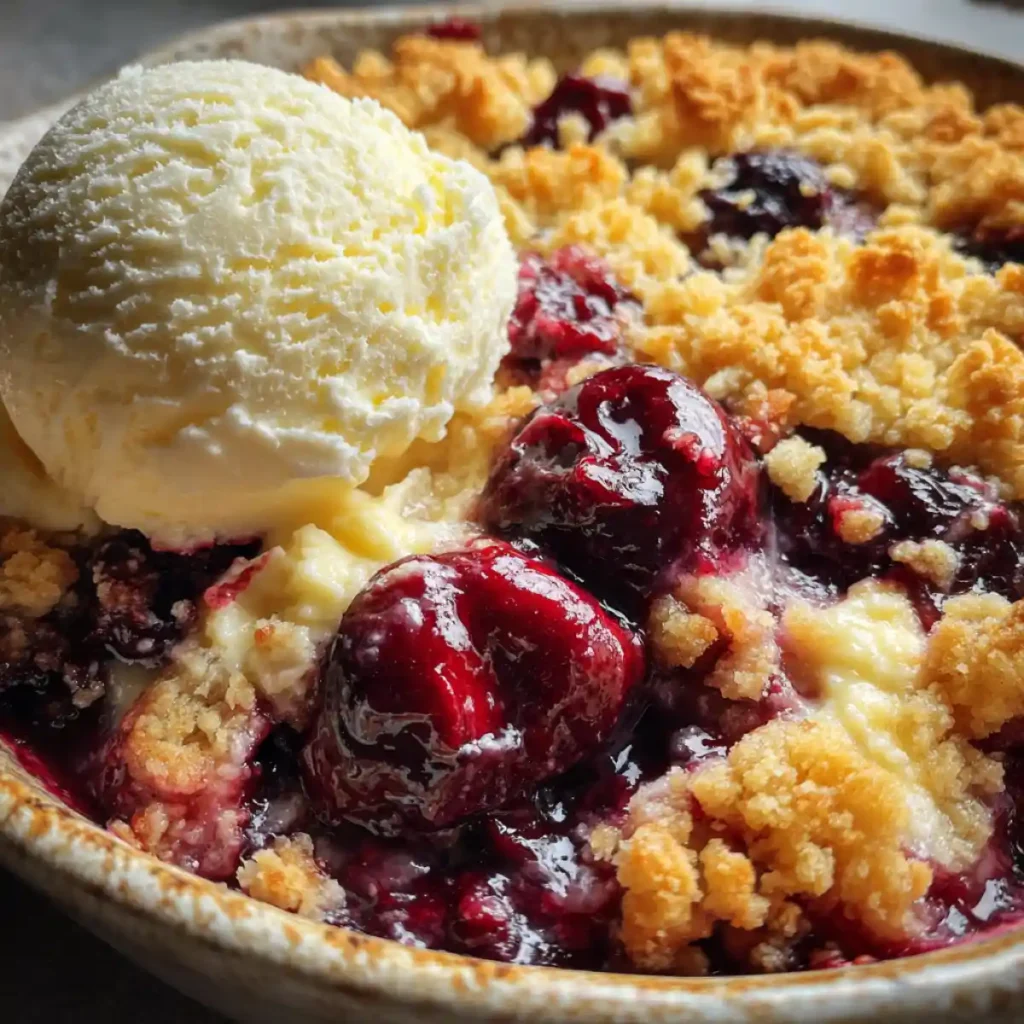
Easy and indulgent dump cake layered with cherry or peach filling and creamy cheesecake—perfect warm with vanilla ice cream.
Ingredients
- 1 can cherry or peach pie filling
- 1 tub Philadelphia cheesecake filling
- 1 box vanilla or yellow cake mix
- ½ cup melted butter
Instructions
- Preheat Oven: Preheat oven to 175°C (350°F).
- Add Fruit Filling: Spread fruit filling in a 9×13 dish.
- Add Cheesecake Layer: Spoon cheesecake filling evenly over top.
- Add Cake Mix: Sprinkle dry cake mix evenly over the cheesecake layer.
- Add Butter: Drizzle melted butter on top of cake mix.
- Bake: Bake for 35–40 minutes, until golden and bubbling.
- Serve: Serve warm with vanilla ice cream.
- Prep Time: 10 minutes
- Cook Time: 40 minutes
- Category: Desserts
- Method: Baked
- Cuisine: American
Nutrition
- Serving Size: 1 slice
- Calories: 420
- Sugar: 28g
- Sodium: 320mg
- Fat: 20g
- Saturated Fat: 10g
- Unsaturated Fat: 8g
- Trans Fat: 0g
- Carbohydrates: 55g
- Fiber: 1g
- Protein: 3g
- Cholesterol: 35mg
Single-Serving No-Bake Jars for Meal Prep
Layering Tip:
In small mason jars, layer:
- 2 tablespoons granola
- ¼ cup cheesecake filling
- 2 tablespoons fruit compote or jam
These store well in the fridge for up to 4 days. They’re portion-controlled, great for lunchboxes, or post-dinner cravings.
Quick Freezer Cheesecake Bites
Instructions:
- Spoon cheesecake filling into silicone mini muffin molds.
- Top with jam or chocolate chips.
- Freeze 2 hours or until firm.
Pop them out and store in a freezer bag. Perfect 100-calorie bite-sized treats.
Dairy-Boosted Cheesecake Mousse (Richer Version)
Instructions:
- Whip ½ cup cold heavy cream to stiff peaks.
- Gently fold into 1 tub of cheesecake filling.
- Spoon into glasses and chill.
The result? A fluffier, airy mousse-style dessert, great for layering with crushed cookies or fruit.
5-Minute Tiramisu Cups
Instructions:
- Dip ladyfingers in cooled espresso.
- Layer in cups with cheesecake filling.
- Dust with cocoa powder.
Fast, flavorful, and no egg yolks or mascarpone needed.
When and How to Use It — Everyday and Special Occasion Ideas for Philadelphia Cheesecake Filling
Philadelphia cheesecake filling isn’t just for last-minute desserts—it’s a year-round standby that adapts to any moment. Whether you’re throwing together a chilled treat for summer BBQs or crafting a festive finish for your holiday table, its creamy, pre-sweetened texture makes it incredibly versatile.
Seasonal Pairing Ideas
Tuning into seasonal flavors can turn a tub of cheesecake filling into something extra special. Try these pairings:
- Spring: Add a spoonful of lemon curd or fresh strawberry slices for bright, citrusy contrast
- Summer: Blueberries with crushed granola or shortbread for a crunchy picnic-ready jar
- Fall: Swirl in pumpkin spice and top with a ginger cookie crumble
- Winter: Cranberry-orange compote with white chocolate shavings for a holiday-worthy dessert
Each combo takes just minutes but delivers big on flavor and visual appeal—no oven required.
Potluck, Brunch & Party Ideas
Planning ahead for a crowd? Philadelphia cheesecake filling makes you look like a dessert genius without lifting a whisk:
- Spoon into mini tart shells or phyllo cups for elegant two-bite servings
- Layer into a trifle bowl with cubed pound cake and fruit for a no-fuss centerpiece
- Fill clear shot glasses or mini jars and top with fresh fruit or chocolate curls for an Instagram-ready platter
It holds up well even after a couple hours chilled, making it party-proof and prep-friendly.
Emergency Dessert Hack for Unexpected Guests
When time is tight but you want something that looks like it came from a bakery:
- Spread the cheesecake filling into store-bought pre-baked tart shells
- Top with whatever fruit you have—frozen mango chunks, berries, or even sliced bananas
- Chill for 10 minutes and serve cold
It’s effortless but elegant—a go-to in our house when company shows up at dinner.
📌 Pinterest CTA Prompt:
Save these no-bake jar desserts to your Quick Weeknight Treats board!
How It Supports Family Dinners & Kid-Friendly Desserts — Why Philadelphia Cheesecake Filling Is a Home Staple
Cheesecake might sound fancy, but when you use the ready-made Philadelphia filling, it becomes a family favorite that even toddlers can help make. Around here, Friday nights mean sweatpants, pizza, and DIY cheesecake cups—and the kids wouldn’t have it any other way.
Make-Your-Own Dessert Bars for Family Night
Set up a fun DIY station where everyone builds their own treat:
- Base: graham cracker crumbs or mini cookies
- Filling: spooned straight from the tub
- Toppings: fresh fruit, chocolate chips, sprinkles, chopped nuts
It’s interactive, zero-bake, and totally mess-tolerant—great for busy parents who still want a “wow” dessert moment.
Lunchbox Cheesecake Hack
Want a sweet bite for school lunches or work snacks?
- Pack the filling into reusable containers
- Add dippers like pretzels, mini graham cookies, or apple slices on the side
- Bonus: it keeps well when chilled with an ice pack
Perfect for portion control and just indulgent enough to feel like a treat.
Sensory Play Dessert for Toddlers
If you’ve got picky eaters or kids learning their way around textures, this filling makes dessert into sensory fun:
- Let them swirl in jam or sauce
- Use soft ingredients like banana slices or cooked fruit
- Build parfaits in cups they can hold
It’s a dessert they can customize and eat—with a spoon or fingers—and that’s half the joy.
Tips, Adjustments, and Cautions — Getting the Most Out of Philadelphia Cheesecake Filling
To make the most of every tub, keep a few tips and tricks in your back pocket. These aren’t just hacks—they’re learned from years of home use, potluck feedback, and a few kitchen flops along the way.
Freezing Tips
Yes, you can freeze it! Here’s how to do it right:
- Freeze flat in zip-top bags for easy stacking
- Thaw overnight in the fridge and give it a quick stir
- Use in pre-filled tart shells or as a base for freezer cheesecake bites
Great for batch prepping desserts for the holidays or unexpected guests.
How to Rescue Runny Cheesecake Filling
Sometimes, the filling doesn’t set quite right—especially if it’s been overmixed or sat out too long. Here’s how to fix it:
- Add a tablespoon or two of instant pudding mix (vanilla or cheesecake flavor)
- Fold in a little whipped cream to bulk it up
- Let it chill overnight for firmer structure
This tip came from a local baker I met at a school fundraiser—her cheesecake shooters were legendary at bake sales.
Crust Tips for Structure and Flavor
A good crust takes your no-bake dessert from okay to incredible:
- Chill cookie or graham crusts for 20+ minutes before filling
- Bake crusts briefly (8–10 minutes at 175°C / 350°F) if you prefer a firmer base
- Add a pinch of sea salt to your crust to balance the sweetness
It’s a simple upgrade that delivers both contrast and crunch.
Avoiding Grainy Texture
One common pitfall? Grainy, separated filling. To avoid it:
- Don’t overmix—gentle folding works best
- Always let the tub come to room temperature before using
- Avoid adding watery ingredients like fresh pineapple or overly juicy fruit directly into the mix
Texture matters, especially in something as smooth and creamy as cheesecake.
FAQs — Common Questions About Philadelphia Cheesecake Filling
Is Philadelphia cheesecake filling gluten-free?
Most varieties are gluten-free, but always check the label—formulations can vary by region.
Can I serve it straight from the tub?
Absolutely. It’s ready-to-eat and delicious as-is, but letting it sit at room temp for 10 minutes improves texture.
Can I thicken the filling?
Yes—use instant pudding mix or gently fold in whipped cream. Avoid adding cornstarch or flour.
How long does it last in the fridge?
Once opened, it stays fresh for about 5–7 days when properly sealed and chilled.
Can I substitute heavy cream or condensed milk in the filling?
You can fold in whipped cream for a lighter mousse, or add sweetened condensed milk for a richer, thicker texture.
How do I keep cheesecake filling from being too sweet?
A pinch of salt or grated lemon zest does wonders to balance out the sweetness.
Can I bake with it?
Yes—but don’t bake it solo. It works great as a swirl in brownies or layered into bar desserts.
How do I transport it for parties or potlucks?
Use small mason jars with lids, or freeze in silicone molds and transfer in a cooler bag for easy, no-mess serving.
Conclusion
From fridge-to-fork elegance to snack-size indulgence, Philadelphia cheesecake filling delivers every time. No oven, no stress—just pure creamy joy. Whether it’s Friday fun with the kids or a last-minute holiday miracle, this is one dessert shortcut you’ll always want in your fridge.
👉 Pin your favorite no-bake recipe from this post and try a new version each week!
