When the weekday grind wears you down and dessert feels out of reach, this recipe delivers warm, cinnamon-sugar comfort—fast.
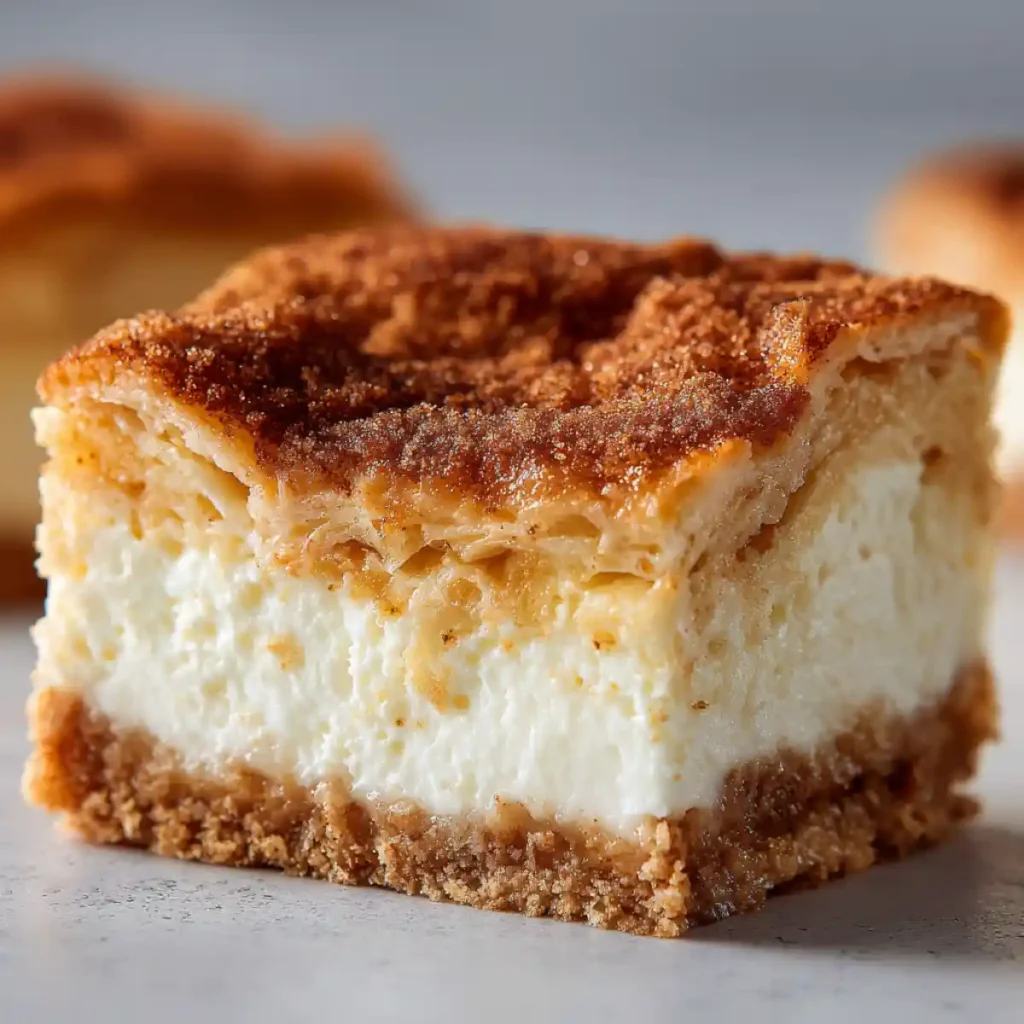
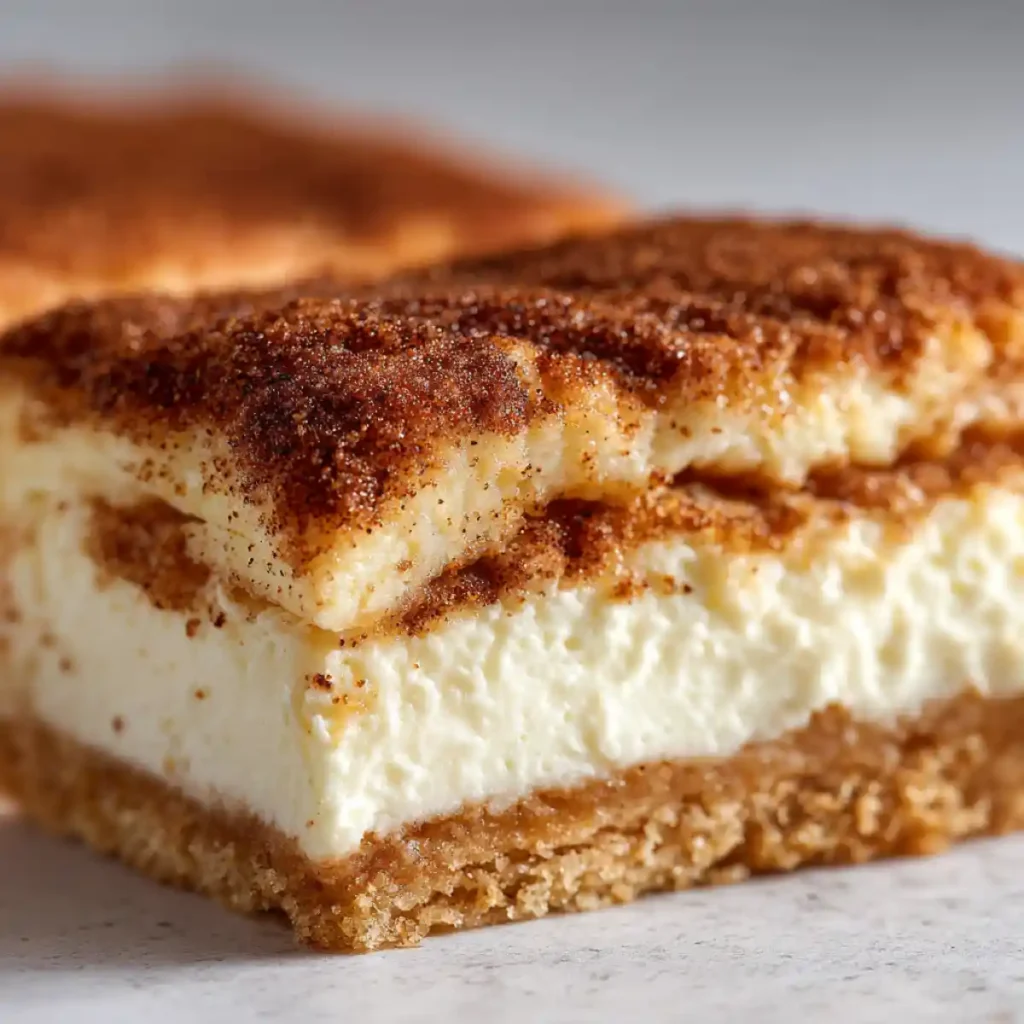
Sopapilla cheesecake transforms store-bought crescent dough and cream cheese into a golden, bakery-worthy treat kissed with spice and nostalgia. It’s the kind of dessert that tastes like it took hours—but comes together in under an hour with pantry staples.
Inspired by my childhood Sundays and saved by weeknight shortcuts, this version is creamy, flaky, and nearly impossible to mess up. It’s a favorite in our kitchen—especially when we need something sweet but don’t want to break out every mixing bowl we own.
Craving a classic? Try my favorite Nestle Toll House cookies—they never disappoint!

Table of Contents
Table of Contents
Ingredients Breakdown (with Measurements, Purpose)
Here’s everything you need to make sopapilla cheesecake from scratch—no fancy tools, just simple ingredients with maximum payoff.
Main Ingredients:
- 2 cans crescent roll dough
Forms the buttery, flaky crust on top and bottom.
✨ Pro Tip: Let the dough sit at room temp for 10 minutes before unrolling—less tearing, easier pressing. - 16 oz cream cheese (2 bricks)
The rich, tangy base that gives this dessert its cheesecake center.
✨ Use full-fat cream cheese for that classic dense, bakery-style texture. - 1 cup granulated sugar
Sweetens the filling and teams up with cinnamon for the churro-like topping. - 1 tsp vanilla extract
Adds depth and softness, balancing the cream cheese’s tang. - 1 tbsp ground cinnamon
Delivers the signature sopapilla warmth and spice. - ½ cup (1 stick) butter, melted
Brushed on top before baking—it crisps the crust and helps the cinnamon-sugar topping caramelize.
Optional Add-Ins:
- Drizzle of honey: Classic sopapilla flair—adds moisture and shine
- Fruit fillings: Cherry, apple, or blueberry pie filling work beautifully
- Chopped nuts or mini chocolate chips: For crunch or richness
Ingredient Swaps for Dietary Needs
Whether you’re cooking for someone with allergies or just swapping based on what’s in your fridge, here are a few tweaks that keep the flavor without the fuss:
- Gluten-free crescent dough: Available at specialty grocers like Whole Foods or online (look for “GF Crescent Rolls”)
- Sugar-free sweeteners: Try monk fruit, stevia blends, or erythritol
- Vegan options: Use dairy-free cream cheese (like Kite Hill or Miyoko’s) and plant-based butter
✨ Note: Texture may vary slightly with substitutions—give it a test run if serving to guests.
Why Crescent Dough Works So Well
Crescent roll dough is the shortcut hero of this dessert.
Its high fat content and pre-layered structure create a lift and flake that mimic traditional fried sopapillas—without deep frying or rolling pins. Once baked, it puffs and crisps beautifully, sealing in the creamy center.
No rising, no rolling, no stress. Just tear, press, and bake.
Flavor Enhancers to Try
Want to make it your own? Here are a few additions we’ve loved in our kitchen:
- Add orange or lemon zest to the cream cheese mixture for a citrus pop
- Sub brown sugar for granulated in the filling for a more caramelized flavor
- Dust with powdered sugar after baking for a bakery-style finish
- Use almond or coconut extract instead of vanilla for a subtle twist
Pantry-Friendly Swaps
No need to make a grocery run if you’re missing a couple of basics. These swaps work in a pinch:
- No vanilla? Use a splash of maple syrup for warm, mellow notes
- Out of butter? Coconut oil brings a slightly nutty richness
- Short on cream cheese? Sub in a bit of Greek yogurt to lighten it up (it adds tang but softens the structure slightly)
Step-by-Step Preparation Instructions
This recipe is weeknight-friendly by design. Minimal prep, easy cleanup, and you can make it ahead.
Prep Time: 10 minutes
Bake Time: 30–35 minutes
Total Time: ~45 minutes
Steps:
- Preheat oven to 350°F and grease a 9×13″ baking dish (or line with parchment).
- Press 1 can of crescent dough into the bottom of the pan, pinching seams closed.
- In a bowl, beat together cream cheese, sugar, and vanilla until smooth and fluffy.
- Spread filling evenly over the bottom layer of dough.
- Unroll second dough can and place it over the filling. Gently press to seal the edges.
- Brush melted butter over the top layer.
- Mix cinnamon and sugar (you can eyeball the ratio if you like it extra spiced) and sprinkle generously over the top.
- Bake for 30–35 minutes, or until golden and puffed.
- Cool completely, then chill at least 2 hours before slicing for clean bars.
Home Cook Tips for Best Results
- Score the top dough with a sharp knife before baking for a rustic bakery look
- Use a glass pan for even baking; use metal if you want crispier edges
- Don’t skip the chill time—it helps the filling firm up for clean, sturdy slices
Make It with Kids (Hands-On Tips)
This dessert is a hit with little helpers—and lets them get creative without chaos:
- Let them press the dough seams or sprinkle the cinnamon sugar
- Use muffin tins to make mini sopapilla cheesecakes with different fillings
- Let them cut out shapes with cookie cutters before baking—stars, hearts, you name it
Small-Batch or Air Fryer Method
Don’t need a full tray? These easy tweaks make it doable for one or two people—or a quick air fryer bake:
- Air Fryer Version: Use ramekins at 320°F for 15–18 minutes. Let cool slightly before digging in.
- Half Batch: Use an 8×8” pan and halve all ingredients. Same bake time, same great taste.
- Single-Serve Prep: Line a few cupcake tins with dough and filling—bake ~20 mins at 350°F
If you love sweet and crunchy bars, you’ve got to check out my go-to Scotcheroos recipe!
When and How to Use It (Occasions, Storage)
Best Occasions
Sopapilla cheesecake hits that sweet spot between casual and crowd-pleasing, making it incredibly versatile for:
- Weeknight pick-me-ups: When you need dessert fast and don’t want to dirty every dish.
- Game nights or sleepovers: Sweet, sliceable, and shareable—perfect for little hands or party platters.
- School bake sales or potlucks: Easy to portion, travel-friendly, and always one of the first trays to disappear.
Serving Tips
- Dust with powdered sugar and slice into bars for a clean, bakery-style presentation.
- Serve warm with a scoop of vanilla ice cream and a drizzle of caramel for a restaurant-style upgrade.
- Add whipped cream and berries if you want to dress it up for brunch or entertaining.
Make-Ahead Strategies for Entertaining
This recipe shines when you need dessert done ahead of time.
- Bake the night before, let cool, then cover and chill.
- Slice into bars and layer with parchment in a container to prevent sticking.
- Reheat at 275°F for 10 minutes just before serving to bring back that fresh-from-the-oven warmth.
Creative Serving Ideas for Holidays and Gatherings
Give your sopapilla cheesecake a seasonal twist:
- Sprinkle with red/green sugar for Christmas cookie platters.
- Serve with Mexican hot chocolate during Cinco de Mayo or Día de los Muertos celebrations.
- Present in mini cupcake liners with cocktail forks for upscale events or dessert buffets.
Fridge, Freezer & Reheat Tips
Sopapilla cheesecake stores and reheats better than you might think—here’s how to keep it tasting fresh:
- Fridge: Store in an airtight container for up to 5 days.
- Freezer: Wrap individual bars tightly and freeze for up to 2 months. Thaw in the fridge overnight.
- Reheat: Use a 275°F oven for 8–10 minutes to revive the crust. Avoid microwaving—it softens the texture and ruins the crisp top.
How It Supports Kid-Friendly Eating and Make-Ahead Cooking
This dessert hits every note for families:
- Familiar ingredients = fewer picky eater complaints.
- Easy prep + long shelf life = built-in convenience for busy weeks.
- One pan = less cleanup and more time to actually enjoy dessert.
“This has saved me on nights when I had zero energy to bake. My kids ask for it every Friday now.” — reader review
School Snack or Sleepover Treat
This is the kind of treat that feels fancy but is totally lunchbox-ready:
- Chill and slice into bars for school snacks or lunch treats.
- Pair with fruit skewers and yogurt dip for a balanced snack board.
- Use mini muffin tins to make tiny cheesecake bombs—great for parties or themed nights.
Batch Cooking for the Month
Double the batch and thank yourself later:
- Use foil pans to make and freeze a second tray—ideal for holidays or surprise guests.
- Great for holiday gifting or potluck trays when cut into bite-sized portions.
- Try a flavor trio tray: one-third cherry jam, one-third Nutella, one-third plain. Slice and label for fun variety.

Tips, Adjustments, and Cautions
Tips for Success
- Chill completely before slicing—this is what gives you those picture-perfect bars.
- Keep an eye on bake time—golden brown is the goal; watch closely in the final 5 minutes.
- Add a pinch of salt to the filling—it quietly boosts the vanilla and cinnamon.
Cautions
- Refrigerate within 2 hours to keep cream cheese safe.
- Avoid microwaving slices if you care about crust texture—it tends to go soft and rubbery.
- Allergen swaps may change the texture—test your recipe version before serving a crowd.
Texture Troubleshooting & Fixes
- Too runny? Chill longer or let it rest before slicing.
- Soggy crust? Bake uncovered for the last 5 minutes to crisp it up.
- Too dense? Make sure to beat the cream cheese until smooth and airy before adding sugar.
Food Safety for Cream Cheese-Based Desserts
- Keep below 40°F to avoid spoilage.
- Toss after 5 days unless frozen.
- Check cream cheese freshness—expired cream cheese = grainy texture and off taste.
FAQs
What is sopapilla cheesecake?
It’s a fusion dessert that combines flaky crescent roll dough with a creamy cheesecake filling, topped with cinnamon-sugar for a sopapilla-style finish.
Does it need to be refrigerated?
Yes—cream cheese filling means it should always be stored chilled for food safety and to maintain structure.
Can I make it ahead of time?
Absolutely. In fact, it tastes even better the next day after it sets up in the fridge.
Hot or cold?
Traditionally served cold, but it’s delicious warm with ice cream or even slightly reheated.
Can it be frozen?
Yes. Wrap individual pieces tightly and freeze. Thaw overnight in the fridge for best results.
How long does it last in the fridge?
Up to 5 days in an airtight container. The crust stays crisp for the first few days, then softens a bit.
Is it a Mexican dessert?
It’s more of a Mexican-American dessert mashup, inspired by sopapillas but made with easy, American pantry ingredients.
Can I make it gluten- or sugar-free?
Yes—look for gluten-free crescent rolls and swap in monk fruit or erythritol to suit your dietary needs.
Can I Add a Fruit Layer Inside?
Yes, and it’s a great way to change things up:Spread a thin layer of cherry jam, apple butter, or blueberry compote between the cream cheese and top dough layer.This adds sweetness, acidity, and a surprise fruit note without complicating the prep.
Conclusion
Sopapilla cheesecake bars are your shortcut to cozy, cinnamon-spiced comfort with a creamy twist. With a handful of ingredients and less than an hour of work, you get a dessert that works for Tuesday night treats or festive party trays.
Make them ahead, freeze for later, or serve them warm from the oven—they’re endlessly flexible and universally loved.
💬 Have a flavor twist or tip to share? Drop it in the comments!
📌 Pin this recipe for the next time your sweet tooth strikes.

Sopapilla Cheesecake
- Total Time: 45 minutes
- Yield: 12 servings
- Diet: Vegetarian
Description
Flaky crescent dough meets creamy cheesecake in this easy, cinnamon-spiced dessert.
Ingredients
- 2 cans crescent roll dough
- 16 oz cream cheese (2 bricks)
- 1 cup granulated sugar
- 1 tsp vanilla extract
- 1 tbsp ground cinnamon
- ½ cup (1 stick) butter, melted
- Optional: Drizzle of honey
- Optional: Fruit fillings (cherry, apple, or blueberry)
- Optional: Chopped nuts or mini chocolate chips
Instructions
- Preheat and Prep: Preheat oven to 350°F and grease a 9×13″ baking dish (or line with parchment).
- Layer Bottom Crust: Press 1 can of crescent dough into the bottom of the pan, pinching seams closed.
- Make Filling: In a bowl, beat together cream cheese, sugar, and vanilla until smooth and fluffy.
- Spread Filling: Spread filling evenly over the bottom layer of dough.
- Top Crust: Unroll second dough can and place it over the filling. Gently press to seal the edges.
- Add Butter: Brush melted butter over the top layer.
- Top with Cinnamon-Sugar: Mix cinnamon and sugar and sprinkle generously over the top.
- Bake: Bake for 30–35 minutes, or until golden and puffed.
- Cool and Chill: Cool completely, then chill at least 2 hours before slicing for clean bars.
Notes
- Use gluten-free crescent dough and monk fruit or erythritol for dietary substitutions.
- Store in the fridge for up to 5 days; texture improves after chilling.
- Sub in dairy-free cream cheese and plant-based butter for a vegan version.
- Optional mix-ins like fruit, zest, or chocolate chips add extra flavor.
- Prep Time: 10 minutes
- Cook Time: 35 minutes
- Category: Desserts
- Method: Baked
- Cuisine: Mexican
Nutrition
- Serving Size: 1 bar
- Calories: 310
- Sugar: 18g
- Sodium: 330mg
- Fat: 20g
- Saturated Fat: 11g
- Unsaturated Fat: 8g
- Trans Fat: 1g
- Carbohydrates: 28g
- Fiber: 1g
- Protein: 4g
- Cholesterol: 45mg
