
Oh, how I adore a dessert that feels luxurious but comes together with surprising ease for my family!
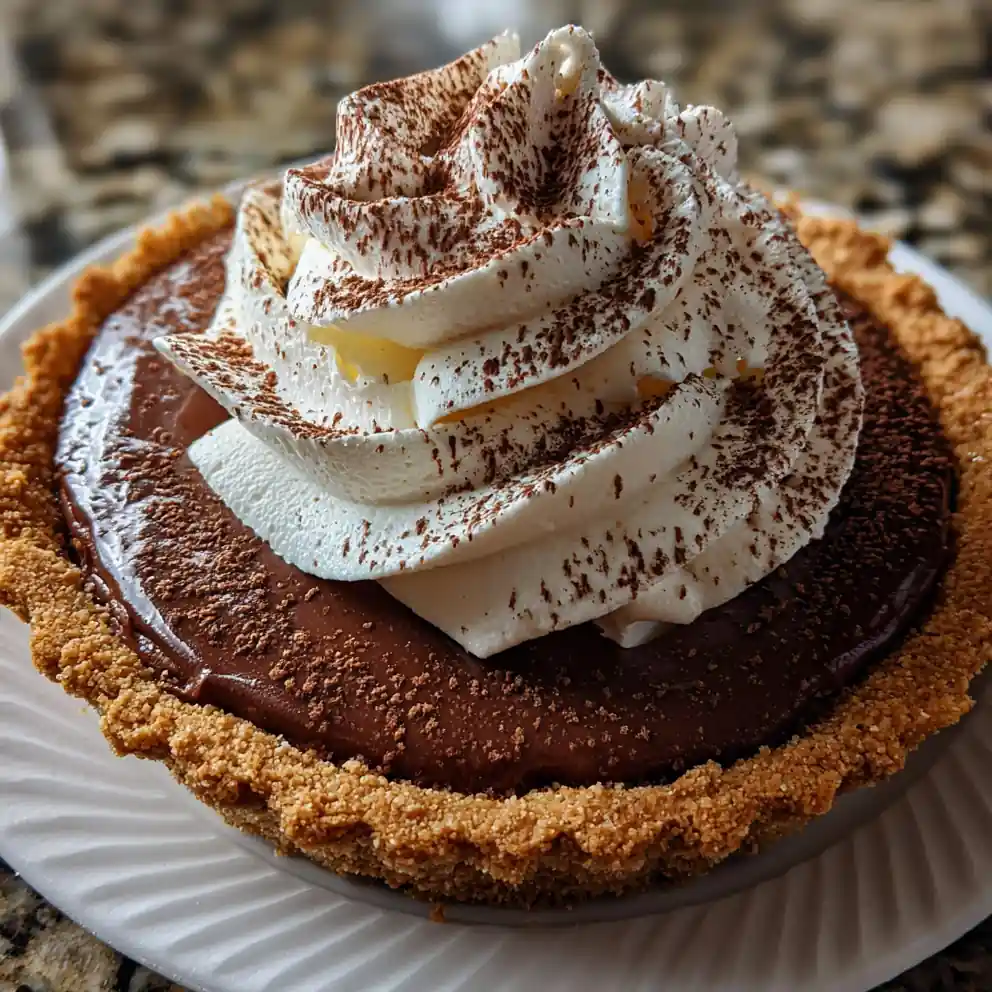
This incredible Chocolate Silk Pie Whipped Chocolate Cream delivers exactly that—a decadently smooth filling crowned with a cloud of light, airy chocolate whipped cream, creating a delightful contrast in every bite. Imagine the delighted smiles around your table after a hearty family dinner, or the excited ‘oohs’ and ‘aahs’ when you present this showstopper at your next gathering. This isn’t just any recipe; it’s perfected for busy home cooks, ensuring a velvety smooth filling and light-as-air topping without the fuss. With tips from years of baking, I’ll guide you to a perfect pie, every single time.
Ingredients You’ll Need (With Purpose & Options)
Gathering good quality ingredients is the first step to a truly memorable Chocolate Silk Pie Whipped Chocolate Cream. Here’s what you’ll need:
- For the Rich Chocolate Silk Filling:
- 1 ½ cups (255g) good quality semi-sweet chocolate chips (I prefer Ghirardelli for its consistent melt and flavor, or dark chocolate for a richer taste).
- ½ cup (113g) unsalted butter, cut into cubes (adds richness and a silky texture).
- 3 large eggs, tempered (creates the custard-like smoothness and thickens the filling; using pasteurized eggs adds an extra layer of safety).
- ¾ cup (150g) granulated sugar (balances the chocolate’s bitterness, making it perfectly sweet).
- 1 teaspoon pure vanilla extract (enhances all the sweet notes).
- ¼ teaspoon salt (wakes up the chocolate flavor and brightens the sweetness).
- For the Fluffy Whipped Chocolate Cream:
- 1 ½ cups (360ml) heavy cream, very cold (whips up light and airy; ensure it’s straight from the fridge!).
- ¼ cup (30g) powdered sugar (sweetens without graininess for a smooth topping, or use a sugar-free alternative like erythritol).
- 2 tablespoons (10g) unsweetened cocoa powder (infuses a subtle, delightful chocolate flavor).
- ½ teaspoon pure vanilla extract (complements the chocolate beautifully).
- For the Perfect Pie Crust:
- 1 pre-made 9-inch graham cracker crust (our go-to for speed and ease, making this an easy dinner idea dessert; ensure it’s gluten-free if needed).
- Option: Homemade flaky butter pie crust (for those who love baking from scratch).
For dietary needs or budget-friendly options:
- Dairy-free option: Use dairy-free chocolate chips, vegan butter, and a well-chilled can of full-fat coconut cream (just the thick part) for the whipped topping.
- Sugar-free options: Use erythritol or monk fruit sweeteners in place of granulated and powdered sugar.
- Gluten-free crust: Ensure your pre-made graham cracker crust is certified GF, or make your own with crushed gluten-free cookies.
Clear Step-by-Step Instructions
Crafting this delightful Chocolate Silk Pie Whipped Chocolate Cream is a journey of simple steps, resulting in an incredible dessert.
Getting Started: The Crust
1. If using a pre-made crust, simply unwrap it and set aside. If making your own, bake according to your recipe until it looks golden brown, then cool completely on a wire rack before filling.
Crafting the Silky Smooth Filling
1. Melt chocolate and butter: In a heatproof bowl set over a saucepan of simmering water (or microwave in 30-second bursts), gently melt the chocolate chips and butter together, stirring until completely smooth. Remove from heat and let it cool slightly for about 10 minutes; it should feel warm, not hot, to the touch.
2. Beat eggs and sugar: In a separate large mixing bowl, whisk the eggs and granulated sugar together vigorously using an electric mixer for 2-3 minutes until the mixture looks light yellow and fluffy.
3. Temper the eggs: Slowly drizzle about ½ cup of the slightly cooled warm chocolate mixture into the egg mixture while continuously whisking. This crucial step prevents the eggs from scrambling! The mixture should feel warm and slightly thicker.
4. Combine and cook: Add the tempered egg mixture back into the remaining chocolate mixture. Place the bowl over low heat (or back over the simmering water) and cook, stirring constantly with a rubber spatula, for 5-7 minutes. It will thicken to a pudding-like consistency and coat the back of a spoon smoothly. If it seems too thin after 7 minutes, continue cooking for another 1-2 minutes until it coats the spoon well.
5. Finish the filling: Remove the bowl from heat, then stir in the vanilla extract and salt. Pour the rich chocolate silk pie filling into your prepared 9-inch pie crust. This forms the base for your exquisite Chocolate Silk Pie Whipped Chocolate Cream.
6. Chill time: Cover the pie lightly with plastic wrap, ensuring it doesn’t touch the surface of the filling, and refrigerate for at least 4 hours, or until firmly set. For the best slices and flavors, chilling overnight is ideal, making this a perfect meal prep recipe for your Chocolate Silk Pie Whipped Chocolate Cream.
Whipping Up the Chocolate Cream Topping
1. Chill your bowl: Place a metal mixing bowl and your whisk attachment (or beater) in the freezer for 10-15 minutes. This simple trick helps the cream whip much faster and creates a more stable topping.
2. Whip the cream: Pour the very cold heavy cream, powdered sugar, cocoa powder, and vanilla extract into the chilled bowl. I find my stand mixer with the whisk attachment makes quick work of this!
3. Beat until stiff: Beat on high speed for 2-4 minutes until stiff peaks form and the cream holds its shape firmly. Be careful not to overbeat, or it will turn grainy. The texture should look smooth and airy, like a cloud.
Assembling Your Masterpiece
1. Top the pie: Once your Chocolate Silk Pie Whipped Chocolate Cream is fully chilled and set, spread or pipe the whipped chocolate cream generously over the top. Use an offset spatula for a rustic swirl or a piping bag for an elegant finish.
2. Garnish (optional): For an extra touch of decadence, dust the top with additional cocoa powder, sprinkle with chocolate shavings, or adorn with mini chocolate chips. This makes the pie even more appealing for family-friendly celebrations.
3. Serve and enjoy: Slice your beautiful Chocolate Silk Pie Whipped Chocolate Cream and serve immediately for the ultimate decadent experience! It’s a delightful end to any meal.
Perfect Times to Serve This Dish
This ‘Chocolate Silk Pie Whipped Chocolate Cream’ isn’t just a dessert; it’s an experience perfect for many occasions. It’s a wonderful way to elevate any family dinner or simply treat yourself after a long week.
- Everyday uses: A special weekend dessert after a family dinner, or the perfect treat to unwind with after a long week.
- Special moments: Impress guests at birthday parties, anniversary dinners, or holiday gatherings like Thanksgiving and Christmas. It’s also a guaranteed crowd-pleaser at potlucks and bake sales.
- Pairings: Serve with a scoop of vanilla bean ice cream, fresh berries (raspberries, strawberries) for a tangy contrast, or a hot cup of coffee, espresso, or a cold glass of milk.
Nutrition & Wellness Angle of Chocolate Silk Pie Whipped Chocolate Cream
Enjoying ‘Chocolate Silk Pie Whipped Chocolate Cream’ can fit into a balanced diet when savored thoughtfully. Making it at home means you control the ingredients, allowing for quality choices and mindful portions for healthy family meals.
- Decadence in Moderation: While an indulgent treat, homemade means you select premium ingredients, offering a satisfying energy lift from quality chocolate and natural fats.
- Consider Lighter Options: For a lighter approach, opt for a reduced-fat dairy or coconut cream whipped topping. Smaller portion sizes keep this a delightful, guilt-free indulgence. Choosing darker chocolate also boosts antioxidant content.
Everyday Benefits & Practical Uses
This ‘Chocolate Silk Pie Whipped Chocolate Cream’ offers everyday convenience without sacrificing elegance. It’s an effortless dessert that truly shines, making it one of my favorite easy dinner ideas for special occasions. It makes for an ideal family-friendly treat.
- Effortless Elegance: This Chocolate Silk Pie looks impressive but is straightforward to make, saving you time in the kitchen.
- Make-Ahead Magic: Prepare the pie up to 2 days in advance (without the whipped cream topping) for stress-free entertaining and seamless meal prep recipes.
- Budget-Friendly Indulgence: Often tastier and more economical than store-bought gourmet desserts.
- Why You’ll Love This Chocolate Silk Pie: It’s incredibly rich and creamy without being overly sweet. The whipped chocolate cream adds a light, airy contrast that’s pure heaven, a guaranteed crowd-pleaser for all ages!
Chef’s Tips and Flexible Adjustments
Here are a few tricks I’ve learned for elevating your ‘Chocolate Silk Pie Whipped Chocolate Cream’ or adapting it to various needs.
- Flavor Boosters: For a deeper flavor, add espresso powder to the chocolate filling. A pinch of orange zest can also brighten the notes.
- Kid-Friendly Tweaks: Let kids help with decorations. Using milk chocolate instead of semi-sweet often suits younger palates better.
- Troubleshooting: If the filling seems lumpy, I always strain it through a fine-mesh sieve before pouring; this ensures ultimate smoothness.
- Safety Note: For extra caution with raw eggs, consider pasteurized eggs or an egg-free chocolate pudding base.
Reader FAQs
Can I freeze Chocolate Silk Pie for later?
Yes, you can! Wrap the un-topped pie tightly in plastic wrap and then foil. This ‘Chocolate Silk Pie Whipped Chocolate Cream’ will keep well in the freezer for up to 1 month. Thaw in the refrigerator overnight before topping with fresh whipped cream.
What’s the healthiest way to prepare this delicious ‘Chocolate Silk Pie Whipped Chocolate Cream’?
To make this a healthier dessert, use a whole-wheat graham cracker crust, opt for dark chocolate (70% cocoa or higher) for more antioxidants, and use a lightened whipped topping made with Greek yogurt or a reduced-fat dairy alternative for protein benefits.
Which brands or stores sell the best ingredients for Chocolate Silk Pie?
For chocolate, Ghirardelli, Guittard, or Trader Joe’s baking bars are excellent choices, offering a premium ingredient experience. For heavy cream, any good quality dairy brand will do. A good pre-made graham cracker crust from Keebler or a store brand works perfectly for creating your own ‘Chocolate Silk Pie Whipped Chocolate Cream’.
My chocolate filling isn’t setting. What did I do wrong?
This usually means the filling wasn’t cooked long enough to thicken properly. Make sure to cook it over low heat, stirring constantly, until it’s thick enough to coat the back of a spoon before chilling. I find giving it an extra minute or two on the stove can make all the difference for a perfectly set pie.
Can I make Chocolate Silk Pie without eggs?
Yes, you can! While traditionally made with eggs, you can use an egg-free chocolate pudding recipe as your base filling for a similar texture, then proceed with a delicious whipped chocolate cream topping.
How long does Chocolate Silk Pie with Whipped Chocolate Cream last in the fridge?
Stored loosely covered, your ‘Chocolate Silk Pie Whipped Chocolate Cream’ will stay fresh and delicious in the refrigerator for up to 3-4 days. The whipped chocolate cream is best enjoyed within 2 days for optimal texture and freshness, perfect for planning family dinners.
Can I use a different type of crust for this ‘Chocolate Silk Pie’?
Absolutely! A classic shortbread crust, an Oreo cookie crust, or even a pre-baked pastry crust would all be delicious alternatives for this amazing dessert. Each offers a unique flavor profile to complement the rich filling.
Conclusion
This Easy ‘Chocolate Silk Pie Whipped Chocolate Cream’ is truly the ultimate creamy, dreamy dessert—simple to make, unforgettable to taste, and perfect for healthy eating. My family always asks for another slice of this one!
Don’t wait for a special occasion; whip one up this weekend for quick meals and delightful family dinners! Pin this recipe for your next family favorite.
Print
Chocolate Silk Pie Whipped Chocolate Cream
- Total Time: 289 minutes
- Yield: 8 servings
- Diet: General
Description
This Chocolate Silk Pie features a decadent, smooth chocolate filling crowned with a light, airy chocolate whipped cream, offering a delightful contrast in every bite. It is designed for busy home cooks, ensuring a velvety smooth filling and light topping with ease.
Ingredients
- 1.5 cups semi-sweet chocolate chips (255g)
- 0.5 cup unsalted butter, cut into cubes (113g)
- 3 large eggs, tempered
- 0.75 cup granulated sugar (150g)
- 1 teaspoon pure vanilla extract
- 0.25 teaspoon salt
- 1.5 cups heavy cream, very cold (360ml)
- 0.25 cup powdered sugar (30g)
- 2 tablespoons unsweetened cocoa powder (10g)
- 0.5 teaspoon pure vanilla extract
- 1 pre-made 9-inch graham cracker crust
Instructions
- Prepare Crust: If using a pre-made crust, unwrap and set aside. If making your own, bake until golden brown, then cool completely on a wire rack before filling.
- Melt Chocolate And Butter: In a heatproof bowl set over simmering water (or microwave), gently melt chocolate chips and butter, stirring until smooth. Remove from heat and cool for about 10 minutes until warm, not hot.
- Beat Eggs And Sugar: In a separate large mixing bowl, whisk eggs and granulated sugar vigorously with an electric mixer for 2-3 minutes until light yellow and fluffy.
- Temper Eggs: Slowly drizzle about 0.5 cup of the slightly cooled warm chocolate mixture into the egg mixture while continuously whisking to prevent scrambling.
- Combine And Cook Filling: Add the tempered egg mixture back into the remaining chocolate mixture. Place the bowl over low heat (or simmering water) and cook, stirring constantly, for 5-7 minutes until it thickens to a pudding-like consistency and coats the back of a spoon smoothly. Continue cooking for 1-2 more minutes if too thin.
- Finish And Chill Filling: Remove from heat, then stir in vanilla extract and salt. Pour the filling into the prepared 9-inch pie crust. Cover lightly with plastic wrap (not touching the surface) and refrigerate for at least 4 hours, or overnight, until firmly set.
- Chill Whipping Bowl: Place a metal mixing bowl and whisk attachment in the freezer for 10-15 minutes to help cream whip faster and create a stable topping.
- Whip Chocolate Cream: Pour the very cold heavy cream, powdered sugar, cocoa powder, and vanilla extract into the chilled bowl. Beat on high speed for 2-4 minutes until stiff peaks form and the cream holds its shape firmly. Be careful not to overbeat.
- Assemble Pie: Once the pie filling is fully chilled and set, spread or pipe the whipped chocolate cream generously over the top.
- Garnish And Serve: Optionally, dust with additional cocoa powder, sprinkle with chocolate shavings, or adorn with mini chocolate chips. Slice and serve immediately.
Notes
For best slices and flavors, chilling overnight is ideal. Consider dairy-free options with coconut cream and vegan butter, sugar-free options with erythritol, and gluten-free crusts for dietary needs. Ensure heavy cream is very cold and equipment chilled for best whipped cream results.
- Prep Time: 40 minutes
- Cook Time: 9 minutes
- Category: Dessert
- Method: Stovetop, Chilling, Whipping
- Cuisine: American
Nutrition
- Serving Size: 1/8 of 9-inch pie
- Calories: 550 calories
- Sugar: 45 g
- Sodium: 180 mg
- Fat: 40 g
- Saturated Fat: 22 g
- Unsaturated Fat: 15 g
- Trans Fat: 0 g
- Carbohydrates: 55 g
- Fiber: 3 g
- Protein: 6 g
- Cholesterol: 120 mg
FREE PRINTABLE RECIPE
Get the Printable Recipe PDF (Free)
Enter your email and we’ll send you the ingredients + step-by-step instructions as a clean PDF you can save to your phone.
- ✅ Printable PDF (ingredients + steps)
- ✅ Save it to your phone (no long scrolling)
- ✅ Includes cook time + servings
- ✅ Easy to follow
FAQ
Where’s the full recipe?
It’s delivered as a printable PDF so you can save it and cook without scrolling.
I didn’t get the email.
Check Spam/Promotions and search your inbox for your site name. Then click Confirm to receive the PDF.