
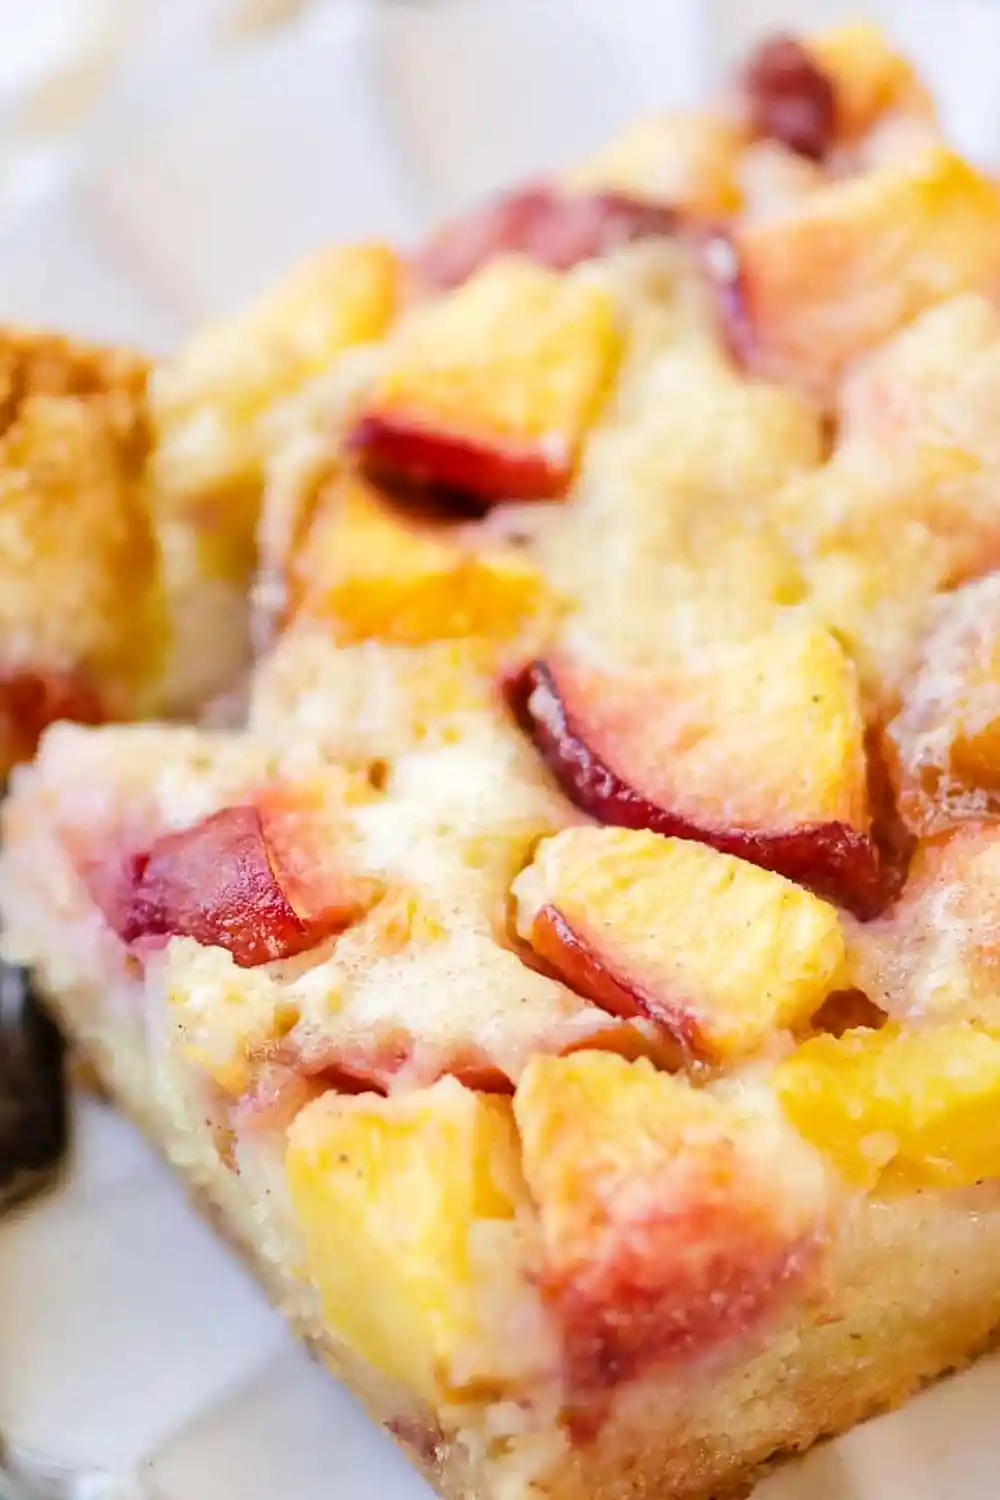
This dessert combines a buttery sugar cookie base with juicy fresh peaches and a creamy custard topping. It is a simple summer treat that requires minimal preparation and provides a rich, velvet-like texture.
List of ingredients
- 1 17.5 ounce pouch Betty Crocker sugar cookie mix – provides the primary base flavor.
- 1/2 cup butter, softened – ensures a crumbly and rich crust.
- 2 Tablespoons all-purpose flour – helps bind the crust ingredients.
- 1 egg – acts as a binder for the cookie base.
- 6 cups fresh peaches, diced – the main fruit component for natural sweetness.
- 3 eggs, beaten – creates the structure of the custard.
- 3/4 cup granulated sugar – sweetens the custard filling.
- 1 cup heavy whipping cream – adds richness and a smooth mouthfeel.
- 1/4 cup flour – thickens the custard to prevent it from being too runny.
- 1/2 teaspoon salt – balances the sweetness of the sugar and peaches.
- 1 teaspoon vanilla extract – enhances the overall aromatic profile.
- 1/4 teaspoon ground cinnamon (OPTIONAL) – adds a warm, spicy note to the custard.
step-by-step instructions
- Prepare Oven and Pan: Heat oven to 350°. Spray the bottom of a 9×13 in pan with non stick spray to prevent sticking.
- Create the Base: In a medium bowl, mix cookie mix, butter, flour and 1 egg until crumbly dough forms. Press gently into the 9×13 pan to keep the crust tender.
- Layer Fruit: Evenly spread the diced peaches over the prepared sugar cookie crust.
- Mix Custard: In a medium bowl, whisk the beaten eggs, flour, sugar, cream and salt just until smooth. Stir in the vanilla extract and optional cinnamon.
- Assemble: Pour the prepared custard mixture evenly over the top of the peaches.
- Bake: Bake at 350° for 50-60 minutes until the center is just set and no longer jiggles excessively.
- Cool and Store: Allow the dessert to cool to room temperature before serving. Store the remaining portions refrigerated.
Managing Peach Skins for Texture
Deciding Whether to Peel
The skins on peaches are entirely edible and often provide a vibrant color to the final dish. Many people prefer to leave them on to avoid the effort of peeling. In this recipe, the skins soften during the baking process and blend into the custard.
Blanching for Easy Peeling
If you prefer a completely smooth texture, you can peel peaches using the blanching method. Score a small ‘X’ on the bottom of each peach and drop them into boiling water for 30 seconds. Immediately plunge them into ice water to slip the skins off easily.
Cleaning the Fruit
Regardless of whether you peel the peaches, always wash them thoroughly under cold running water. This removes any surface debris or residue before dicing. Use a soft brush for a more thorough clean if necessary.
Dicing Peaches for Consistent Cooking
Maintaining Uniform Size
Aim for chunks approximately 1/2 inch in size. Uniform pieces ensure that the peaches cook at the same rate and distribute evenly across the pan. This prevents some pieces from becoming mushy while others remain too firm.
Removing the Pit Efficiently
Slice the peach along the seam and twist the two halves apart to release the pit. If the pit is stubborn, use a small paring knife to carefully cut around it. Once the pit is removed, slice the fruit into the required dice.
Handling Overripe Fruit
If your peaches are extremely soft, dice them carefully to avoid crushing the fruit. Overripe peaches release more juice, which may make the custard slightly softer. Ensure you don’t over-mix them after dicing.
Preparing Canned Peaches for Baking
Draining Excess Syrup
If using canned peaches, drain the syrup thoroughly in a colander for several minutes. Excess liquid can seep into the sugar cookie crust, making it soggy. Patting the peaches dry with a paper towel is a helpful extra step.
Choosing the Right Cut
Select canned peaches that are sliced or diced rather than halves. If using halves, cut them manually into 1/2 inch pieces to match the texture of fresh peaches. This ensures the custard can flow around the fruit properly.
Adjusting Sugar Levels
Canned peaches are often packed in heavy syrup and may be sweeter than fresh ones. You can slightly reduce the granulated sugar in the custard by one tablespoon if you prefer a less sweet dessert. Taste the fruit first to decide.
Avoiding Over-compacting the Cookie Crust
Using a Gentle Press
Press the crumbly dough into the pan using your fingers or the back of a spoon. Avoid pressing too hard or packing the dough tightly. Over-compacting the crust can lead to a hard, chewy base rather than a tender cookie texture.
Checking for Gaps
Ensure the dough covers the entire bottom of the pan without leaving large holes. Small gaps are fine, but large voids can cause the custard to leak through to the pan. Smooth the surface lightly to create a level foundation.
Ensuring Butter is Properly Softened
Butter should be soft enough to incorporate but not melted. If the butter is too cold, the dough will be lumpy; if melted, the crust may spread too much and become greasy. Set butter at room temperature for about an hour before mixing.
The Role of Extra Flour in the Base
Adding Stability
The addition of two tablespoons of all-purpose flour to the cookie mix provides extra structure. This prevents the base from absorbing too much moisture from the peaches and custard. It helps maintain a distinct layer between the crust and the filling.
Preventing Stickiness
The flour helps reduce the stickiness of the dough during the pressing process. This makes it easier to spread the mix evenly across the 9×13 pan. It also contributes to a slightly more professional, bakery-style crumb.
Mixing Technique
Mix the flour in with the cookie mix and butter until just combined. Over-mixing the dough can develop too much gluten, which makes the crust tough. Stop mixing as soon as a crumbly texture is achieved.
Whisking the Custard to Remove Lumps
Achieving a Smooth Texture
Use a whisk to combine the eggs, flour, sugar, and cream. Whisk steadily until the flour is fully integrated and no small white clumps remain. A smooth batter is essential for a velvet-like finish in the final dessert.
Avoiding Excessive Air
Whisk until the ingredients are combined, but avoid beating the custard for too long. Incorporating too much air can cause the custard to puff up in the oven and then collapse. This can create an uneven surface or large air pockets.
Integrating the Eggs
Ensure the eggs are beaten before adding them to the other custard ingredients. This ensures they emulsify quickly with the heavy cream. Beaten eggs prevent streaks of cooked egg from appearing in the finished product.
Adjusting Flavor Profiles in the Custard
The Impact of Cinnamon
Adding 1/4 teaspoon of ground cinnamon provides a warm, autumnal contrast to the bright peach flavor. It is optional but recommended for those who enjoy a more complex taste. Stir it in at the very end of the custard mixing process.
Enhancing the Vanilla
Use a high-quality pure vanilla extract for the best aromatic results. Vanilla complements both the buttery crust and the creamy custard. If you prefer a stronger flavor, you can increase the amount to 1.5 teaspoons.
Balancing the Salt
Do not omit the salt, as it is crucial for balancing the sugar. Salt enhances the perception of the peach flavor and prevents the custard from tasting flat. Use a fine-grain table salt for the most consistent distribution.
Using Heavy Whipping Cream for Richness
Selecting the Right Fat Content
Heavy whipping cream is necessary for the structure and richness of the custard. Using milk or half-and-half will result in a thinner, less stable filling that may not set properly. Ensure the cream is chilled before mixing.
Creating the Velvet Mouthfeel
The high fat content in the cream interacts with the flour and eggs to create a dense, creamy texture. This contrasts beautifully with the juicy peaches. This richness is what gives the dessert its signature ‘velvet’ description.
Substitution Alternatives
If you must substitute, full-fat coconut cream can work for a dairy-free option. However, this will alter the flavor and may require a slightly longer baking time. The texture will be similar, though slightly less buttery.
Adding Fresh Whipped Cream for Sweetness
Creating a Light Topping
Whip heavy cream with a touch of powdered sugar until stiff peaks form. Place a generous dollop on each slice just before serving. The light, airy texture of whipped cream cuts through the richness of the baked custard.
Pairing with Fresh Berries
Top the whipped cream with a few fresh raspberries or blueberries. The acidity of the berries complements the sweet peaches and creamy custard. This also adds a pop of color to the presentation.
Applying the Topping
Wait until the dessert is completely cooled to room temperature before adding whipped cream. If the dessert is still warm, the cream will melt and run. For a cleaner look, use a piping bag to add small swirls of cream.
Pairing Warm Slices with Vanilla Ice Cream
The Temperature Contrast
Serving a slightly warm slice of peach custard with a cold scoop of vanilla ice cream creates a professional dessert experience. The ice cream begins to melt over the warm peaches, creating a creamy sauce. This is a favorite serving method for summer gatherings.
Choosing the Right Ice Cream
A high-quality vanilla bean ice cream is recommended to mirror the vanilla in the custard. The speckles of vanilla bean add visual appeal and depth of flavor. Avoid overly sweet ice creams to keep the peach flavor prominent.
Plating for Guests
Place a square slice of the dessert in the center of a plate. Position the ice cream scoop slightly off-center to allow the sauce to run down the side. Garnish with a sprig of mint for a finished look.
Using Mint and Berries for Presentation
Fresh Mint Garnish
A single leaf of fresh mint placed on top of each slice adds a professional touch. The green color contrasts beautifully with the orange hues of the peaches. Mint also provides a subtle, refreshing scent that complements the fruit.
Berry Accents
Slicing a few fresh strawberries and placing them around the edge of the plate adds visual variety. Berries provide a tartness that balances the sugar in the crust and custard. This makes the plate look more like a restaurant-style dessert.
Dusting with Powdered Sugar
For an elegant finish, lightly dust the top of the dessert with powdered sugar through a fine-mesh sieve. This creates a snow-like effect that looks beautiful against the baked custard. Use a very light hand to avoid overpowering the flavor.
Proper Refrigeration for Dairy Stability
Storing the Dessert
Because this recipe contains eggs and heavy cream, it must be stored in the refrigerator. Once it has cooled to room temperature, cover it and place it in the fridge. This prevents spoilage and allows the custard to firm up further.
Preventing Odor Absorption
Dairy-based desserts can easily absorb odors from other foods in the refrigerator. Always cover the pan tightly with plastic wrap or transfer slices to airtight containers. This keeps the flavor pure and the surface from drying out.
Chilling for Better Slicing
While the dessert can be eaten at room temperature, chilling it for several hours makes slicing much easier. The cold temperature firms the custard, resulting in clean, sharp edges. This is ideal for parties where presentation is important.
Selecting Airtight Containers for Storage
Using Glass Containers
Glass containers are ideal for storing custard desserts as they do not leach chemicals or odors. They also allow you to see the contents clearly. Ensure the lid creates a vacuum seal to keep the moisture locked in.
Individual Portioning
Pre-slice the dessert into 15 portions and store them in individual small containers. This makes it easier to grab a snack without disturbing the rest of the pan. It also simplifies the process of reheating individual servings.
Avoiding Foil Wraps
Avoid using only aluminum foil to cover the dessert, as it can sag and touch the surface of the custard. This can leave marks on the dessert and may not provide a perfect seal. Use foil only in combination with plastic wrap.
Using Low Oven Heat for Reheating
Gentle Oven Warming
To reheat the dessert, place a slice in a baking dish and cover it loosely with foil. Heat in an oven set to 300°F for about 5-10 minutes. This warms the peaches and crust without overcooking the delicate custard.
Microwave Quick-Heat
For a faster option, microwave a slice on medium power for 20-30 seconds. Be careful not to over-microwave, as the eggs in the custard can rubberize if overheated. Use short bursts of heat and check the temperature frequently.
Maintaining Texture
Avoid reheating the dessert multiple times. Each heating cycle can cause the custard to lose its velvet texture and the crust to become soggy. It is best to reheat only the portion you intend to eat immediately.
Preparing Fruit in Advance
Dicing Ahead of Time
You can dice your peaches up to 24 hours in advance. Store them in a sealed container in the refrigerator to keep them fresh. When you are ready to bake, simply pour them directly from the container onto the crust.
Managing Oxidation
Peaches can brown slightly when exposed to air. To prevent this, toss the diced peaches in a small amount of lemon juice. This acidity preserves the bright color without significantly altering the taste of the dessert.
Thawing Frozen Peaches
If using frozen peaches, thaw them completely in the refrigerator overnight. Once thawed, place them in a colander and pat them dry with paper towels. This prevents the excess frozen moisture from ruining the crust.
Mixing Custard Ahead of Time
Pre-mixing the Batter
The custard mixture can be whisked and stored in a jar or airtight container for up to 12 hours. Keep it refrigerated until you are ready to pour it over the peaches. Give it a quick whisk before pouring to reintegrate any settled flour.
Storage Temperature
Ensure the custard remains chilled at all times. Because it contains raw eggs and cream, it is susceptible to bacterial growth if left at room temperature. Always move it directly from the fridge to the oven.
Avoiding Separation
If you notice the custard has separated slightly after sitting, do not panic. A quick 10-second whisk with a fork or small whisk will bring the emulsion back together. This will not affect the final baked result.
Baking and Chilling One Day Prior
Make-Ahead Baking
This dessert actually tastes better when made a day in advance. Baking it the day before allows the flavors to meld and the custard to set completely. It also removes the stress of baking on the day of an event.
Overnight Cooling
Allow the dessert to cool completely on the counter before moving it to the refrigerator overnight. This slow cooling process prevents condensation from forming on the surface of the custard. It ensures a smooth, matte finish.
Planning the Timeline
If serving for a party, bake the dessert in the morning or the evening before. Store it chilled, and then either serve it cold or warm it slightly just before the guests arrive. This allows you to focus on other preparations.
Preventing Moisture from Seeping into the Crust
Managing Fruit Juices
Fresh peaches release a significant amount of liquid during baking. The flour in the crust helps, but you can also slightly under-fill the peach layer if the fruit is exceptionally juicy. This prevents the bottom from becoming too wet.
Pre-baking Option
For a very crisp crust, you can pre-bake the cookie base for 5-8 minutes before adding the peaches. This sets the structure and creates a barrier. However, this is optional and changes the texture to be more like a traditional tart.
Using a Non-Stick Spray
Ensure the pan is well-greased with non-stick spray. This not only prevents sticking but also creates a thin oil barrier that helps protect the crust from the custard. Focus especially on the corners of the pan.
Identifying When the Custard is Set
The Jiggle Test
To check for doneness, gently shake the pan. The edges should be firm and slightly puffed, while the center should have a slight, slow jiggle. If the center sloshes like liquid, it needs another 5-10 minutes in the oven.
Visual Cues
Look for the custard to change from a translucent liquid to an opaque, creamy solid. The top may develop a very light golden color in some spots. This indicates that the eggs have coagulated sufficiently.
Using a Toothpick
Insert a toothpick or knife into the center of the custard. It should come out mostly clean, though a few moist crumbs are acceptable. If the toothpick comes out coated in liquid batter, continue baking.
Ensuring Full Emulsification of Eggs
Preventing Egg Streaks
If the eggs are not fully beaten into the custard, you may see streaks of cooked egg in the final slice. To avoid this, whisk the eggs separately before adding the cream and flour. This ensures a homogeneous mixture.
Integrating the Flour
Sift the flour into the wet ingredients if you notice clumps. Alternatively, whisk vigorously in a circular motion starting from the center of the bowl. This incorporates the flour without needing to over-mix the batter.
Maintaining Room Temperature Eggs
Using room temperature eggs helps them emulsify more easily with the cream. If your eggs are cold, place them in a bowl of warm water for 5 minutes before cracking them. This leads to a smoother custard texture.
Frequently Asked Questions
Can I use frozen peaches?
Yes, you can use frozen peaches. Thaw them completely in the refrigerator first, then drain any excess liquid and pat them dry with a paper towel before placing them on the crust.
Do I need to peel the peaches?
Peeling is optional. The skins are edible and soften during baking, adding a nice color to the dish. Peel them only if you prefer a completely smooth texture.
Can I use a different cookie mix?
While sugar cookie mix is recommended for its flavor and texture, you can use other varieties like vanilla or butter cookie mix. Avoid chocolate or spice mixes as they may clash with the peach flavor.
How long does the dessert last?
When stored in an airtight container in the refrigerator, this dessert lasts for 3 to 4 days. It is best consumed within this window to maintain the best texture.
What pan size should I use?
A 9×13 inch baking pan is required for this recipe. Using a smaller pan will make the dessert too thick and it may not bake through in the center; a larger pan will result in a thin crust and filling.
Print
Easy Peach Custard Dessert
- Total Time: 65 minutes
- Yield: 15 servings
- Diet: Vegetarian
Description
This amazingly easy and delicious Peach Custard Dessert is the perfect summer treat with simple sugar cookie crust made from a mix topped with fresh fruit and a velvet custard with a hint of cinnamon and vanilla.
Ingredients
- 1 17.5 ounce pouch Betty Crocker sugar cookie mix
- 1/2 cup butter, softened
- 2 Tablespoons all-purpose flour
- 1 egg
- 6 cups fresh peaches, diced
- 3 eggs, beaten
- 3/4 cup granulated sugar
- 1 cup heavy whipping cream
- 1/4 cup flour
- 1/2 teaspoon salt
- 1 teaspoon vanilla extract
- 1/4 teaspoon ground cinnamon (optional)
Instructions
- Step 1: Heat oven to 350°. Spray the bottom of a 9×13 in pan with non stick spray.
- Step 2: In a medium bowl, mix cookie mix, butter, flour and 1 egg until crumbly dough forms. Press gently into the 9×13 pan. Top the crust with peaches.
- Step 3: In a medium bowl, whisk the eggs, flour, sugar, cream and salt just until smooth. Pour the custard over the peaches.
- Step 4: Bake at 350° for 50-60 minutes until the center is just set.
- Step 5: Allow to cool to room temperature before serving.
- Step 6: Store refrigerated.
Notes
Drained canned peaches can be substituted for fresh peaches.
- Prep Time: 10 minutes
- Cook Time: 55 minutes
- Category: Desserts
- Method: Baking
- Cuisine: American
Nutrition
- Serving Size: 1 serving
- Calories: 212 kcal
- Sugar: 17 g
- Sodium: 150 mg
- Fat: 14 g
- Saturated Fat: 8 g
- Unsaturated Fat: 6 g
- Trans Fat: 0 g
- Carbohydrates: 20 g
- Fiber: 1 g
- Protein: 3 g
- Cholesterol: 84 mg