
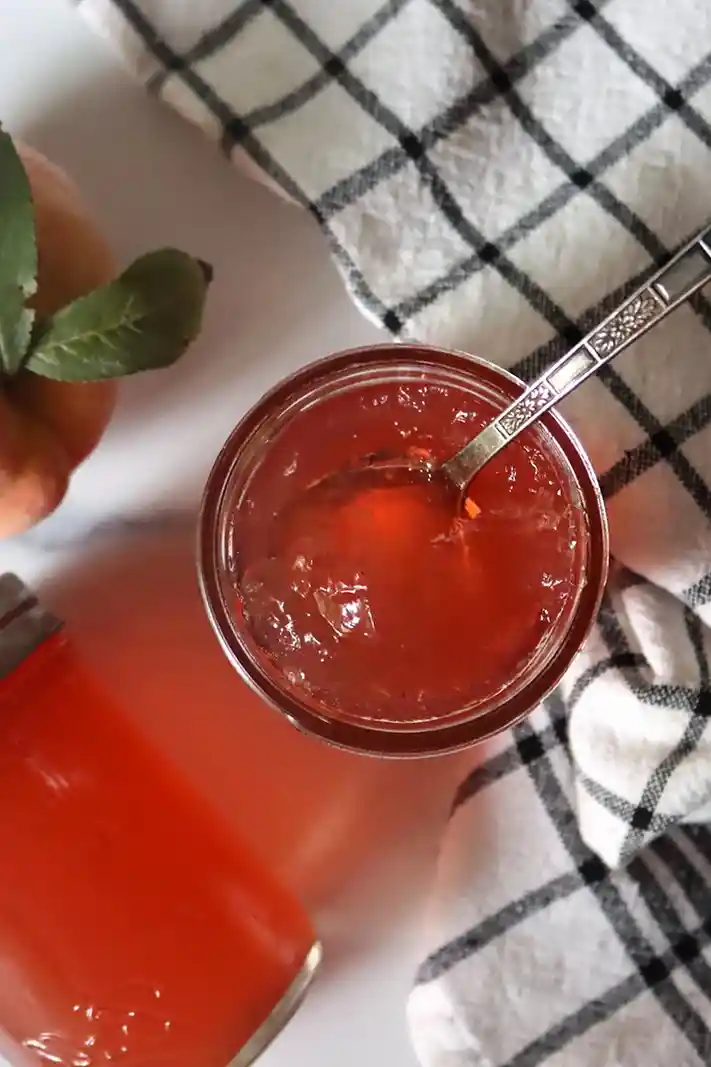
This smooth and vibrant peach jelly is a perfect way to capture the concentrated flavor of ripe summer peaches. It is a seedless, pulp-free preserve that works beautifully on toast or as a glaze for desserts.
List of ingredients
- 4 cups peach juice – extracted from approximately 12 medium peaches and 2 cups water.
- 1 box powdered pectin – 1.75 oz or 6 Tbsp (standard pectin like Sure-Jell).
- 4 cups sugar – provides sweetness and helps the jelly set.
- 2 tbsp lemon juice – optional, used to add tartness to very sweet peaches.
step-by-step instructions
- Prepare the fruit: Wash the peaches thoroughly. Quarter them and remove the pits to help produce a clearer juice, although pits can be left in during the boiling phase.
- Extract the juice: Combine the quartered peaches and 2 cups of water in a large stainless steel pot. Bring to a boil, then reduce heat and simmer gently for 20 minutes, stirring occasionally to break down the fruit.
- Strain the mixture: Pour the cooked peaches into a damp jelly bag or several layers of cheesecloth over a bowl. Let the juice drip undisturbed for at least 2 hours or overnight for the clearest results.
- Combine base ingredients: Pour 4 cups of the extracted peach juice into a large saucepan. Stir in the pectin and the optional lemon juice until fully dissolved.
- Initial boil: Place the pan over medium-high heat and bring the mixture to a full boil, stirring occasionally.
- Add sugar: Stir in 4 cups of sugar and bring the mixture back to a rapid rolling boil. Stir constantly for 1-2 minutes to prevent the sugar from scorching.
- Fill the jars: Ladle the hot jelly into clean, sterilized jars, leaving exactly 1/4 inch of headspace at the top. Wipe the rims with a clean cloth to ensure a tight seal.
- Process the jars: Screw on the lids until fingertip tight. Process in a water bath canner for 10 minutes, or 15 minutes if you are located above 6,000 feet in elevation.
- Cool and set: Remove jars using a lifter and place them on a towel. Let them sit undisturbed for 12 to 24 hours before checking the seals.
Optimizing the Jelly Set
Performing the Cold Plate Test
To ensure your jelly has reached the correct consistency before jarring, place a few small plates in the freezer. Drop a small spoonful of hot jelly onto a frozen plate and let it sit for a minute. Push the edge of the jelly with your finger; if it wrinkles, it has set correctly.
Using the Correct Pectin Type
This recipe relies on standard powdered pectin, which requires a high concentration of sugar to form a gel. If you use a pectin designed for low-sugar recipes, the jelly may not set properly if you follow the full-sugar measurements. Always match your pectin type to the amount of sugar in your pot.
Avoiding Overcooking the Mixture
Cooking the jelly for too long after adding the sugar can break down the pectin chains. This results in a syrup rather than a spreadable jelly. Stick strictly to the 1-2 minute rolling boil to maintain the structural integrity of the set.
Selecting the Right Cookware
Use a large, heavy-bottomed stainless steel pot to prevent the jelly from burning. Avoid aluminum or reactive metals, as they can react with the acidity of the fruit and lemon juice. This can cause the jelly to take on a metallic taste or a discolored hue.
Stone Fruit Substitutions
Substituting with Nectarines
Nectarines can be used in the exact same ratio as peaches. Follow the same juicing process by simmering the fruit with water and straining through a jelly bag. The resulting jelly will have a slightly more tart profile than the peach version.
Using Plums for Jelly
Plums provide a deep color and a tangy flavor. Use approximately 9 medium plums for every cup of juice required. Follow the same simmering and straining steps to extract the juice before proceeding with the pectin and sugar.
Adapting for Apricots
Apricots are excellent for jelly but produce less juice than peaches. You will need a larger quantity of fruit to reach the required 4 cups of juice. The process remains the same, though you may find the juice is naturally thicker due to higher native pectin levels.
Making Cherry Jelly
Cherries can be used to make a rich, dark jelly. Pit the cherries first, then simmer them with water as you would with peaches. Strain the juice carefully to remove all solids before boiling with pectin and sugar.
Zero-Waste Peel Method
Collecting Peach Peels
If you are already canning whole peaches, save the peels instead of discarding them. You will need approximately 1 pound of peach peels for every cup of juice you intend to extract. This is an efficient way to use the most fragrant part of the fruit.
Extracting Juice from Peels
Simmer the collected peels in water just as you would with whole fruit pieces. Let them boil and simmer until the peels have released their color and flavor. Strain the mixture through a jelly bag and let it drip for several hours to get a concentrated juice.
Choosing Organic Fruit for Peels
Because pesticides often concentrate in the skin of the fruit, use organically grown peaches when making peel jelly. This ensures that you are not concentrating chemical residues in your final preserve. Thoroughly wash the peels before simmering.
Low-Sugar Modifications
Switching to Low-Sugar Pectin
To reduce the sugar content, you must use a pectin specifically labeled as low-sugar or no-sugar. Regular pectin will not gel without the chemical reaction triggered by high sugar levels. This allows you to maintain a spreadable texture with far less sweetener.
Reducing the Sugar Quantity
When using low-sugar pectin, you can reduce the sugar to 1 or 2 cups for the 4 cups of juice. This results in a jelly that is more fruit-forward and less syrupy. Note that the total yield of jars will be lower than the full-sugar version.
Texture Differences in Low-Sugar Jelly
Low-sugar jellies often have a softer, more gel-like set compared to the firm, glossy texture of full-sugar preserves. They also have a shorter shelf life if not processed correctly in a water bath. Always follow the pectin manufacturer’s specific instructions for low-sugar ratios.
Canning and Preservation Guide
Sterilizing Jars and Lids
Ensure your jars are clean and sterilized to prevent spoilage. You can sterilize them by washing them in hot, soapy water and keeping them warm in the canner. This prevents the glass from cracking when filled with boiling hot jelly.
Maintaining Proper Headspace
Leave exactly 1/4 inch of space between the top of the jelly and the rim of the jar. Too much headspace can prevent a proper vacuum seal from forming. Too little headspace may cause the jelly to bubble over during processing, interfering with the seal.
The Water Bath Process
Place the filled jars in the canner, ensuring they are covered by at least one to two inches of water. Bring the water to a boil and start your timer. This process kills microorganisms and forces air out of the jar to create a vacuum.
Checking the Vacuum Seal
After the jars have cooled for 24 hours, press the center of the lid. If the lid does not pop back or click, the vacuum seal is successful. If it pops, the jar is not sealed and must be stored in the refrigerator and consumed within a few weeks.
Optimal Pantry Storage
Store your sealed jars in a cool, dark place away from direct sunlight. Extreme temperature fluctuations can compromise the seal over time. Properly processed peach jelly can remain shelf-stable for up to 18 months.
Serving and Pairing Ideas
Breakfast and Brunch Pairings
Spread the jelly on toasted sourdough, brioche, or English muffins. It also tastes excellent stirred into plain Greek yogurt or swirled into oatmeal for a natural sweetener. Pair it with a dollop of ricotta cheese for a sophisticated breakfast toast.
Using Jelly in Baking
Use peach jelly as a filling for thumbprint cookies or as a layer in a sponge cake. You can also brush a thin layer of jelly over a warm peach tart to give it a professional, glossy finish. It works well as a glaze for cinnamon rolls.
Savory Cheese Board Combinations
Peach jelly pairs exceptionally well with soft cheeses like brie, camembert, or goat cheese. Serve it on a platter with crackers, walnuts, and sliced pears. The sweetness of the peach cuts through the richness of the creamy cheese.
Troubleshooting Common Issues
Fixing Runny Jelly
If your jelly is too runny after cooling, it likely didn’t reach the full rolling boil or the pectin was old. You can fix this by pouring the jelly back into a pot, adding a small amount of additional pectin, and re-boiling. Process the jars again in the water bath canner.
Preventing Cloudy Juice
Cloudy jelly is usually caused by squeezing the jelly bag or cheesecloth to speed up the process. To get a crystal-clear jelly, let the juice drip naturally without applying pressure. This prevents fruit solids from being forced into the liquid.
Avoiding Scorched Sugar
Sugar burns quickly once it reaches a high temperature. To prevent scorching, stir the mixture constantly after adding the sugar. Use a wide-bottomed pot to distribute heat evenly across the surface of the jelly.
Frequently Asked Questions
Can I use frozen peaches for this recipe?
Yes, you can use frozen peaches. Thaw them slightly before simmering, or add them directly to the pot with water. The juicing and canning process remains exactly the same.
Do I have to remove the pits?
Removing pits is recommended to make the juicing process easier and the final result clearer. However, if you are using a jelly bag for straining, the pits will be filtered out regardless.
Can I make this jelly without a water bath canner?
You can make a refrigerator jelly by skipping the canning process. Simply ladle the hot jelly into jars and store them in the fridge. These will last for a few weeks rather than 18 months.
Why did my jelly develop crystals?
Crystallization happens when sugar doesn’t dissolve completely or the jelly is cooled too slowly. Adding a tablespoon of corn syrup or a bit more lemon juice can help prevent sugar crystals from forming.
Print
Golden Peach Preserve Jelly
- Total Time: 140 minutes
- Yield: 40 servings
- Diet: Vegetarian
Description
Peach jelly is a smooth, golden preserve made from fresh peach juice, sugar, and pectin—perfect for spreading on toast or adding to baked goods. This classic jelly highlights the sweet, floral flavor of ripe summer peaches without any pulp or chunks.
Ingredients
- 4 cups peach juice (from about 12 medium peaches and 2 cups water)
- 1 box powdered pectin (1.75 oz pectin or 6 Tbsp)
- 4 cups sugar
- 2 tbsp lemon juice (optional)
Instructions
- Prepare the Peaches: Wash your peaches thoroughly. You don’t need to peel them, but it’s a good idea to quarter them and remove the pits if you want to reduce the amount of solids in your juice.
- Cook the Peaches: In a large, stainless steel saucepan, combine the quartered peaches with water. Bring the mixture to a boil over high heat, stirring occasionally. Once boiling, reduce the heat and let it simmer gently for about 20 minutes, stirring occasionally to crush the peaches and release their juices.
- Strain the Juice: Place a damp jelly bag (or several layers of dampened cheesecloth) over a large bowl. Pour the cooked peach mixture into the jelly bag or cheesecloth-lined strainer and allow the juice to drip through, undisturbed, for at least 2 hours or overnight.
- Prepare Your Jars and Equipment: Wash and prepare jelly jars, lids and rings. Preheat a waterbath canner to just simmering, about 180 F.
- Cook the Juice and Pectin: In a large saucepan, combine the peach juice and water. Add the pectin and stir to dissolve. Place the pan over medium-high heat and bring the mixture to a boil. Stir occasionally, ensuring that the pectin is fully dissolved. Once it’s boiling, allow it to cook for 1 minute.
- Add Sugar and Boil Again: Add the sugar to the pan and stir until it dissolves completely. Bring the mixture to a rapid boil, and let it cook for 1-2 minutes. Keep stirring to prevent burning.
- Fill the Jars: Once the jelly has reached the right consistency (it should be thick but still pourable), remove the pan from the heat. Ladle the hot jelly into your prepared jars, leaving about 1/4 inch of headspace. Wipe the rims of the jars with a clean cloth to ensure a good seal.
- Seal the Jars: Place the lids on the jars and screw on the bands until they are “fingertip tight.”
- Process the Jars: Process the jars in a waterbath canner for 10 minutes, or 15 minutes if above 6,000 feet in elevation.
- Cool and Store: Remove the jars from the canner using a jar lifter and place them on a clean towel to cool. Leave them undisturbed for 12-24 hours to ensure that the seals form properly.
Notes
Store the sealed jars in a cool, dark place, where they will keep for up to 18 months. Refrigerate after opening. For a low-sugar version, use low-sugar pectin and reduce sugar to 1-2 cups.
- Prep Time: 120 minutes
- Cook Time: 10 minutes
- Category: Jelly
- Method: Canning
- Cuisine: American
Nutrition
- Serving Size: 1 serving
- Calories: 93 kcal
- Sugar: 22 g
- Sodium: 4 mg
- Fat: 0.1 g
- Saturated Fat: 0.01 g
- Unsaturated Fat: 0.09 g
- Trans Fat: 0 g
- Carbohydrates: 24 g
- Fiber: 0.2 g
- Protein: 0.03 g
- Cholesterol: 0 mg