
This guide provides a detailed method for baking a fresh peach pie with a flaky crust. It ensures a perfect balance of sweet summer fruit and a golden, buttery pastry.
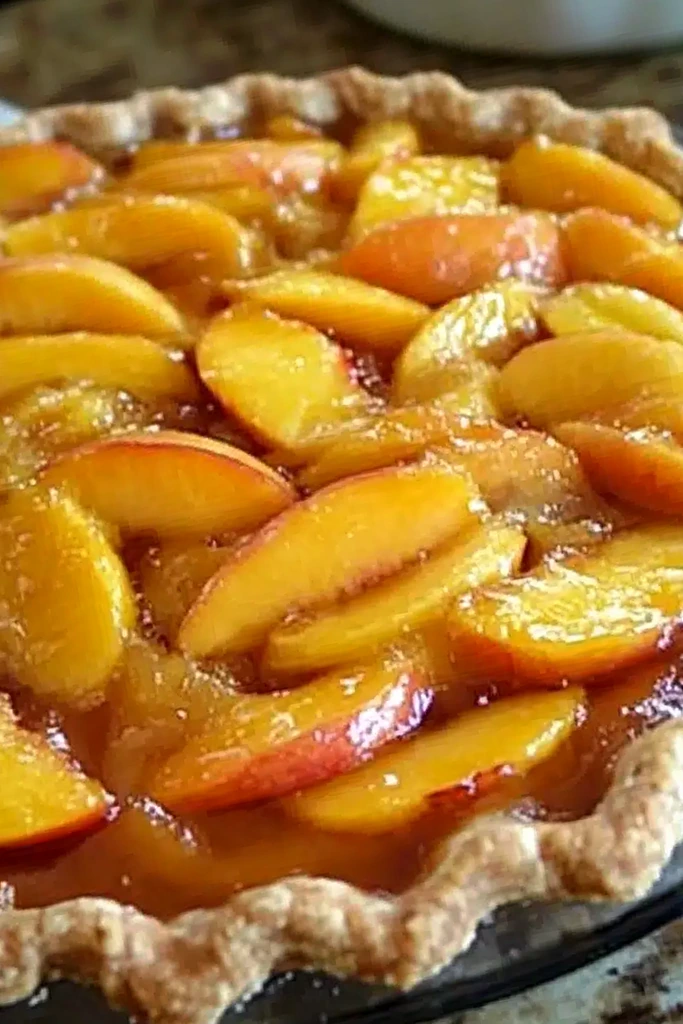
List of ingredients
- 6 to 7 medium peaches (about 1.2 kg), peeled and sliced – use ripe but firm fruit.
- ¾ cup (150g) granulated sugar – adjusts the sweetness of the peaches.
- ¼ cup (30g) all-purpose flour – acts as the thickening agent for the juices.
- 1 tablespoon lemon juice – adds acidity to balance the sugar.
- 1 teaspoon vanilla extract – enhances the natural fruit flavor.
- ½ teaspoon ground cinnamon – provides a warm spice profile.
- ⅛ teaspoon ground nutmeg (optional) – adds a subtle depth of flavor.
- Pinch of salt – balances the sweet and savory elements.
- 2 pie crusts (store-bought or homemade), one for the base and one for the top – ensure they are chilled.
- 1 egg, beaten – used for the golden egg wash.
- 1 tablespoon coarse sugar (optional) – for adding texture to the top crust.
- 1 tablespoon butter (optional) – dotted on top of filling for richness.
step-by-step instructions
- Prepare the Oven and Base: Preheat the oven to 200°C (400°F). If using homemade pie dough, roll out the bottom crust and fit it into the pie dish, then refrigerate it while preparing the filling.
- Peel the Peaches: Score the bottoms of the peaches with an “X” and blanch them in boiling water for 30 seconds. Immediately transfer them to an ice bath so the skins slip off easily.
- Mix the Filling: In a large bowl, combine sliced peaches, sugar, flour, lemon juice, cinnamon, nutmeg, salt, and vanilla. Toss gently and let the mixture sit for 10 minutes to allow juices to develop.
- Fill the Crust: Pour the peach mixture into the prepared bottom pie crust. Dot the top of the fruit with small pieces of butter if using for extra flavor.
- Apply the Top Crust: Roll out the top crust and lay it over the filling using a full crust, lattice, or cut-out design. Crimp the edges to seal the pie and trim any excess dough.
- Finish the Surface: Brush the top crust with the beaten egg wash and sprinkle with coarse sugar for a golden, sparkling finish.
- Vent the Pie: Cut a few slits in the top crust to allow steam to escape during baking. Place the pie on a baking sheet to catch any potential drips.
- Bake the Pie: Bake for 45 to 50 minutes until the crust is golden brown and the filling bubbles. Cover the edges with foil or a pie shield if they brown too quickly.
- Cool and Set: Let the pie cool on a wire rack for at least 2 hours. This critical step allows the filling to set and prevents it from running when sliced.
Secrets for a Flaky Pastry Crust
Maintain Cold Temperatures for Butter
Keep the butter, water, and flour chilled until the moment they are mixed. Cold fats create small pockets of steam during baking, which results in the characteristic flaky layers of a professional crust.
Avoid Overworking the Dough
Mix the ingredients only until they just combine. Over-kneading develops too much gluten, which makes the crust tough and chewy instead of tender and crisp.
Allow the Dough to Rest
Let the rolled-out dough rest in the refrigerator for at least 30 minutes before baking. This relaxes the gluten and prevents the crust from shrinking down the sides of the pie dish.
Ensure Proper Steam Ventilation
Always cut vents in the top crust to let moisture escape. Without these holes, steam builds up inside the pie, which can make the bottom crust soggy and the filling too watery.
Peach Selection and Preparation
Choosing the Right Ripeness
Select peaches that are fragrant and give slightly when pressed but are not mushy. Peaches that are too soft will break down into a jam-like consistency, while those that are too firm may not soften fully during baking.
Mastering the Blanching Technique
Blanching is the most efficient way to remove skins without losing the fruit’s flesh. The rapid temperature change from boiling water to an ice bath loosens the skin for effortless peeling.
Slicing Peaches for Even Cooking
Cut peach slices to a consistent thickness of about 1/4 to 1/2 inch. Uniform slices ensure that all pieces of fruit cook at the same rate and maintain their shape within the filling.
Allowing Juices to Develop
Letting the filling sit for 10 minutes after mixing allows the sugar to draw out the natural juices. This ensures the flour thickener is fully integrated with the liquid before the pie enters the oven.
Alternative Fruit Options
Using Frozen Peach Slices
Thaw frozen peaches completely and drain them in a colander before use. Pat the slices dry with paper towels to remove excess moisture, which prevents the filling from becoming too runny.
Working with Canned Peaches
Use peaches packed in natural juice rather than heavy syrup to avoid over-sweetening the pie. Drain and rinse them thoroughly, and reduce the added sugar in the recipe by 2 to 3 tablespoons.
Incorporating Other Summer Fruits
Blueberries or raspberries can be added to the filling for a mixed-berry peach pie. If adding berries, increase the flour by one tablespoon to account for the additional moisture these fruits release.
Substituting Peach Varieties
Yellow peaches provide a classic, bold flavor, while white peaches offer a more delicate, floral sweetness. You can mix both varieties to create a complex flavor profile and a visually appealing filling.
Customizing the Pie Top
Creating a Lattice Design
Cut the top dough into strips and weave them over and under each other across the filling. This allows for maximum steam release and creates a professional, decorative appearance.
Making a Rustic Galette
For a faster version, roll the dough into a circle on parchment paper and pile the filling in the center. Fold the edges over the fruit in a pleated fashion, leaving the center open.
Substituting with a Crumble Topping
Replace the top crust with a mixture of oats, brown sugar, flour, and cold butter. Rub the ingredients together until crumbly and sprinkle over the filling for a crisp-style dessert.
Adding Decorative Cut-outs
Use cookie cutters to create stars or hearts from the top crust. Lay these over the filling for a festive look, ensuring there is still enough space between them for steam to escape.
Serving and Pairing Suggestions
Traditional Ice Cream Pairings
Serve a warm slice of pie with a scoop of high-quality vanilla or cinnamon ice cream. The contrast between the hot fruit and the cold cream enhances the overall eating experience.
Adding Fresh Whipped Cream
Whip heavy cream with a small amount of honey or powdered sugar until soft peaks form. A dollop of fresh cream adds a light, airy texture that complements the dense fruit filling.
Serving as a Breakfast Dessert
For a breakfast variation, pair a slice of chilled peach pie with a side of plain Greek yogurt. This adds a tangy element that cuts through the sweetness of the peaches.
Incorporating Toasted Nuts
Sprinkle toasted slivered almonds or chopped walnuts over the slice before serving. This adds a necessary crunch that contrasts with the soft fruit and flaky pastry.
Storage and Preservation
Room Temperature Guidelines
Keep the baked pie in a cool, dry place for up to 2 days. Ensure the pie is completely cooled before covering it to prevent condensation from softening the crust.
Refrigeration and Shelf Life
Store the pie in the refrigerator for up to 5 days in an airtight container. Refrigeration helps the filling stay set, though it may slightly affect the crispness of the crust.
Freezing Unbaked Pies
Wrap an unbaked pie tightly in plastic wrap followed by a layer of aluminum foil and freeze for up to 3 months. Bake directly from frozen, adding 10 to 15 minutes to the total cook time.
Freezing Baked Slices
Freeze individual slices wrapped in parchment paper and foil. To restore the texture, thaw in the fridge overnight before reheating in the oven.
Reheating Instructions
Oven Reheating for Maximum Crispness
Heat the oven to 160°C (325༏). Place slices on a baking sheet and warm for 10 minutes to crisp the crust without overcooking the fruit.
Quick Microwave Reheating
Use the microwave for fast warming, heating in short 20-second bursts. Note that this method will soften the crust and remove the flakiness of the pastry.
Preventing Sogginess During Reheating
Avoid covering the pie with foil during reheating. Allowing the air to circulate around the crust ensures that it regains its crisp texture.
Troubleshooting Common Pie Issues
Preventing a Soggy Bottom
Use a high oven temperature of 200°C to sear the bottom crust quickly. Alternatively, blind-bake the bottom crust for 10 minutes before adding the filling to create a moisture barrier.
Managing Over-Browning Crusts
If the edges of the crust brown too quickly, cover them with strips of aluminum foil or a professional pie shield. This protects the pastry while the center continues to bubble.
Fixing a Runny Filling
If the filling is too liquid, ensure you have used enough flour as a thickener. Most importantly, allow the pie to cool for the full 2 hours to let the starches set.
Adjusting for Underripe Fruit
If your peaches are not sufficiently sweet, add an extra tablespoon of sugar and a dash of lemon zest to the filling. This boosts the flavor profile and mimics the taste of ripe fruit.
Frequently Asked Questions
Do I need to peel the peaches?
Peeling is recommended for a smooth, professional texture. However, if the skins are very thin and you prefer a rustic style, you can leave them on.
Can I make this pie vegan?
Yes, use a vegan-certified pie crust and replace butter with plant-based margarine or coconut oil. Substitute the egg wash with a mixture of soy milk and a pinch of maple syrup.
Can I use a different thickener than flour?
Cornstarch or tapioca starch can be used as alternatives. Replace the 1/4 cup of flour with 3 tablespoons of cornstarch for a slightly clearer filling.
How long should the pie cool before slicing?
The pie must cool for at least 2 hours. Slicing too early will cause the hot filling to flow out, leaving you with a runny mess on the plate.
What is the best pie dish for this recipe?
A 9-inch glass or ceramic pie dish is ideal. These materials distribute heat evenly and allow you to see the bottom crust to ensure it is fully baked.
Print
Homemade Fresh Peach Pie with Flaky Crust
- Total Time: 3 hours 15 minutes
- Yield: 1 pie
- Diet: General
Description
There are few things more comforting than the smell of a freshly baked pie wafting through the kitchen, and when that pie is filled with sun-ripened peaches? Pure summertime bliss
Ingredients
- 6 to 7 medium peaches (about 1.2 kg), peeled and sliced
- ¾ cup (150g) granulated sugar
- ¼ cup (30g) all-purpose flour
- 1 tablespoon lemon juice
- 1 teaspoon vanilla extract
- ½ teaspoon ground cinnamon
- ⅛ teaspoon ground nutmeg (optional)
- Pinch of salt
- 2 pie crusts (store-bought or homemade)
- 1 egg, beaten
- 1 tablespoon coarse sugar (optional)
Instructions
- Step 1: Preheat the oven to 200°C (400°F). If using homemade pie dough, roll out the bottom crust and fit it into the pie dish. Refrigerate while you make the filling.
- Step 2: Peel and slice the peaches. To peel easily, score the bottoms with an “X” and blanch them in boiling water for 30 seconds, then transfer to an ice bath. The skins should slip off easily.
- Step 3: In a large bowl, combine the sliced peaches, sugar, flour, lemon juice, cinnamon, nutmeg, salt, and vanilla. Toss gently to coat. Let the filling sit for 10 minutes to allow the juices to develop.
- Step 4: Pour the peach mixture into the prepared pie crust. Dot the top with small pieces of butter if using.
- Step 5: Roll out the top crust and lay it over the filling. You can do a classic full crust, a lattice design, or even cut-outs for a rustic effect. Crimp the edges to seal and trim any excess dough.
- Step 6: Brush the top crust with beaten egg and sprinkle with coarse sugar for a beautiful golden finish.
- Step 7: Cut a few slits in the top to let steam escape. Place the pie on a baking sheet to catch any drips.
- Step 8: Bake for 45 to 50 minutes, until the crust is golden brown and the filling is bubbling. If the crust browns too quickly, cover the edges with foil or a pie shield.
- Step 9: Let the pie cool on a wire rack for at least 2 hours before slicing. This allows the filling to set properly.
Notes
Keep everything cold—your butter, water, and even flour. Cold ingredients mean flakier layers. Don’t overwork the dough. Mix just until combined. Rest the dough in the fridge for at least 30 minutes before rolling it out. Use a hot oven (200°C) to ensure a crisp bottom and beautifully browned top. Vent the top crust so steam can escape.
- Prep Time: 25 minutes
- Cook Time: 50 minutes
- Category: dessert
- Method: Baking
- Cuisine: American
Nutrition
- Serving Size: 1 slice
- Calories: 310 kcal
- Sugar: 23 g
- Sodium: 160 mg
- Fat: 14 g
- Saturated Fat: 6 g
- Unsaturated Fat: 8 g
- Trans Fat: 0 g
- Carbohydrates: 42 g
- Fiber: 2 g
- Protein: 3 g
- Cholesterol: 45 mg