
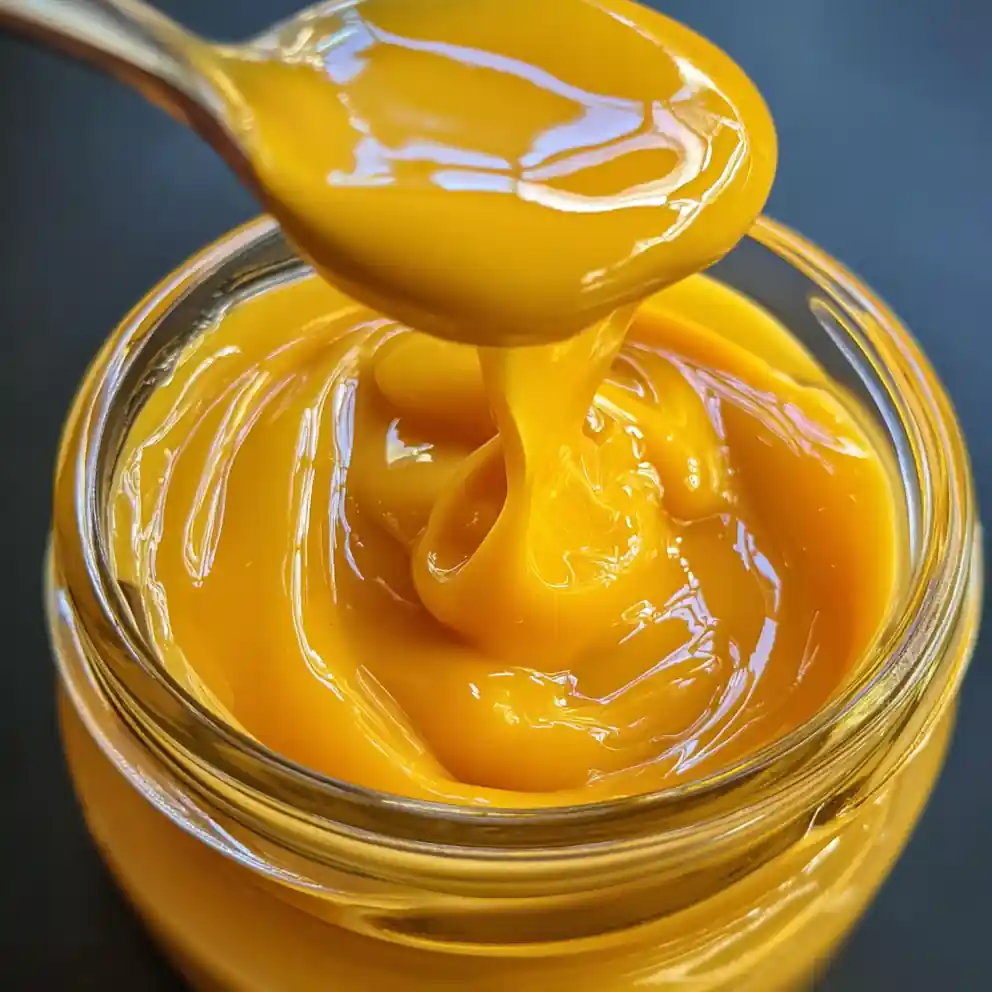
I absolutely adore making a batch of something vibrant and delicious to brighten our week, and this easy passion fruit curd recipe always hits the spot. Its brilliant sunset yellow hue and intense tropical aroma are simply irresistible, bringing sunshine to any dish. This homemade passion fruit curd recipe is a fantastic way to elevate everyday breakfasts or create a show-stopping dessert for family-friendly gatherings, especially when I’m looking for a special treat without too much fuss after a busy day.
Ingredients You’ll Need (With Purpose & Options)
Creating this passion fruit curd recipe Sunset Yellow Tart Filling starts with fresh, quality ingredients.
- Fresh Passion Fruit: 6-8 fruits (approx. 300g) will yield about ½ cup (120ml) of juice. Look for wrinkly, heavy fruits for the most juice and intense flavor, essential for a vibrant passion fruit curd recipe Sunset Yellow Tart Filling.
- Large Eggs & Egg Yolks: 2 whole eggs and 2 extra yolks. The whole eggs provide structure, while the extra yolks ensure a rich, velvety texture and help thicken the curd perfectly.
- Granulated Sugar: ½ cup (100g). Balances the tangy passion fruit, creating a harmonious sweet-tart profile. (You can reduce this to ¼ cup (50g) for a less sweet, low-carb friendly option, or swap for erythritol if preferred).
- Unsalted Butter: 6 tablespoons (85g), cold and cut into small cubes. Adds a silky smoothness and a luxurious mouthfeel to the finished curd, making it a truly premium ingredient. (For a dairy-free version, use a high-quality plant-based butter alternative, though the flavor may vary slightly).
- Lemon Juice (Optional): 1 teaspoon (5ml). A tiny splash can further brighten the flavors without overpowering the passion fruit, especially if your fruit isn’t super tart.
Alternative swaps for dietary needs or budget.
- Sugar-Free: Use erythritol or monk fruit as a 1:1 substitute for a delicious low-carb passion fruit curd, perfect for those watching their sugar intake.
- Dairy-Free: Swap butter for a plant-based alternative or coconut oil; note that the flavor and texture may differ slightly, so choose a brand you trust.
- Egg-Free: While possible with cornstarch (e.g., 2 tablespoons mixed with 2 tablespoons water per egg), the classic rich texture will vary significantly and won’t be as true to a traditional passion fruit curd recipe.
Premium and healthy upgrades: organic, low-carb, high-protein, dairy-free.
Opt for organic ingredients for the purest, most natural flavor profile in your passion fruit curd recipe Sunset Yellow Tart Filling. For a lighter touch, you can slightly reduce the sugar or use a natural, unrefined sweetener like agave, keeping it part of your healthy family meals plan.
Seasonal highlights or fresh produce tips.
- Best time to buy passion fruit: Typically available from late spring through fall in many regions, providing the freshest, most flavorful juice for your passion fruit curd recipe Sunset Yellow Tart Filling.
- How to get the most juice: Halve the fruit, scoop the pulp into a fine-mesh sieve, and press firmly with a spoon or spatula to extract all the liquid, discarding the seeds. I usually push and swirl it for a minute or two to make sure I get every last drop of that precious juice!
Clear Step-by-Step Instructions
Follow these simple steps for a perfect passion fruit curd recipe Sunset Yellow Tart Filling every time. This is a quick and easy recipe that adds a gourmet touch to many dishes.
- Prepare Your Fruit: Halve 6-8 passion fruits and scoop the vibrant, golden pulp into a fine-mesh sieve placed over a small bowl. Press firmly with a spoon to extract about ½ cup (120ml) of bright, golden passion fruit juice; discard the seeds. This step is crucial for that intense flavor.
- Whisk It Up: In a heatproof bowl (ideally stainless steel or glass), whisk together 2 large eggs, 2 large egg yolks, ½ cup (100g) granulated sugar, and the ½ cup (120ml) passion fruit juice until the mixture is well combined and slightly pale, about 1-2 minutes of brisk whisking.
- Cook Gently: Place the bowl over a saucepan of gently simmering water (a bain-marie or double boiler – the bottom of the bowl should not touch the water). Whisk continuously for 8-10 minutes, or until the mixture thickens significantly and coats the back of a spoon. It should feel warm but never boil; you’ll notice steam rising gently from the mixture. If it curdles slightly, don’t panic; remove it from heat and quickly blend with an immersion blender for a smoother texture.
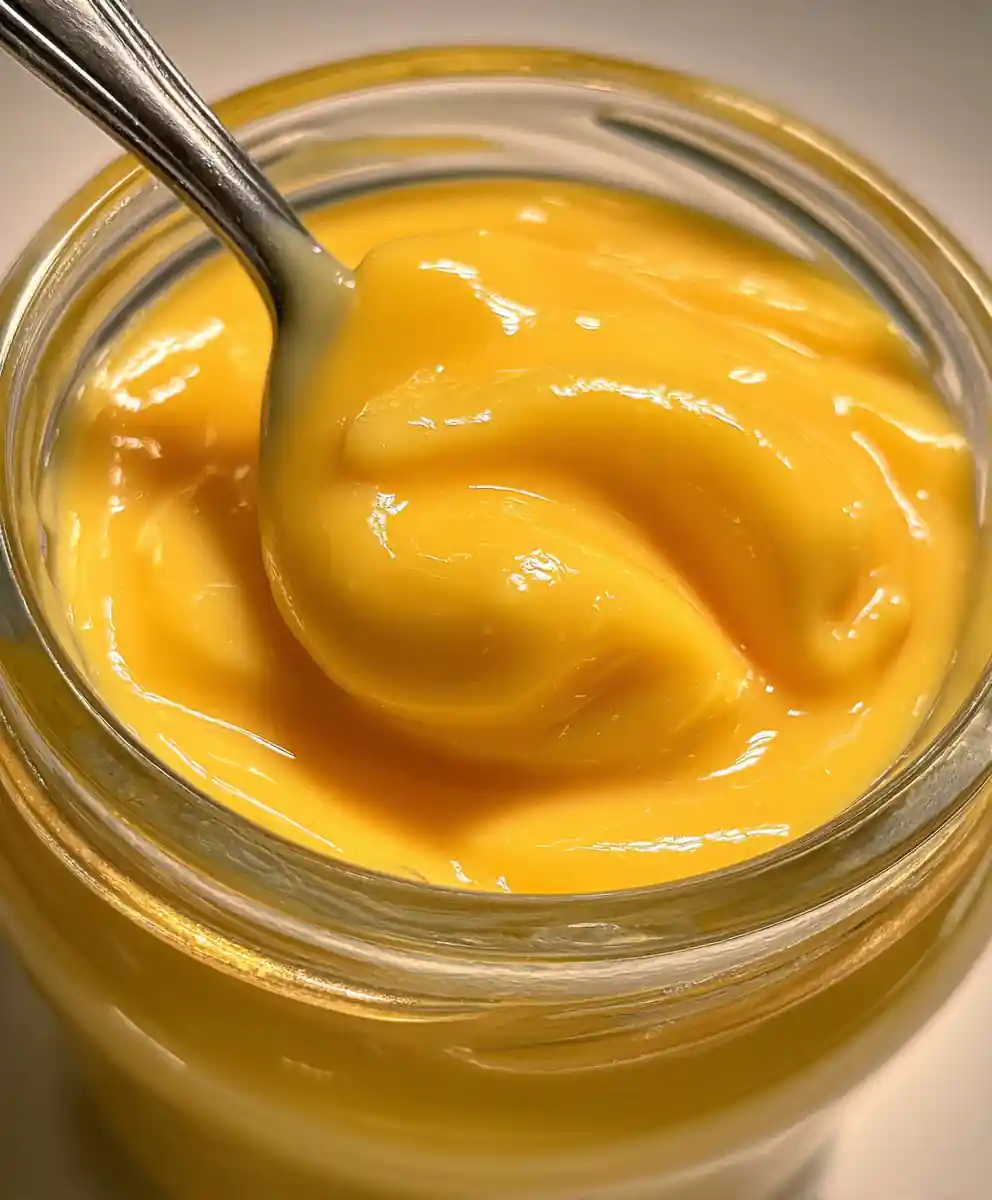
- Add Butter: Remove the bowl from the heat. Whisk in 6 tablespoons (85g) of cold unsalted butter, cut into small cubes, one piece at a time. Continue whisking until each piece is fully melted and incorporated, creating a glossy, smooth curd that shimmers.
- Strain for Smoothness: For an extra-silky finish, press the warm curd through a fine-mesh sieve into a clean jar or bowl. This removes any tiny bits of cooked egg or remaining pulp, ensuring a perfectly smooth Sunset Yellow Tart Filling.
- Chill & Enjoy: Cover the surface of the curd directly with plastic wrap to prevent a skin from forming. Chill in the refrigerator for at least 4 hours, or until firm and cold to the touch. It will thicken considerably as it cools, making it ideal for meal prep recipes or quick desserts.
Optional shortcuts or quick methods.
If you’re short on time for your homemade curd, you can cook the curd in 30-second intervals in the microwave, stirring vigorously after each interval, until thickened. Be extra careful not to overheat, as this can lead to scrambling the eggs!
Common mistake callouts and how to avoid them.
- Curdling: The most common pitfall! Always cook over gentle heat and whisk constantly. The steam should be gentle, not a roiling boil in the saucepan below.
- Too Thin: Don’t panic if it seems thin after cooking. Passion fruit curd thickens considerably as it cools in the refrigerator. If still too thin after chilling for 4 hours, you can gently reheat it in the double boiler and whisk in another egg yolk dissolved in a tablespoon of juice, cooking until thickened again.
Perfect Times to Serve This Dish
This vibrant curd brings tropical sunshine to any meal, proving incredibly versatile.
Everyday uses: quick dinner, meal prep, family lunch.
- Swirl into yogurt, oatmeal, or spread on toast.
- Dollop over ice cream or fresh berries.
- Make for easy flavor boosts; ideal for healthy family meals.
Special moments: parties, holidays, comfort food nights.
- The ultimate Sunset Yellow Tart Filling for impressing guests.
- A vibrant filling for cakes, cupcakes, or delicate shortbread.
Pairings with sides, drinks, or sauces.
- Delicious with berries, mango, or kiwi.
- Enjoy with warm scones or buttery shortbread.
Nutrition & Wellness Angle of Passion Fruit Curd
Enjoy this flavorful treat as part of a balanced diet, adding bright, fresh taste.
Link to health-conscious goals (balanced diet, energy boost, weight management).
Passion fruit provides Vitamin C and A. Reduce sugar or use substitutes for low-carb recipes.
Highlight nutrients, protein, fiber, or light options.
This curd elevates healthy family meals with vibrant, homemade flavor. Opt for organic ingredients.
Everyday Benefits & Practical Uses
Making homemade curd is economical and satisfying, perfect for eating well.
Show how passion fruit curd fits goals like saving time, eating well, or stretching a budget.
- Economical: Cheaper and tastier than store-bought gourmet versions.
- Versatile: Elevates simple pantry staples like yogurt or biscuits. My kids especially love it swirled into their morning oatmeal for a fast, colorful breakfast!
- Make-Ahead Magic: Prepare a batch in advance, freeing up time.
2–3 bullet points on why readers will love it.
- Bursting Flavor: Tangy-sweet explosion of homemade curd.
- Impressive Yet Easy: Looks gourmet but is surprisingly simple.
Chef’s Tips and Flexible Adjustments
Achieve a perfect result every time with these simple tricks.
Flavor enhancers, seasoning tricks, and cooking techniques.
- A Pinch of Salt: Enhances sweet and tart notes.
- Zest It Up: Add lime or orange zest.
- Gentle Heat: Whisk slowly over a non-boiling water bath.
Adjustments for kids, picky eaters, or dietary needs.
- For Kids: If too tart, serve with powdered sugar or sweet berries.
- Texture: Add extra egg yolk for thicker; reduce one for pourable.
Safety or allergy notes where needed.
- Raw Eggs: Ensure curd reaches 160°F (71°C) for safety.
- Dairy Allergy: Use a suitable dairy-free butter substitute.
Reader FAQs
Can I freeze passion fruit curd for later?
Yes, freeze homemade passion fruit curd up to 3 months in an airtight container. Thaw slowly in the refrigerator; it’s a great way to preserve your Sunset Yellow Tart Filling.
What’s the healthiest way to prepare passion fruit curd?
Reduce sugar or use natural substitutes for a low-carb recipe. Focus on fresh, organic passion fruit; I sometimes use half the sugar and find it still delicious.
Which brands or stores sell the best passion fruit?
Look for fresh, heavy passion fruit at local grocery stores or farmers’ markets. Frozen pulp is also a convenient option.
How long does homemade passion fruit curd last?
Stored in an airtight container in the refrigerator, your homemade curd will stay fresh for about 1-2 weeks. Ideal for regular family dinners.
What can I use passion fruit curd for besides tarts?
It’s wonderfully versatile! Use this curd as a filling for cakes, trifles, spread on scones, or swirled into yogurt for easy dinner ideas.
My curd is too thin, what went wrong?
It likely needed more time to cook over gentle heat. Return it to the double boiler and continue whisking until it thickens; it will thicken considerably as it cools.
Can I use bottled passion fruit juice?
While fresh yields best flavor, high-quality bottled passion fruit juice (100% juice) can be used. Adjust sugar to taste.
Conclusion
This easy passion fruit curd recipe is your ticket to bringing vibrant, homemade sunshine to any dish, proving that simple ingredients create extraordinary flavor and make every meal feel special. Pin this recipe now so you always have this delightful Sunset Yellow Tart Filling on hand for quick meals and family dinners!
Print
passion fruit curd recipe Sunset Yellow Tart Filling
- Total Time: 270 minutes
- Yield: About 1.5 cups (360ml) or 6-8 servings
- Diet: General
Description
This passion fruit curd recipe creates a vibrant, sunset yellow, sweet-tart spread with an intense tropical aroma. It’s perfect for elevating breakfasts or as a gourmet filling for desserts.
Ingredients
- 6–8 passion fruits (approx. 300g, yields about 0.5 cup (120ml) juice)
- 2 large eggs
- 2 large egg yolks
- 0.5 cup (100g) granulated sugar
- 6 tablespoons (85g) unsalted butter, cold and cut into small cubes
- 1 teaspoon (5ml) lemon juice (optional)
Instructions
- Prepare Your Fruit: Halve 6-8 passion fruits and scoop the pulp into a fine-mesh sieve placed over a small bowl. Press firmly with a spoon to extract about 0.5 cup (120ml) of passion fruit juice; discard the seeds.
- Whisk It Up: In a heatproof bowl, whisk together 2 large eggs, 2 large egg yolks, 0.5 cup (100g) granulated sugar, and the 0.5 cup (120ml) passion fruit juice until well combined and slightly pale (1-2 minutes).
- Cook Gently: Place the bowl over a saucepan of gently simmering water (double boiler). Whisk continuously for 8-10 minutes, or until the mixture thickens significantly and coats the back of a spoon. Do not boil.
- Add Butter: Remove the bowl from the heat. Whisk in 6 tablespoons (85g) of cold unsalted butter, one piece at a time, until fully melted and incorporated, creating a glossy, smooth curd.
- Strain for Smoothness: For an extra-silky finish, press the warm curd through a fine-mesh sieve into a clean jar or bowl to remove any bits of cooked egg or pulp.
- Chill & Enjoy: Cover the surface of the curd directly with plastic wrap to prevent a skin from forming. Chill in the refrigerator for at least 4 hours, or until firm and cold to the touch.
Notes
To prevent curdling, always cook over gentle heat and whisk constantly. If it curdles slightly, remove from heat and blend with an immersion blender for a smoother texture. If the curd is too thin after chilling, gently reheat in a double boiler and whisk in another egg yolk dissolved in a tablespoon of juice, cooking until thickened again. Store in the refrigerator, covered, for up to a week.
- Prep Time: 20 minutes
- Cook Time: 10 minutes
- Category: Dessert
- Method: Double Boiler
- Cuisine: General
Nutrition
- Serving Size: 0.25 cup (approx. 60g)
- Calories: 250 calories
- Sugar: 25 g
- Sodium: 30 mg
- Fat: 18 g
- Saturated Fat: 10 g
- Unsaturated Fat: 5 g
- Trans Fat: 0 g
- Carbohydrates: 25 g
- Fiber: 1 g
- Protein: 5 g
- Cholesterol: 150 mg
FREE PRINTABLE RECIPE
Get the Printable Recipe PDF (Free)
Enter your email and we’ll send you the ingredients + step-by-step instructions as a clean PDF you can save to your phone.
- ✅ Printable PDF (ingredients + steps)
- ✅ Save it to your phone (no long scrolling)
- ✅ Includes cook time + servings
- ✅ Easy to follow
FAQ
Where’s the full recipe?
It’s delivered as a printable PDF so you can save it and cook without scrolling.
I didn’t get the email.
Check Spam/Promotions and search your inbox for your site name. Then click Confirm to receive the PDF.