
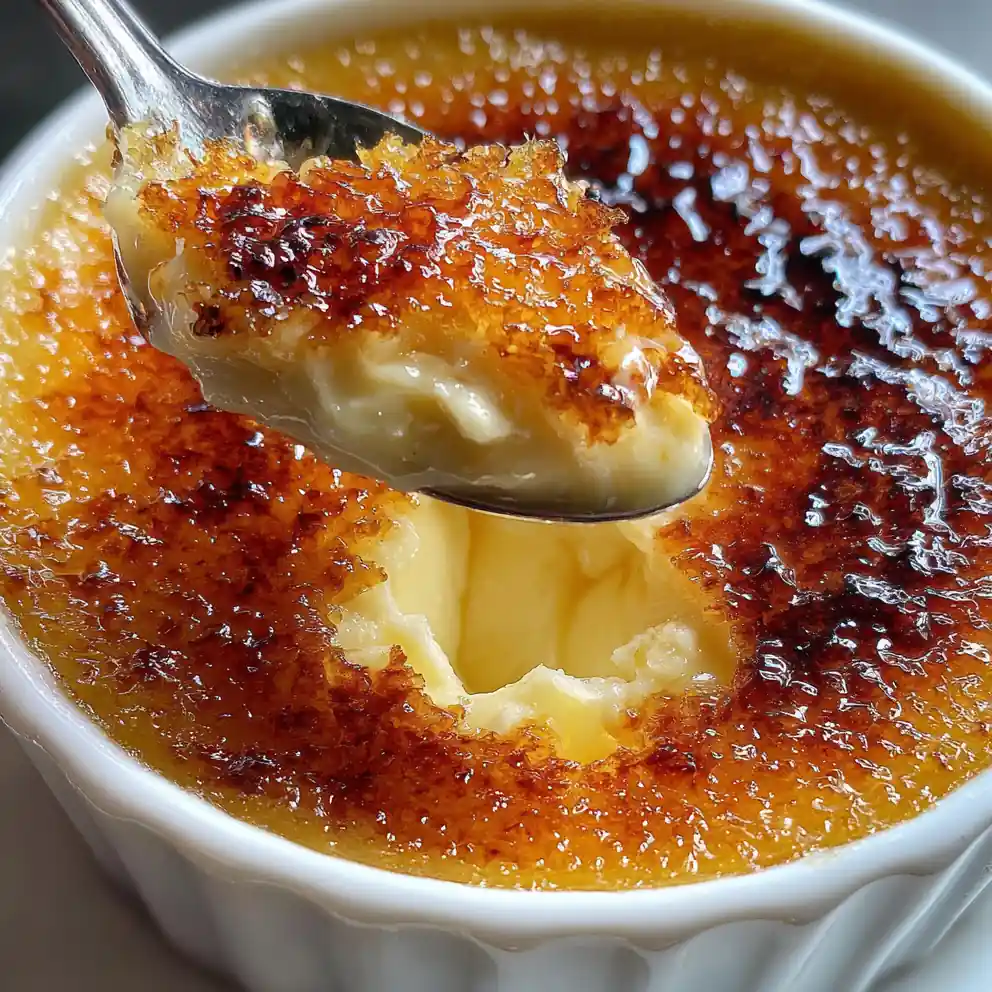
I often find myself dreaming of an elegant dessert that doesn’t demand hours in the kitchen, and my go-to is always this wonderful vanilla custard recipe Torch-Brûléed Sugar Glass. It’s truly a delight, with its satiny smooth texture and that utterly irresistible crisp, amber sugar top. This delightful vanilla custard recipe Torch-Brûléed Sugar Glass is perfect for busy families and home cooks who want to elevate their dessert game effortlessly. This recipe simplifies classic techniques for a perfect creamy custard every time. Get ready for a rich treat crowned with an irresistible crunch that everyone will adore.
Ingredient Essentials & Flavor Roles
Core ingredients for this delightful vanilla custard recipe Torch-Brûléed Sugar Glass ensure a luxurious result. To make this easy family dinner dessert, you’ll need:
- Heavy Cream & Milk: 2 cups (470ml) heavy cream, 1 cup (235ml) whole milk. This creamy base creates a rich, indulgent texture. For a healthier option, use more milk than cream.
- Egg Yolks: 6 large egg yolks. These are key for thickness and that signature silky smoothness.
- Granulated Sugar: ¾ cup (150g) for the custard, plus 2-3 tablespoons for the iconic brûlée top. It provides sweetness and the essential caramelized crunch.
- Vanilla Bean (or extract): 1 whole vanilla bean, split and scraped (or 2 teaspoons pure vanilla extract). This is the star flavor, for authentic aroma. I prefer a good quality vanilla bean; it makes all the difference!
- Pinch of Salt: ¼ teaspoon. It balances sweetness and enhances all the other flavors.
For a truly premium ingredient experience, use organic dairy for richer flavor and choose high-quality vanilla beans or pure vanilla extract. These small choices elevate your vanilla custard recipe Torch-Brûléed Sugar Glass beautifully.
Smart substitutions for convenience and dietary needs:
- For a lighter custard, use more milk than cream.
- Dairy-free? Explore coconut cream alternatives (adjust cooking time and expect a subtle coconut note).
- No vanilla bean? 2 teaspoons of good quality vanilla extract works great (or vanilla paste for visible specks).
Flavor boosters and seasonal upgrades:
- Add a citrus zest (orange or lemon) for a bright, refreshing note.
- A tiny pinch of cinnamon adds warmth and complexity.
Easy Preparation Steps for Your Vanilla Custard
Creating this family-friendly dessert is simpler than you might think. Just follow these steps for a perfect vanilla custard recipe Torch-Brûléed Sugar Glass every time:
- Prep Your Custard Base: In a medium saucepan, gently warm the heavy cream, milk, and ¾ cup of the granulated sugar with the scraped vanilla bean (or extract). Heat over medium-low heat for 5-7 minutes until steamy and small bubbles form around the edges, but do not boil. You’ll notice a lovely vanilla aroma filling your kitchen.
- Temper the Yolks: In a separate bowl, whisk the 6 egg yolks with the remaining sugar until light yellow and slightly thickened. Slowly pour about half of the warm cream mixture into the egg yolks, whisking constantly to prevent scrambling. This brings the yolks up to temperature gently.
- Strain and Fill: Pour the tempered egg yolk mixture back into the saucepan with the remaining cream. Stir well, then strain the entire custard mixture through a fine-mesh sieve into a large measuring cup or pitcher. This step ensures an ultimate, luxuriously smooth vanilla custard. Pour the strained mixture evenly into six 4-ounce ramekins.
- Bake to Perfection: Place the filled ramekins into a 9×13 inch baking dish. Carefully pour hot water into the baking dish, coming halfway up the sides of the ramekins. This ‘water bath’ (bain-marie) ensures even cooking. Bake at 325°F (160°C) for 30-35 minutes, until the edges are set and the center still has a slight, delicate jiggle. If your custard looks too liquid after 35 minutes, it might need 5-10 more minutes; overbaking can lead to a less creamy texture.
- Chill Thoroughly: Carefully remove the ramekins from the water bath and let them cool completely on a wire rack at room temperature. Once cool, cover each ramekin with plastic wrap and chill in the fridge for at least 4 hours, or ideally overnight, for the best firm yet creamy texture. This cooling process is crucial for a perfect Torch-Brûléed Sugar Glass.
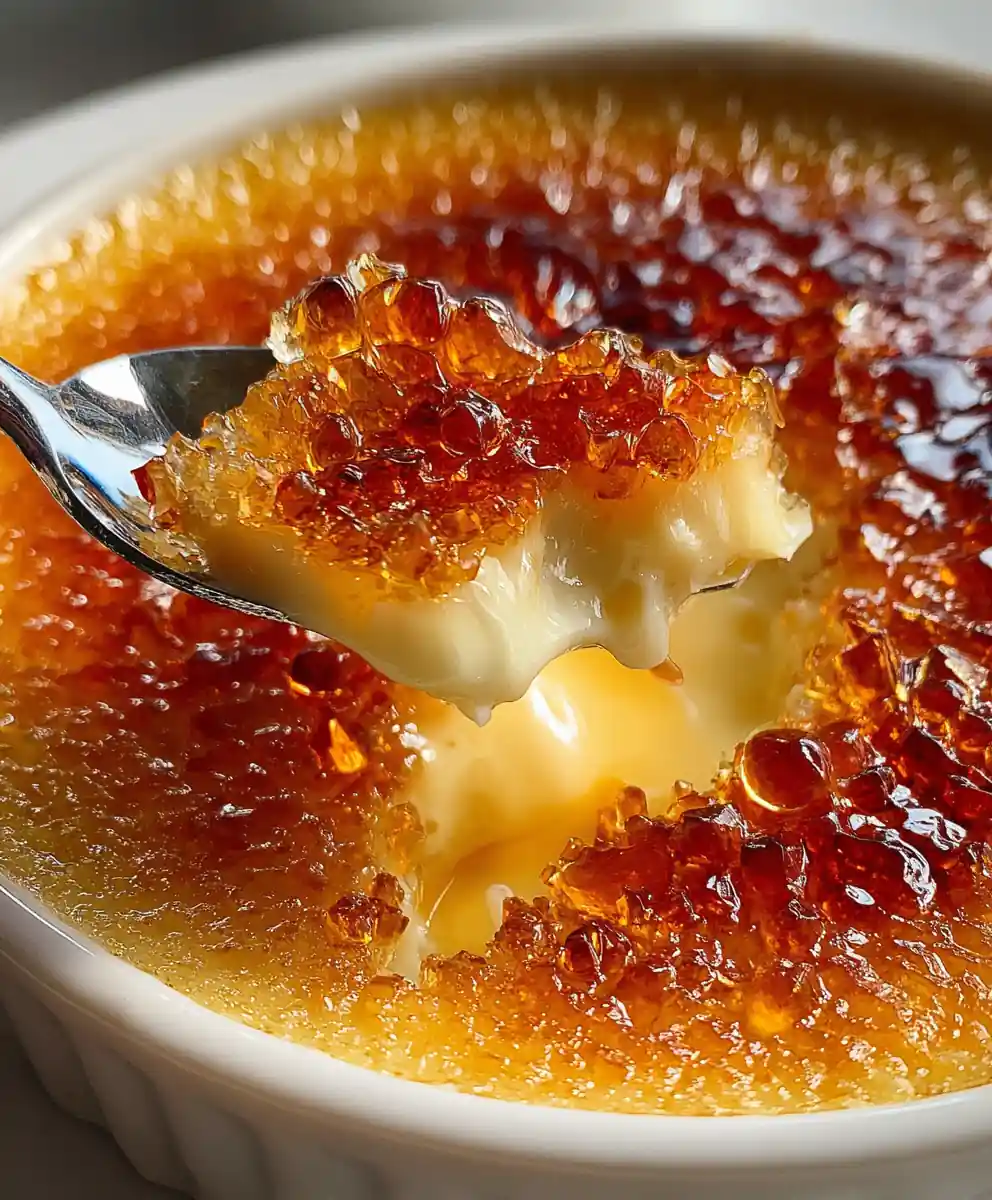
- Torch-Brûléed Sugar Glass Finish: Just before serving, remove the chilled custards from the fridge. Sprinkle 1-2 teaspoons of granulated sugar evenly over the top of each custard. Use a kitchen torch to melt and caramelize the sugar until it forms a crisp, amber layer. Move the torch constantly to prevent burning and achieve an even, glassy top. You’ll hear a satisfying crackle as the sugar sets.
Inline notes for healthy swaps:
- Reduce sugar slightly in the custard by 1-2 tablespoons for a less sweet treat, perfect for healthy eating.
- For a lower-fat option, use more milk and less heavy cream, for example, 1.5 cups cream and 1.5 cups milk.
Quick reminders for avoiding common mistakes:
- Don’t boil the cream mixture; just heat until steamy to prevent curdling.
- Be careful not to overbake; a slight jiggle in the center is perfect for a creamy result.
- Ensure custard is completely cold before torching for the best crisp top for your vanilla custard recipe Torch-Brûléed Sugar Glass.
Perfect Occasions and Storage for This Delicious Custard
Our vanilla custard recipe Torch-Brûléed Sugar Glass isn’t just for special moments; it’s a versatile treat that fits right into your family’s routine.
- Everyday uses: A simple, elegant weeknight dessert to make any meal special. A satisfying treat for after-school or weekend indulgence.
- Celebrations and special events: An impressive finale for holiday dinners like Thanksgiving or Christmas. A sophisticated dessert for dinner parties, potlucks, or family gatherings.
Storage and Make-Ahead Instructions
- Un-torched vanilla custard can be stored in the fridge, covered tightly, for up to 3-4 days.
- Torch just before serving for the best crispness and delightful crack.
- Freezing is not recommended for maintaining the custard’s ideal silky texture.
Nutrition & Everyday Benefits of This Vanilla Custard Recipe
This delightful custard brings a satisfying sense of indulgence and comfort, offering a balanced treat that fits well into many eating styles. It’s fantastic for easy family dinners or as a thoughtful dessert option that feels special without being overly complicated. The eggs in the custard base contribute to a naturally high-protein snack if you’re looking for a sweet bite with more substance. Plus, it’s a simple, elegant way to enjoy a delicious dessert.
How This Recipe Saves Time & Money
Crafting this elegant dessert is surprisingly budget-friendly and efficient, making it a smart choice for busy households.
- Affordable ingredients: Made with common pantry staples, making it a very economical sweet treat.
- Efficient prep: Hands-on time is minimal; most of the work is passive chilling, freeing you up for other tasks.
- Easy clean-up: Mostly bowls and ramekins, nothing too complex to wash after a delicious dessert.
For ultimate convenience, I often prepare the custard base for this elegant dessert a day or two in advance. Then, when it’s time for dessert, it’s just a quick torch and serve. This makes it perfect for quick meal prep.
Expert Tips and Adjustments for Your Vanilla Custard
Elevate your homemade vanilla custard with these simple techniques and modifications for a truly professional finish and customized flavor.
- Technique upgrades for better taste/presentation: Always use a water bath for even cooking and a silky-smooth texture. For a perfect brûlée, ensure the sugar is spread evenly and the torch is moved constantly for a consistent Torch-Brûléed Sugar Glass.
- Adjust seasoning and texture for different preferences: For a firmer custard, bake a few minutes longer. For a softer, melt-in-your-mouth experience, a few minutes less. Experiment with different sugars for the brûlée, like turbinado for a deeper caramel flavor.
- Allergy-friendly, kid-friendly, or diet-based modifications: This dessert is naturally gluten-free. Kids especially love the exciting cracking of the sugar top; just be sure to supervise torch use carefully!
Common Questions Answered about Vanilla Custard with Torch-Brûléed Sugar Glass
Q: “Can this vanilla custard recipe Torch-Brûléed Sugar Glass fit into a meal prep plan?”
A: Absolutely! You can prepare the vanilla custard base, pour it into individual ramekins, and chill them for up to 3-4 days in the refrigerator, tightly covered. Torch the sugar right before you plan to serve for that freshest, most satisfyingly crispy top, making it a convenient meal prep option.
Q: “What are the best substitutes for the vanilla bean in this vanilla custard recipe?”
A: High-quality pure vanilla extract is the best substitute; use about 2 teaspoons per vanilla bean. Vanilla paste is also an excellent option. I often reach for paste when I want those beautiful visible specks and an intense vanilla flavor without the bean.
Q: “How long does vanilla custard Torch-Brûléed Sugar Glass stay fresh in the fridge?”
A: Once the sugar is torched to create that beautiful Torch-Brûléed Sugar Glass, it’s best enjoyed within an hour or two to maintain peak crispness. The untorched vanilla custard itself, however, will keep beautifully in the fridge for 3-4 days when tightly covered.
Q: “What if I don’t have a kitchen torch for the sugar glass?”
A: While a kitchen torch is ideal for achieving the perfect Torch-Brûléed Sugar Glass, you can use your oven broiler on high heat as an alternative. Place the sugared custards on a baking sheet and watch them very carefully, as sugar can burn quickly under the broiler. Remove as soon as the sugar caramelizes to a deep amber.
Q: “Can I make individual portions of this vanilla custard recipe for a crowd?”
A: Yes, this vanilla custard recipe is absolutely perfect for individual portions in ramekins! It makes for an elegant and easy dessert that’s ideal for any gathering or dinner party. Simply scale the recipe up as needed to accommodate your guest count for family-friendly events.
Q: “Are there any tips for getting a perfectly smooth vanilla custard?”
A: Tempering your egg yolks slowly with the warm cream mixture is a crucial step to prevent curdling. Also, straining the custard through a fine-mesh sieve before baking ensures an ultimate silky-smooth texture. Cooking the ramekins in a water bath further promotes even heat distribution for a consistently delicate custard.
Conclusion
This vanilla custard recipe Torch-Brûléed Sugar Glass offers a simple way to create an incredibly elegant and delicious dessert that will impress everyone, proving that gourmet flavors can be an easy family dinner reality. I love how it elevates any meal effortlessly. Pin this recipe for your next special meal or holiday gathering, or share it with a friend who loves easy, impressive treats!
Print
vanilla custard recipe Torch-Brûléed Sugar Glass
- Total Time: 300 minutes
- Yield: 6 servings (4-ounce ramekins)
- Diet: General
Description
This elegant vanilla custard features a satiny smooth texture crowned with a crisp, amber sugar top. It’s a simplified classic dessert perfect for elevating any meal with an irresistible crunch.
Ingredients
- 2 cups heavy cream
- 1 cup whole milk
- 6 large egg yolks
- 0.75 cup granulated sugar, for custard
- 2–3 tablespoons granulated sugar, for brûlée top
- 1 whole vanilla bean, split and scraped (or 2 teaspoons pure vanilla extract)
- 0.25 teaspoon salt
Instructions
- Prep Your Custard Base: In a medium saucepan, gently warm the heavy cream, milk, and 0.75 cup of the granulated sugar with the scraped vanilla bean (or extract) over medium-low heat for 5-7 minutes until steamy and small bubbles form around the edges (do not boil).
- Temper Egg Yolks: In a separate bowl, whisk the 6 egg yolks until light yellow and slightly thickened. Slowly pour about half of the warm cream mixture into the egg yolks, whisking constantly to prevent scrambling.
- Strain And Fill Ramekins: Pour the tempered egg yolk mixture back into the saucepan with the remaining cream. Stir well, then strain the entire custard mixture through a fine-mesh sieve into a large measuring cup or pitcher. Pour the strained mixture evenly into six 4-ounce ramekins.
- Bake In Water Bath: Place the filled ramekins into a 9×13 inch baking dish. Carefully pour hot water into the baking dish, coming halfway up the sides of the ramekins. Bake at 325F (160C) for 30-35 minutes, until the edges are set and the center still has a slight, delicate jiggle.
- Chill Thoroughly: Carefully remove the ramekins from the water bath and let them cool completely on a wire rack at room temperature. Once cool, cover each ramekin with plastic wrap and chill in the fridge for at least 4 hours (ideally overnight).
- Torch Sugar Top: Just before serving, remove the chilled custards from the fridge. Sprinkle 1-2 teaspoons of granulated sugar evenly over the top of each custard. Use a kitchen torch to melt and caramelize the sugar until it forms a crisp, amber layer, moving the torch constantly to prevent burning.
Notes
Reduce sugar by 1-2 tablespoons for a less sweet treat. For a lower-fat option, use more milk and less heavy cream (e.g., 1.5 cups cream and 1.5 cups milk). Do not boil the cream mixture to prevent curdling. Avoid overbaking; a slight jiggle in the center is perfect for a creamy result. Ensure custard is completely cold before torching for the best crisp top. Dairy-free alternatives (like coconut cream) can be explored, but cooking time may need adjustment and expect a subtle coconut note. Add citrus zest (orange or lemon) or a pinch of cinnamon for flavor variations.
- Prep Time: 25 minutes
- Cook Time: 35 minutes
- Category: Dessert
- Method: Baking, Torching
- Cuisine: French-inspired
Nutrition
- Serving Size: 1 (4-ounce) ramekin
- Calories: 350 calories
- Sugar: 32 g
- Sodium: 60 mg
- Fat: 17 g
- Saturated Fat: 9 g
- Unsaturated Fat: 8 g
- Trans Fat: 0 g
- Carbohydrates: 35 g
- Fiber: 0 g
- Protein: 5 g
- Cholesterol: 224 mg
FREE PRINTABLE RECIPE
Get the Printable Recipe PDF (Free)
Enter your email and we’ll send you the ingredients + step-by-step instructions as a clean PDF you can save to your phone.
- ✅ Printable PDF (ingredients + steps)
- ✅ Save it to your phone (no long scrolling)
- ✅ Includes cook time + servings
- ✅ Easy to follow
FAQ
Where’s the full recipe?
It’s delivered as a printable PDF so you can save it and cook without scrolling.
I didn’t get the email.
Check Spam/Promotions and search your inbox for your site name. Then click Confirm to receive the PDF.